When it comes to growth and profitability in the world of competitive businesses and industries, winning contracts through competitive bidding is crucial for your business.
Whether you’re a seasoned professional or new to the game, the key to success lies in creating a compelling bid package.
A well-structured bid package is your ticket to stand out in a crowded marketplace, win over clients, and secure projects that can propel your organization forward.
However, bid package construction goes beyond mere paperwork; it’s a strategic art that combines planning and clear communication.
In this blog, we’ll explore the essentials of bid package construction. We’ll cover fundamental elements, stress the importance of effective communication, and provide strategies for tailoring your approach to meet specific bid requirements.
But before we learn about construction bid package, we first need to understand what’s a bid and how do bids work.
What’s a Bid, and How Do Bids Work?
A bid is a proposal that a contractor submits to a project owner or their representative to compete for a construction project or service.

These bids include information about the contractor’s qualifications, costs, and timeline for the project.
Bids work by creating a competitive environment where the owners (such as government agencies, private companies, or individuals) can compare and evaluate different proposals and select the best one for the project.
The construction bidding process typically involves 9 steps:
1. Project Advertisement
The owner or client publicly advertises the construction project with a request for proposal (RFP), providing detailed project specifications, drawings, and any other relevant information.
This advertisement can be done through various means, including newspapers, online platforms, or industry-specific publications.
2. Prequalification
In some cases, the owner may require contractors to go through a prequalification process.
This process assesses the financial stability, experience, and capabilities of potential bidders. Only prequalified contractors are allowed to participate in the bidding process.
3. Bid Documents
The owner or their representative provides bid documents to interested contractors. These documents typically include:
1. Project plans and specifications: Detailed drawings and written descriptions of the project’s scope, materials, and quality standards.
2. Bid forms: Standardized forms that bidders must complete, providing their proposed costs, schedules, and other project-related information, including bidding drawing, and bill of materials or bill of quantities..
3. Instructions to bidders: Guidelines on how to prepare and submit a bid, including the deadline and required documentation.
4. Contract terms and conditions: The terms and conditions that will govern the construction project, including payment terms and dispute resolution mechanisms.

4. Site Visits
Contractors may have the opportunity to visit the project site to assess the conditions, which can help them refine their bids.
5. Bid Preparation
Contractors prepare their bids, which typically include:
- Bid price: The total cost of the project, including materials, labor, equipment, and overhead expenses.
- Schedule: The proposed timeline for completing the project, including key milestones.
- Qualifications: Information about the contractor’s experience, capabilities, and references.
- Subcontractor bids: If applicable, the contractor may also include bids from subcontractors for specific parts of the project.
- Bonds and insurance: Proof of the contractor’s ability to meet bonding and insurance requirements.
- Any alternative proposals: Contractors may suggest alternative approaches or materials that could reduce costs or improve project efficiency.
6. Bid Submission
Bidders must submit their proposals by the specified deadline. The bids are usually sealed to maintain confidentiality.
7. Bid Opening
When it’s time to see what everyone brought to the table, the owner or their representative opens the bids publicly. The bid prices are read aloud and recorded. This process ensures transparency and fairness.
8. Bid Evaluation
After the bids are out in the open, the owner evaluates the bids based on various criteria, such as price, schedule, qualifications, and any alternative proposals. The lowest bid is not always the winning bid, as other factors are also considered.
9. Award of Contract
The owner selects the winning bid and awards the contract to the chosen contractor. This decision is typically based on a combination of price and other relevant factors. The selected contractor is then expected to sign a formal contract and begin work on the project.
Note: The bidding process may vary depending on the type of construction project, local regulations, and specific project requirements.
You might also like to read: What is A General Contractor? (Everything Uncovered)
Construction Bid Specifications
Construction bidding specifications are a project’s instruction manual for contractors. They lay out all the details about what’s needed, how big it is, and what materials to use. This helps both the project owner and the contractors.
Here’s what’s usually in these bid specs:
- Project Drawings: These are like pictures showing how the project should look. They help contractors see the size and features and figure out how much stuff and work is needed.
- Project Specifications: This is the written part that explains exactly what the project needs. It talks about the materials, how things should be done, and making sure everything is safe and meets the rules.
- Project Reports: These are extra papers with more info about the project. They might talk about the ground, the environment, traffic, or if it’s even possible to do the project. This helps contractors plan better.
- Draft Contract: This is like the early version of the legal agreement between the project owner and the contractor. It talks about how the project will happen, how much it will cost, and what rules everyone has to follow.
The project owner sends out all these details in a bid package, and contractors who want to work on the project look at this package and send in their bids. It’s like following the rules of a game to make things fair and clear for everyone involved in the construction project.
General and Supplemental Conditions of Bid Package
In a bid package, you find important details about how a project will be run. This includes general conditions, which are the rules everyone needs to follow.
They cover things like:
- Project Management: How people communicate and report responsibilities.
- Site Management: How the site is accessed and how waste is removed.
- Permits, Licenses, and Regulations: Who gets permits, licenses, and follows laws and rules.
- Insurance and Bonding: What kind of insurance and bonds people need.
- Change Orders: How the contract can change, who approves it, and what it costs.
- Payment Terms: When and how people get paid, including any money held back.
- Dispute Resolution: How problems are solved and what happens if things go to court.
- Project Closeout and Warranty: How the project is finished, who owns it, and if there’s a warranty.
The bid package might also have supplemental conditions, which are details specific to the project, like special construction methods or local rules.
Both general and supplemental conditions are crucial for contractors to think about because they affect costs.
Owners use general conditions to make sure the project goes how they want, but they need to be careful not to make them too strict or it can make the project cost more.
4 Types of Construction Bids
There are four main types of construction bids: open, negotiated, selective, and serial. Each type has its own advantages and disadvantages, depending on the project’s scope, complexity, and budget.
1. Open Bids
Open bids are like an open invitation for any contractor or vendor who meets the basic requirements. They’re commonly used for public projects, where it’s crucial to be open and fair.
Open bids can bring in more competition and lower costs, but sometimes, they might also mean lower quality and take a bit longer to evaluate.
2. Negotiated Bids
In negotiated bids, the owner talks directly with one contractor or vendor. These bids are often used for private projects, where the owner has more freedom to choose.
Negotiated bids might mean better quality and quicker results, but sometimes, they can also lead to higher prices and less competition.
3. Selective Bids
Selective bids are when only a chosen group of prequalified contractors or vendors can participate. These bids are used for projects that need special skills or experience.
Selective bids aim for better quality and less risk, but they may limit the number of potential bidders and increase the time and cost for prequalification.
4. Serial Bids
In serial bids, the same contractor or vendor gets chosen for lots of projects over time. This happens when the projects are alike in what they involve or where they are.
Serial bids can create good long-term relationships and save money, but sometimes, they might mean fewer new ideas and less competition.
What is a Bid Package and Bid Package Construction?
As far as the definitions go, a bid package is a set of documents that are needed to participate in a bidding process for a construction project or other service.
It usually includes information such as bid schedules, project specifications, drawings, quantities, conditions, and bid forms.
The bid package helps the owner to compare and evaluate different proposals from potential contractors or vendors.
Now, the construction bid package is simply the process of preparing and submitting the bid package.
That being said, now you might be wondering what is a bid schedule in a bid package.
Well, let’s get into it.
You might also like to read: Concrete Coring Procedure: All You Need To Know
What is a Bid Schedule?
As we mentioned earlier, a bid schedule is usually part of the bid package that is prepared and submitted by the bidders.
It is a document that lists the work items and quantities that are required for a construction project or other service, along with the unit prices and extensions that form the basis of the bidder’s proposal.
It helps the owner to compare and evaluate different bids from potential contractors or vendors, as well as to verify the accuracy and completeness of the bids.
A bid schedule can be organized in different ways, depending on the type and complexity of the project.
Some of the typically used bid schedules are
Lump Sum Bid Schedule
It is a straightforward format that shows the total price for the entire project without breaking down the individual work items or quantities.
Unit Price Bid Schedule
This is a detailed bid schedule that shows the work items, quantities, unit prices, and extensions for each part of the project, as well as the total price.
Alternate Bid Schedule
This bid schedule format lists the prices for different options or scenarios that the owner may choose from, such as different materials, methods, or designs.
Allowance Bid Schedule
This schedule accounts for work items that are not entirely defined or specified during biddings, such as contingencies, provisional sums, or allowances.
Types of Construction Contracts
Different types of construction contracts are used for different kinds of projects. The type of contract is usually decided by the contractor and the client during the negotiation stage.
Lump-Sum Contract
A lump-sum contract is a commonly used and straightforward agreement that establishes a fixed price for a project, making it suitable for endeavors with precise and detailed specifications.
While it is easy to comprehend and negotiate, it poses risks for both parties. Contractors may face losses if the project exceeds the budget or if the client alters the scope.
On the other hand, clients might overpay if the contractor adds a high markup or compromises on quality. Specialty contractors often favor lump-sum contracts, particularly for specific project aspects.
Time and Materials Contract
Time and materials contracts, on the other hand, offer flexibility by compensating the contractor for the actual cost of materials and an agreed-upon labor rate.
This type is well-suited for projects with vague or evolving scopes. However, managing the budget and schedule can be challenging, and there may be concerns about the contractor’s motivation to complete the project efficiently.
These contracts are commonly employed in repairs, maintenance, or emergency work scenarios.
Cost-Plus Contract
A cost-plus contract involves the client covering the contractor’s material and labor costs plus an additional amount for profit.
It provides flexibility for both parties, minimizing the impact of miscalculations on the contractor’s profit margin.
Clients also have the opportunity to negotiate unreasonable costs, reducing the risk of exploitation by dishonest contractors. However, efficient cash flow management is crucial for contractors under this agreement.
You might also like to read: How much soil testing cost: factors and tips for 2023
Unit Price Contract
Unit price contracts are common for projects with parts that have set prices. It’s easy to make the project bigger, but you might not know the total cost if you’re not sure how many parts you need.
Guaranteed Maximum Price Contract
In a guaranteed maximum price contract, the contractor commits not to charge more than a specified amount unless there are significant changes to the project scope.
Common in well-defined projects with minimal expected variation, this contract is the riskiest for contractors with weak estimating skills.
They may be responsible for costs exceeding the maximum price, except in cases defined by specific contract criteria, often limited to client-initiated scope changes.
Challenges in Bid Package Construction
However, despite all its advantages, bid project construction comes with its set of challenges, such as:
Low-Bid Mentality
In certain cases, project owners may prioritize the lowest bid above all else. While cost efficiency is important, this approach can potentially sacrifice quality, timelines, and overall project success.
Contractors, in their pursuit of winning bids, may be tempted to underbid, which can lead to difficulties in delivering the project within the allocated budget and schedule.
To improve this situation, it’s important for project owners to consider factors beyond cost, such as a contractor’s qualifications, track record, and ability to meet project requirements.
Bid Shopping
It is the unethical practice of revealing one contractor’s bid to another in an attempt to negotiate a lower price. This practice undermines trust and fairness in the bidding process, and it can lead to substandard work as contractors cut corners to reduce costs.
To address bid shopping, project owners and contractors should uphold the confidentiality of bids and focus on open and honest communication in their dealings.
Bid Rigging
As the name suggests, bid rigging is a highly unethical and illegal practice where contractors collude to manipulate the bidding process, eliminating competition and inflating prices.
This harmful behavior not only harms project owners but also undermines the public interest and can violate antitrust laws and regulations.
To combat bid rigging, it’s essential for authorities to actively monitor and enforce fair competition in the construction industry, and contractors must commit to ethical and transparent business practices.
Bid Project Construction Best Practices
To ensure the success and integrity of the bidding process in construction, both project owners and contractors can adopt best practices that promote transparency, fairness, and collaboration. Here are enhanced best practices:
Thorough Research and Due Diligence
Before inviting bids, project owners need to do their homework. Understand what the project involves, look at the current market conditions, and consider any trends. This helps set reasonable expectations and decide if the project is doable.
Contractors need to really dig into everything about the project, the person who owns it, the other companies in the market, and any possible problems before they offer their bid. Understanding all this makes sure your offer is on point and helps avoid unexpected and expensive issues during construction.
Clear and Comprehensive Documentation
When owners share the project details, they must be crystal clear. Give all the info, explain how they will judge the bids, and lay out the rules. Clear documents make the bidding process fair, and everyone knows what’s what.
Likewise, contractors must make sure their bid package is easy to understand, doesn’t contradict itself, and covers everything. Tell them how much it’ll cost, what you’ll do, how well you’ll do it, and when it’ll be done. Being clear helps them compare bids accurately and prevents confusion during the project.
Effective Communication and Collaboration
Project owners and contractors should talk openly and honestly from the start. Create a way to ask questions, clear up doubts, or deal with changes quickly. Working together and helping each other is vital for a smooth project and resolving problems while building.
Evaluation Beyond Cost
Owners shouldn’t just focus on the price; they should also think about the bidder’s skills, experience, and history. It’s important to find a balance between cost and quality for the project to succeed in the long run.
Contractors, on the other hand, show what you’re good at, like your experience and past work. Don’t offer too low a price if it means you can’t do the job well and on time. Quality matters more than just winning with a low bid.
Ethical Conduct and Compliance
It goes without saying that everyone included in the process should always follow the rules and be honest in the bidding process. Don’t cheat or work together with others to manipulate prices or unfairly gain an advantage, as this can get you into legal trouble.
By adhering to these improved best practices, project owners and contractors can create a more transparent and collaborative environment for the bidding process in construction, ultimately leading to successful, high-quality projects that benefit all stakeholders.
Important Construction Bidding Terms
1. Solicitation: When clients ask contractors to send in their project bids, providing details on what’s needed.
2. Contractors: Two main types – subcontractors and general contractors. General contractors bid to clients and gather bids from subcontractors for different project parts.
3. Contract Formation: When a client picks a bid and finalizes the deal terms.
4. Bill of Quantities: It breaks down costs for each project part, giving a detailed material cost breakdown.
5. Bid-Hit Ratio: It is how many bids a company sends for each awarded contract. Varies by expertise, location, and industry. For example, some might have a ratio of 1.5 bids to 1 award, while others may be less successful.
Understanding your bid-hit ratio helps you see how competitive you are and adjust your bidding strategy. Check out local competition and industry trends to figure out what’s right for your business.
What is a Construction Bid Database?
In simple terms, a construction bid database is a valuable resource/software that is designed for construction bidding, neatly organized, and easy to access.
It includes a wide array of information, from current and upcoming projects to contractors, subcontractors, vendors, material costs, and much more.
By providing this wealth of data, a construction bid database helps construction companies discover, compare, and ultimately prepare and submit competitive and precise bids.
Here are a few examples of construction bid databases:
1. Construction Market Data: This tool focuses on commercial projects and helps subcontractors find the right opportunities.
2. Smartsheet: It’s software that helps create and manage bid packages while working together with your team.
3. InEight: This software is great for making accurate project cost and schedule estimates quickly.
4. Archdesk: It’s software that helps with estimating costs for labor, materials, vendors, equipment, and more.
5. ProEst: This software makes estimating, takeoff, and bid management easier.
These tools give construction professionals what they need to succeed in the competitive world of construction bidding.
Wrapping It Up
Nailing bid package construction is crucial for success in the competitive construction industry. Whether you’re a pro or a newbie, a well-made bid package is your key to standing out, winning contracts, and pushing your business forward.
Even though challenges like the low-bid mindset exist, following best practices—like doing thorough research, communicating clearly, and being ethical—makes a big difference.
Now, bid package construction can get a bit complicated at times, and it is always best to get an expert to do the job for you. And when it comes to bid package construction, Souffront Engineering & Construction (SCE) is your expert partner.
Whether you’re experienced or new to construction, We are here to help you create winning bid packages. We will guide you through bid schedules, project details, and all the essentials.
With us, you get a reliable partner invested in your bidding success. Contact us today to learn more about what we have to offer.
As much luxury and tranquility as seafront homes offer, they’re also vulnerable to the harsh conditions that seawater and coastal weather can bring.
In fact, the only thing that makes these homes stand strong on a coastline with unpredictable sea patterns is the seawall.
You see, seawalls are engineered to withstand waves and storm surges, making coastal homes as stable as they’d be on solid ground.
Nevertheless, seawalls have their limits too, not the least of which is constantly tested by the extreme force of the sea. And this makes seawall maintenance extremely important for coastal property owners.
After all, a solid and resilient seawall is the only protection you’ve got between your home and the sea.
Now, when it comes to maintaining a seawall, you’re sure to have a ton of questions. And that’s exactly why we’ve compiled this thorough guide, detailing all things seawall upkeep along with our pro tips and tricks.
So, let’s dive right in and have a look.
Seawall maintenance: Why is it so important?
Before we get into the nitty gritty of maintaining and upkeeping the seawall, it’s essential for you to understand its importance.
For starters, your seawall takes a heavy toll on a regular basis resulting from high tidal waves and storms, among others.
And although seawalls are designed for endurance, there’s always a limit. So much so that a lack of maintenance, and you can have an eroding seawall on your property.
Moreover, seawalls are highly critical for waterfront properties, and unlike other structural components, timely maintenance is of the essence. That’s because negligence can result in a major structural failure in your home as the seawall protection becomes ineffective.
Also, a failing seawall can cause soil erosion around the property, making your home prone to frequent flooding.
In short, any neglect to maintain your seawall can lead to anywhere from costly repairs to inhabitable conditions to an unsafe home, and more.
What does seawall maintenance involve?
Complicated as it might sound, maintaining your seawall is quite straightforward.
In fact, seawalls are easier to maintain than a lot of structural elements; all you’ve got to do is pay close attention to some areas of concern.
It all starts with a detailed seawall inspection wherein a licensed inspector analyzes the seawall and detects problem areas. And this is followed by remedies such as waterproofing and crack sealing, among others.
The best thing is that with some experience and expertise, you can even carry out the maintenance by yourself.
Interesting, isn’t it?
Now, if you’re wondering how exactly you can maintain a seawall, here are five simple steps that you can follow:
Step 1. Inspecting the seawall
The first step in maintaining a seawall involves a comprehensive inspection, which should ideally be carried out by a seasoned seawall inspector.
Herein, the inspector will visually analyze the seawall, examining its condition and determining whether or not it is structurally sound. As such, you can expect a clear identification of the problem areas and essential remedies to fix them.
For instance, if you’ve got a concrete or vinyl seawall, the inspection will check for cracks and suggest reliable methods to repair them.
Similarly, for seawalls made of timber, the inspectors will look for signs of rot, termite infestation, splitting, etc.
Now, depending on the extent of maintenance you’re looking to undertake, you can choose between three types of inspections, namely:
- Visual Inspection
- Structural Inspection
- Elevation Inspection
You see, the whole idea of having seawalls inspected before maintenance is to have a clear understanding of what exactly needs to be fixed. Not to mention, a routine inspection also brings potential problems to your notice before they become expensive repairs.
You can go through our blog – The Ultimate Seawall Inspections Guide.
Curious about what else a seawall inspection involves?
Step 2. Unclogging the weep holes
As we discussed earlier, seawalls have to withstand a lot of pressure. And it’s not just seawater that exerts pressure as a seawall has to stand the stress from the other side.
This is precisely why weep holes are built into seawalls, serving as crucial pressure relief points that allow seawater to move and ensure proper drainage.
Nevertheless, it’s commonplace for weep holes to get clogged from things such as sand or soil, trash brought in by seawater, loose construction mortar, etc. And without water flowing through these holes, the pressure on the seawall can be tremendous, potentially leading to structural damage.
Also, leaves, twigs, and limbs from the surrounding plants and trees can partially clog weep holes, reducing the flow of water.
So, unclogging the weep holes to relieve pressure is an important step in maintaining seawalls.
Thankfully, it doesn’t take much to unclog a weep hole, as clearing the debris and ensuring that water flow is normal is all it needs.
It goes without saying you can regularly inspect the weep holes and check if the movement of water is optimal. In fact, this will allow you to detect a clogged hole and clear it before it entirely chokes the water flow.
Step 3. Relocating your landscape away from the seawall
Believe it or not, the trees and shrubs in your backyard can be the worst enemy of the seawall. Moreover, the damage from your plantation can be imminent if they’re close enough to the seawall.
You see, the problem lies with the roots, which naturally grow towards the water and end up growing against the seawall. This exerts tremendous pressure on the seawall, more than what it is designed to withstand, thus forming cracks.
Not to mention, the roots of some trees can even make their way through the seawall, leaving them wide open and exposing the soil to seawater.
We’re not suggesting that you shouldn’t be planting trees on your property. However, for the safety of the seawall, it’s best to have the area around it clear of landscaping.
Also, if you already have trees and shrubs in the vicinity of the seawall, we suggest you relocate them at least 20-30 feet away.
Simply put, the larger the trees are, the farther away they should be from the seawall.
Step 4. Removing vegetation from the seawall
The tropical Florida weather is perfect for natural vegetation to grow around your property. And that’s especially true for seafront homes.
So, it isn’t surprising to have a layer of vegetation grow on the seawall.
However, any vegetation on the seawall can be concerning as it damages its structural system, leaving it fragile.
Like the trees and shrubs, it’s the roots that create the problem, as they can create large cracks and leave a deteriorating seawall.
Meaning it is essential to remove all the vegetation from the seawalls and check for signs of potential damage during maintenance.
Step 5. Sealing all the cracks off
Cracks, notwithstanding their size, can be the worst kind of damage to a seawall. That’s because not only can they cause water-induced damage to the seawall itself, but they can also expose your property to the risk of gradual structural damage.
As such, we can’t overstate the importance of looking for cracks and sealing them during maintenance.
Now, if your seawall undergoes regular upkeep, you’ll mostly encounter small cracks. And you need not hire a professional to repair these.
In fact, even if you’re a newbie, you can refer to online tutorials to fix these cracks. For instance, you can buy sealants such as marine grout, liquid concrete, or seawall repair concrete and follow the tutorial to apply them to the cracks.
Nonetheless, larger and more significant cracks are best left to the experts. So, instead of DIY, we suggest you hire an experienced expert to repair such cracks.
Step 6. Waterproofing the seawall
Lastly, as you wrap up the maintenance, it’s essential to apply a coat of top-notch waterproofing material to the seawall.
You see, waterproofing provides an additional layer of protection against erosion and goes a long way in increasing the longevity of the seawall.
And although there’s a wide range of seawalls, including those made from concrete, steel, wood, and stones, waterproofing materials are readily available for all. So, all you need to do is get the right water-resistant coating for your seawall and spray it on.
You might also want to read – The Ultimate Guide To Attic Inspections.

Seawall maintenance: Frequently asked questions
1. Can you DIY your seawall maintenance?
Yes, you can.
In fact, a lot of maintenance tasks are easy and thus ideal for DIY.
For instance, you can unclog the weep holes by yourself more often than not. Similarly, you can seal the smaller cracks and waterproof the seawall without having to hire a professional.
In all, these are the maintenance checklist items that you can do yourself:
A. Clearing vegetation
Getting rid of the natural vegetation on the seawall is simple, and some elementary gardening skills are all it takes. So you don’t need an expert here.
For instance, clearing grass and seaweed is something you can do quickly and without hassle.
However, you might want to hire an expert if the vegetation has grown deep into the seawall and you suspect potential damage.
B. Waterproofing
Another maintenance activity apt for DIY is waterproofing. Herein, you can simply take a waterproof coating and spray it on the seawall.
C. Clearing weep holes
Weep holes that are clogged by leaves and twigs are easy to clean and thus perfect for DIY.
However, if the weep hole is completely clogged, it’s best to call in a professional to unclog it.
Note: You should never DIY the inspection
Seawall inspection is a meticulous exercise and calls for expertise to detect hidden problems. As such, we suggest you always hire a licensed inspector and never settle for DIY inspection.
2. What are the signs that your seawall needs maintenance?
While an inspection is the best way to determine the true extent of maintenance that a seawall needs, here are some signs you should always look for:
- Cracks, leaks, and corrosion in sea walls made of concrete or steel.
- Dislodged stones in sea walls made of stone.
- Rotting, splitting, and termites in sea walls made of wood.
3. How do you know if repairing a seawall is needed?
Inspecting your seawall on a regular basis is the best way to detect underlying problems. Also, you should be on the lookout for signs of damage, such as sagging, bowing, or dipping of the seawall.
Further, if you notice holes or pits forming near the seawall, it’s a sign that the seawall has been breached and the soil has started to erode.
Remember, these are signs of significant damage and are a serious concern. That’s because not only do they endanger the safety of the seawall, but they also impact your overall property.
As such, it’s best to call in seawall experts and get a comprehensive repair at the earliest.
4. How much does sea wall maintenance cost?
As per estimates from HomeGuide, maintaining a seawall can cost you anywhere between $100 and $600.
Here’s a complete cost breakdown for a better understanding:
Seawall inspection – $200 – $600
Seawall repairs – $100 – $250 (per linear foot)
Seawall replacement – $150 – $600
5. How long do sea walls last?
Depending on the type of materials and extent of upkeep, a seawall can last you anywhere between 35 and 50 years. In fact, by waterproofing the seawall and maintaining it frequently, you can increase its longevity by years.
Also, a stone seawall usually outlasts all other seawalls. So much so that with the right maintenance, it can even last you for a lifetime
You might also want to read – Complete guide to 40 year recertification
Conclusion
As you can see, maintaining a seawall is easier than it seems. In fact, it is as easy as looking after other areas of your home.
Not to mention, you can maintain the seawall by yourself most of the time, that too on a shoestring budget.
Looking for a thorough inspection before you undertake seawall maintenance?
You can get in touch with us!
At Souffront Construction and Engineering, we are South Florida’s leading inspection company with a team of highly-seasoned inspectors. So, whatever be the type of your seawall, we’ve got all your inspection needs covered.
A final building inspection is a crucial step in the construction process. It ensures the safety and compliance of your newly built or renovated property.
But how do you ensure that everything is up to mark?
This is exactly why we have a final inspection checklist.
In this blog, we’ll delve into the significance of a new construction final inspection checklist, distinguish between a final inspection and a pre-settlement inspection, and offer expert insights for efficiently conducting a thorough final inspection.
Additionally, we’ll provide you with a selection of free, customizable final inspection checklist templates that you can adapt for your specific projects.
But first, let us learn more about the final inspection.
What is the Final Inspection?
A building final inspection is a critical quality control step conducted before a product or property is delivered to the customer or occupant.
In simple terms, it is like a last check to make sure a product or property is good to go before the customer gets it.
Its primary purpose is to ensure that the product or property aligns with the specified requirements and safety standards agreed upon by both the buyer and seller.
This inspection also helps in detecting and rectifying any potential issues in the manufacturing or construction processes.
A final building inspection is done by an official inspector from the local building authority. They check to see if there are any rule violations, issues, or dangers that might stop them from giving a certificate that says the property is safe to live in or sell. This certificate called a Certificate of Occupancy (CO), is usually needed for most properties to be legally used or sold.
Depending on the nature of the product or property and the contract terms, the building final inspection can be conducted by an independent third-party inspector, a contractor, a building inspector, or the commercial property owner.
During a final inspection, various assessments and checks are done, including elements such as quality, quantity, appearance, dimensions, durability, functionality, and safety. These evaluations are aimed at guaranteeing that the end product is both of high quality and safe for use.
Additionally, final inspections are typically scheduled when a substantial portion, usually around 80%, of the products are ready for shipment or when the property is prepared for occupancy.
You might also like to read: Commercial Building Inspection Cost: Factors & Considerations
Final Inspection vs Pre-Settlement Inspection
A final inspection and a pre-settlement inspection are two different types of inspections that are done before the settlement of a property.
As we discussed earlier, a final inspection is conducted by the city’s building inspector to determine if the property meets the building code standards and is ready for occupancy.
On the other hand, a pre-settlement inspection is conducted by the buyer or owner to verify that the property is in the same condition as when it was purchased and that any agreed works have been completed.
The main difference between a final inspection and a pre-settlement inspection is that the final inspection is mandatory and official, while the pre-settlement inspection is optional and informal.
The final inspection can affect the settlement process, as the inspector can issue a certificate of occupancy or a notice of violation.
The pre-settlement inspection can also affect the settlement process, as the buyer can request repairs or compensation for any defects or damage found.
A final inspection and a pre-settlement inspection can also differ in terms of timing, participants, and checklist. A final inspection comes after the pre-settlement check, which usually happens a few days before the property sale is finalized.
A final inspection is typically carried out by a building inspector from the city or another expert responsible for ensuring that the property meets all the required building standards.
On the other hand, the pre-settlement inspection is done by the buyer or owner, often with a witness like a real estate agent.
In the final inspection, the inspector checks various parts of the property, like drainage, walls, doors, and windows, the roof, foundation, plumbing, and more. They ensure everything meets safety and accessibility standards.
The pre-settlement inspection is similar but also includes things like appliances, furniture, keys, and manuals, making sure everything is ready for the new owner to move in.
What is the Final Inspection Checklist?
As we said before, a final inspection checklist is an important tool for making sure your new or fixed-up property follows all the building rules and is ready to be used.
It’s like a handy guide for different people involved, such as building inspectors, contractors, and commercial property owners, to find and fix safety problems, issues, or things that don’t meet the rules before they hand over the property.
This new construction final inspection checklist should cover all the things the inspector will be looking at. Using this checklist can help you avoid any delays, extra work, or fines that might happen if you fail the inspection.
You might also like to read: Concrete Coring Procedure: All You Need To Know
What is Required for a Final Building Inspection Checklist?
The list for final inspection requirements can be customized according to the type and scope of the project, but it usually includes some common elements, such as:
Site Drainage and Grading
To guarantee efficient water control and correct site grading, make sure to:
- Check that the site’s grading prevents water from collecting or running toward the foundation.
- Ensure the gutters and downspouts are correctly installed and in good working order.
- Verify that the stormwater drainage system is clear and sufficient.
- Confirm that the landscaping work is finished and doesn’t obstruct the drainage.
Exterior Walls, Doors, and Windows
To make sure the outside of a building is in good shape and works well, look for these things:
- Check the outer walls for any cracks, stains, or damage.
- Examine the siding, brickwork, or stucco to ensure it’s put in and finished correctly.
- Verify that doors and windows are properly aligned and sealed.
- Ensure the locks and hardware on doors and windows are working smoothly.
- Make sure screens and shutters are in good condition.
- Check that the caulking and weatherstripping are still doing their job.
Roofing and Flashing
To evaluate the roof and its related flashing, it’s important to:
- Ensure the roof is devoid of leaks, holes, or any missing shingles.
- Verify that the flashing is securely fastened and covers all joints and edges.
- Confirm the proper installation and sealing of vents and skylights.
- Check the cleanliness and functionality of the chimney and fireplace.
- Assess the adequacy of attic insulation and ventilation.
Foundation and Framing
When inspecting the structural foundation and framing elements, it’s important to:
- Examine the foundation for cracks, settlement, or moisture problems.
- Ensure the basement or crawl space is dry and well-ventilated.
- Verify the sump pump’s proper functioning.
- Check that floor joists, beams, columns, and walls are straight and level.
- Confirm that the framing is securely attached and braced.
- Look for any indications of termite or pest presence.
Electrical, Plumbing, and Mechanical Systems
When confirming the functionality and compliance of these vital systems, make sure to:
- Verify that the electrical panel is labeled and easy to access.
- Ensure that the wiring is appropriately grounded and protected.
- Check that all outlets, switches, lights, fans, smoke detectors, carbon monoxide detectors, and appliances are in good working order.
- Examine the plumbing pipes for any signs of leaks or corrosion.
- Confirm that the water pressure and temperature meet the required standards.
- Assess the performance of faucets, toilets, showers, tubs, sinks, drains, water heaters, sump pumps, garbage disposal, and dishwashers.
- Inspect the heating, cooling, and ventilation systems to ensure they are clean, efficient, and compliant with energy codes.
- Ensure there are no gas leaks or unusual odors.
You might also like to read: Dig Deeper: The Importance of Soil Sampling for Construction for Stronger Foundations
Interior Finishes and Fixtures
To ensure the quality and safety of interior components, be sure to:
- Examine walls, ceilings, and floors for any cracks, stains, or damage.
- Confirm that paint, wallpaper, or tiles are applied and finished correctly.
- Check doors, windows, cabinets, closets, shelves, and drawers for alignment and functionality.
- Verify that hardware, hinges, knobs, and handles operate smoothly.
- Inspect countertops, backsplashes, sinks, and faucets for cleanliness and secure installation.
- Assess the proper functioning of lighting fixtures, switches, outlets, and dimmers.
- Ensure carpets, rugs, curtains, blinds, and furniture are in good condition.
Fire Safety and Emergency Exits
When assessing fire safety measures and the accessibility of emergency exits, make sure to:
- Confirm the presence and readiness of fire extinguishers.
- Ensure that fire alarms and sprinkler systems are in good working order.
- Verify the visibility and functionality of emergency exit signs and lights.
- Check that emergency exit doors and windows are unlocked and can be easily opened.
- Ensure that escape routes are clear and free from obstructions.
- Inspect the safety and accessibility of fire escape ladders or stairs.
Accessibility and ADA Compliance
When confirming compliance with accessibility standards, including the Americans with Disabilities Act, make sure that the property meets the needs of people with disabilities or special requirements:
- Verify the presence and proper functioning of ramps, elevators, lifts, or stairlifts.
- Check that doorways, hallways, bathrooms, kitchens, and bedrooms are spacious enough for wheelchairs or walkers.
- Ensure that handrails, grab bars, and lever handles are securely in place.
- Confirm that sinks, faucets, toilets, showers, and tubs are positioned at appropriate heights with sufficient clearance.
- Inspect switches, outlets, thermostats, and controls to ensure they are reachable and operational for all.
Meeting these final inspection requirements can help you verify that all aspects of the property are compliant with the codes and regulations.
How to Effectively Use a Final Inspection Checklist?
A final building inspection checklist can be used throughout the construction process to ensure that the work is done according to the codes and standards. It can also be used as a communication tool between the contractor, the owner, and the inspector.
Here are 7 steps on how you can use a final building inspection checklist effectively:
Step #1 Review Project Requirements
Start by thoroughly reviewing the project specifications, plans, and permits to understand the exact requirements for the final building inspection.
Step #2 Assign Roles and Responsibilities
Clearly define roles and responsibilities for completing and verifying checklist items. Ensure all project members understand their tasks and deadlines.
Step #3 Regular Inspections
Use the checklist as a guiding tool for regular inspections throughout the project. Document any issues, defects, or non-compliances and act promptly to address them.
Step #4 Schedule the Final Inspection
Engage in open communication with the inspector or building authority to schedule the final building inspection. Ensure all essential documents, including permits, certificates, warranties, and manuals, are prepared for review.
Step #5 Pre-Final Walkthrough
Conduct a pre-final walkthrough with the owner or their representative. Use the checklist as a reference, attentively address any concerns or questions, and seek their approval before progressing to the final building inspection.
Step #6 Conduct the Final Inspection
During the final building inspection, use the checklist as proof of compliance. Collaborate closely with the inspector, resolve minor issues on-site, and mutually agree on a plan of action for major issues or violations.
Step #7 Obtain the Certificate of Occupancy (CO)
Once you successfully navigate the final building inspection, the inspector or building authority will grant a Certificate of Occupancy. It means your property adheres to all codes and standards and is ready for occupancy or sale.
Leveraging Digital Tools for Your Final Inspection Checklist
While a paper checklist remains an option, a building final inspection checklist can also be created using a digital tool. Not to mention, digital tools offer numerous advantages, including:
- Easy Accessibility: The checklist is readily available and shareable with the project team and stakeholders.
- Real-Time Updates: Receive instant notifications regarding checklist status and progress.
- Enhanced Documentation: Attach photos, comments, and signatures to checklist items for thorough record-keeping.
- Effortless Reporting: Easily generate and export reports from the completed checklist, streamlining post-inspection procedures.
How to Address Issues Found During the Final Inspection?
Fixing an issue identified in the final inspection depends on the type and severity of the issue, as well as the time and resources available to address it.
Some possible ways to fix an issue are:
1. Corrective Action and Rework
Request the supplier or contractor to repair or modify the defective or non-compliant goods or services. This approach is suitable for relatively simple issues that can be quickly rectified, such as applying new stickers, removing excess glue, or adjusting loose components.
2. Re-inspection and Chargebacks for Defects
Ask the supplier or contractor to conduct a re-inspection of the goods or services after implementing corrections, with the cost of re-inspection and rework deducted from the payment.
This approach is more appropriate for more serious or widespread issues, such as faulty wiring, leaky pipes, or missing components.
3. Product Disposal for Unsalvageable Goods
Request the supplier or contractor to dispose of or destroy goods or services that are beyond repair or correction.
This is a viable option for issues that are extremely severe or pose significant safety risks, such as contaminated food, defective medical devices, or faulty fire alarms.
4. Updating QC Checklists for Preventive Measures
Revise your quality control criteria and procedures to prevent the recurrence of similar issues in future orders.
This strategy is effective for addressing issues stemming from human errors, inadequate design, or insufficient testing.
Note: Each of these strategies should be chosen based on the specific nature of the issue and the desired outcome, ensuring that the final result meets the required standards and specifications.
What Happens When a Project Fails Final Inspection?
If a project fails final inspection, it means that the project did not meet the quality standards or acceptance criteria agreed upon by the stakeholders.
Depending on the severity and impact of the failure, the project may need to undergo corrective actions, rework, or even termination.
In such situations, the project manager and the project team should analyze the root causes of the failure and document the lessons learned for future reference.
They should also communicate with the stakeholders and clients about the failure and the next steps to take.
Expert Insights for Successful Final Building Inspections
To prepare for a final inspection, there are some best practices that can help avoid delays, rework, or failure. Here are some of them:
Comprehensive Inspection Preparation
Make sure all required inspections have been conducted before the final inspection. These include foundation, rough-in, framing, mechanical, electrical, plumbing, and fire inspections. Review the checklist with the inspector to identify any areas of concern.
Safety Assurance
Address all safety hazards and repair any outstanding issues before the final inspection. This includes fixing any leaks, cracks, gaps, or damages in the structure, systems, or fixtures. Make sure all equipment and appliances are properly installed and functioning.
Strategic Scheduling
Schedule a final inspection for a time when the property is unoccupied to avoid any disruptions. Ensure that the site is clean and organized and that all debris and materials are removed. Provide access to all areas of the property, including the roof, attic, basement, and crawl spaces.
Thorough Documentation
Document everything and create organizational systems. Keep records of all permits, inspections, approvals, and certificates related to the project. Use digital tools to store and share documents with the inspector and other stakeholders. Label and organize all files and folders for easy access and reference.
Proactive Planning
Plan ahead and maintain a positive relationship with inspectors. Communicate with the inspector regularly and update them on the progress of the project. Anticipate potential problems and prepare contingency plans. Be respectful and cooperative with the inspector and follow their instructions.
Incorporating these best practices into your final inspection preparations will not only help you avoid delays, rework, and failures but also contribute to a more efficient and successful project completion.
By following these guidelines, you can increase your project’s chances of passing the final inspection with flying colors, ensuring that your construction or renovation project is not only safe but also compliant with all relevant codes and regulations.
Remember, good preparation is key to a seamless and satisfactory final inspection process.
In The End
A final building inspection is vital for ensuring your property is safe and follows all the rules. To make sure everything’s in order, you need a checklist.
Your building final inspection checklist is like a roadmap to avoid problems that could cause delays or fines. It helps ensure your property meets the necessary standards.
By following the best practices we provided, you can handle any issue that you may face along the road and increase your chances of a successful final inspection, ensuring you have a safe, compliant property.
It is a complex process, but you don’t have to navigate this process alone.
When it comes to the intricate details of inspection and ensuring your property meets all the necessary standards, Souffront Engineering and Construction is here to lend a helping hand.
Our experienced professionals understand the intricacies of final inspections and are well-versed in local building codes and regulations.
With our expertise, you can rest assured that your property will meet all the required standards, keeping you free from worries about delays or fines.
So, whether you’re in need of expert guidance on the inspection process or assistance with resolving any issues that may arise, Souffront is your trusted partner for a successful construction or renovation project.
Your commitment to quality, coupled with their expertise, will pave the way for a successful project.
So, feel free to get in touch with us and make the most of our free initial consultation. This is a chance for you to learn more about the valuable contributions we can make to your project.
When embarking on a project to build, renovate, or enhance your property, it may be crucial for you to consider hiring a general contractor.
But what is a general contractor?
In simple words, a general contractor is an individual or a company that supervises and orchestrates the entire construction project. They ensure that the project is successfully executed from inception to completion.
Building, renovating, or improving your property is a substantial project that demands meticulous planning, expert coordination, and precise execution.
A skilled general contractor construction serves as the linchpin of this process, taking on the responsibility of ensuring that all elements of the project harmoniously come together.
In this comprehensive blog, we will get into the nuances of general contracting and construction, discussing further what they do.
We will also provide valuable insights into the criteria you should consider when selecting the right general contractor for your project.
But first, let us start from the basics.
What is General Construction?
Before we get into what is a general contractor, we must first understand what is general construction.
General construction is a broad spectrum that encompasses a wide array of construction projects, each serving a unique purpose and function.
Whether it’s creating residential spaces, commercial venues, or infrastructure, the world of general construction is rich and diverse.
Let us look at some of these projects to get a better understanding of general construction.
1. Residential Buildings
Residential buildings serve as havens for individuals and families, providing the comfort and security of a home. They come in various forms, including houses, apartments, condos, and townhouses, tailored to meet diverse lifestyle needs.
2. Commercial Buildings
Commercial buildings are designed to facilitate businesses and serve customers. Whether it’s an office space, a retail store, a hotel, or a restaurant, these structures are integral to the economic landscape.
3. Institutional Buildings
Institutional buildings play a crucial role in society by housing educational and healthcare facilities. These buildings include schools, hospitals, libraries, and museums, which provide essential services and resources to the public and specific groups.
4. Industrial Buildings
Industrial buildings house the engines of production. Factories, warehouses, and power plants are crafted to manufacture goods or store essential resources like energy.
5. Infrastructure
Infrastructure projects, like roads, bridges, tunnels, railways, and airports, are the vital arteries of transportation and communication networks. They facilitate the movement of people and goods, connecting communities and fostering progress.
6. Recreational Facilities
Recreational facilities are designed for enjoyment and leisure. Think of parks, stadiums, golf courses, and more, all offering spaces for people to unwind and engage in entertainment activities, and simply have some fun.
You might also like to read: Progressive Design Build: All You Need To Know
What is General Contracting?
General contracting is a term that encompasses the managerial and supervisory responsibilities carried out by a general contractor in a construction project.
It involves overseeing and facilitating the installation, replacement, or repair of various components within a building, structure, highway, sewer, or any other real property improvement.
Now, let us discuss the person who does general contracting.

What is a General Contractor?
General contractor definition, in simple terms, describes them as an individual or a company responsible for the management of construction projects, guiding them through every stage, from initial conception and design to final completion and inspection.
They serve as the central point of coordination and control for the entire construction process.
A general contractor typically enters into a formal contract with the project client, who can be the property owner or a developer.
This contract underlines crucial details such as the project’s scope, budget, timeline, and payment arrangements.
In some jurisdictions, construction general contractors must obtain licenses and carry appropriate insurance to operate, demonstrating their commitment to professionalism, legal compliance, and the protection of both their clients and themselves.
Types of General Contractors
There are different types of general contractors depending on their scope of work, specialty, and contract type.
Some of the common types of general contractors are:
Construction Managers
They oversee the planning, budgeting, and coordination of a construction project. They act as consultants to the project owner and do not have direct contracts with subcontractors or suppliers.
Design-build contractors
Design-build contractors provide both design and construction services for a project. They have a single contract with the project owner and are responsible for delivering the project from concept to completion.
Prime contractors
Prime contractors have a direct contract with the project owner and are responsible for hiring subcontractors and suppliers. They may also perform some of the work themselves or delegate it to other contractors.
What Does a General Contractor Do?
Pre-Construction
Before construction commences, a general contractor is entrusted with several crucial responsibilities:
Project Evaluation and Estimation
The general contractor meticulously reviews project plans and specifications in collaboration with the client, offering a comprehensive estimate covering costs, duration, and required materials.
Regulatory Compliance
They handle building permits and licenses, ensuring full adherence to local regulations and legal requirements.
Subcontractor Selection and Negotiation
In assembling a skilled team, they hire and negotiate contracts with specialized subcontractors who possess expertise in various areas like plumbing, electrical work, roofing, and more.
Material Procurement
The general contractor efficiently manages the procurement and delivery of essential materials and equipment from suppliers and vendors.
Budget and Schedule Management
A detailed project schedule and budget are prepared and closely monitored throughout the construction process to ensure progress and financial flow align with expectations.
During Construction
During the construction phase, the general contractor’s role includes the following vital tasks:
Worksite Supervision and Coordination
They oversee and synchronize the efforts of subcontractors, workers, and all other stakeholders present on the construction site.
Quality Assurance
Ensuring that work adheres to project plans, specifications, building codes, and the highest quality standards is a top priority.
Issue Resolution
As construction progresses, the general contractor is responsible for swiftly resolving any challenges that surface, be it delays, alterations, disputes, safety concerns, or any other issues.
Meticulous Record-Keeping
All aspects of the project are accurately documented, including contracts, invoices, receipts, payments, and change orders.
Client Communication
Regular, transparent communication with you ensures that you stay well-informed about the project’s status and any developments.
Post Construction
After construction wraps up, the general contractor continues to add value through these post-construction tasks:
Thorough Inspection and Testing
They conduct a meticulous inspection and test the finished work to guarantee it aligns with your expectations and standards.
Regulatory Approval
The general contractor takes the lead in obtaining the final approval and sign-off from local authorities and inspectors.
Site Cleanup
All construction waste and debris are promptly cleaned and disposed of, leaving the site in a pristine state.
Financial Settlement
Subcontractors, suppliers, vendors, and employees are compensated according to their contracts, ensuring fair and timely payments.
Client Support
They provide you with a comprehensive warranty and an operation and maintenance manual, which empowers you to manage and maintain your newly constructed project with confidence.
General Contractor Bidding Process
In commercial and public construction projects, the bidding process typically serves as the initial gateway for a general contractor to become involved in the project.
The bidding process is a critical method for selecting the ideal contractor for a construction project based on their proposal, qualifications, and cost.
This process can be broken down into 6 steps:
Step #1: Request for Proposal (RFP) or Invitation to Bid (ITB)
The project owner or manager issues an RFP or ITB, which would look something like this, to potential general contractors, which includes project specifications, scope, schedule, budget, and evaluation criteria.
Step 2: Bid Preparation
Interested general contractors carefully review the RFP or ITB and assemble their bids. A bid is a comprehensive document that outlines the contractor’s approach, methodology, team, experience, and project cost estimate. It may also include supporting documents like references, licenses, and insurance.
Step #3: Bid Submission
General contractors submit their sealed bids to the project owner or manager by a specified deadline, maintaining confidentiality until the bid opening date.
Step #4: Bid Evaluation
The project owner or manager assesses the bids based on the criteria specified in the RFP or ITB. This evaluation may involve scoring, ranking, shortlisting, or negotiations. It might also include requests for clarifications, presentations, or interviews with the bidders.
Step #5: Contract Award
The project owner or manager selects the best bid and awards the contract to the winning general contractor. The contract outlines the project’s terms and conditions, including scope, schedule, payment, quality, and risk.
Step #6: Contract Execution
The selected general contractor signs the contract and initiates work on the project. They are responsible for hiring and managing subcontractors, suppliers, and workers, obtaining permits and inspections, ensuring safety and quality, and delivering the project per the contract.
The bidding process can vary based on project type, size, industry, market conditions, and the preferences of the project owner or manager.
These 4 are the most common variations:
- Design-bid-build: A separate design team is hired before inviting general contractors to bid on project plans and specifications.
- Design-build: A single entity provides both design and construction services and is selected based on qualifications and proposal rather than solely on price.
- Construction management at risk: In this method, a construction manager acts as a consultant during the design phase and a general contractor during construction, guaranteeing a maximum project price.
- Best value: Here, the project owner or manager considers both price and non-price factors when evaluating bids and prioritizing quality, performance, and cost.
Expert Insights for Success in the General Contractor Bidding Process
Navigating the general contractor bidding process can be competitive for both bidders and project owners.
To succeed, here are some expert insights that you can follow for the best results:
- Conduct thorough research on project requirements, specifications, market conditions, and competitors.
- Prepare a clear, concise, and compelling bid that highlights your strengths, differentiators, and value proposition.
- Carefully follow RFP or ITB instructions and submit your bid on time and in the correct format.
- Maintain effective communication with the project owner or manager throughout the process, promptly addressing any questions or concerns they might have.
- Remain flexible and open to feedback, changes, or negotiations if necessary.
What to Look for When Hiring a General Contractor?
When it comes to hiring a general contractor, making the right choice is important, like any other decision you need to make.
Here are some expert insights to help you select a reliable and reputable general contractor for your project:
Verify License and Insurance
Ensure the general contractor holds the necessary license and insurance to operate legally in your area.
A valid license signifies that they meet local requirements, while insurance provides coverage for any potential damages or injuries during the project.
You can verify this information online or by contacting your local building department.
Review their Portfolio and References
A reputable general contractor should have a portfolio showcasing their past projects, demonstrating their skills and experience.
Ask for samples of their work or visit their website to view their portfolio.
Additionally, request references from previous clients who can attest to their quality and professionalism.
Finally, contact these references to gauge their satisfaction with the contractor’s work.
Assess Reputation and Reviews
A general contractor’s reputation within the industry and among clients is important.
You can gauge this by examining their online ratings and reviews on platforms like Google, Yelp, or Angie’s List.
Check for any history of complaints or lawsuits on platforms like the Better Business Bureau or other consumer protection agencies.
We recommend that you avoid contractors with numerous negative feedback or unresolved issues.
Examine the Contract and Warranty
A trustworthy general contractor should provide you with a written contract detailing the project’s scope, budget, timeline, and payment terms.
Before signing, thoroughly review the contract to ensure you understand and agree with all terms.
Additionally, inquire about their warranty policy, which should cover any post-project defects or errors, and get copies of the contract and warranty for your records.
By following these guidelines, you can make an informed decision when selecting a general contractor, ensuring your project is in capable hands.
You might also like to read: Commercial Building Inspection Cost: Factors & Considerations
Licensing Requirements for General Contractors
Getting a general contractor license can be a bit of a puzzle, and the rules can vary quite a bit from one state to the next and even within local areas. It also depends on the specific type of license you need and the kind of work you’re planning to do.
Typically, to get a general contractor license, you’ll need to check off these boxes:
- Age and Education: You’ll need to be at least 18 years old and have a high school diploma or something equivalent.
- Experience and Education: You usually have to prove that you’ve got the right experience and educational background for the job.
- Examinations: Expect to take some tests related to the construction business, including trade, business, and law exams.
- Background Check: You’ll need to pass a background check and provide your fingerprints.
- Insurance: Most places will want to see proof of liability insurance and workers’ compensation insurance.
- Financial Requirements: Sometimes, you’ll have to hand over financial statements or a bond to show you’re financially stable.
- Work History: Don’t forget to provide evidence of your experience working in construction.
The exact details can vary widely between states and the specific type of license you’re after. Plus, depending on the type of work you’re planning to do, you might need additional licenses or permits for things like plumbing, electrical work, or HVAC.
Remember, it’s always a good idea to check in with your local licensing authority to make sure you’ve got all your ducks in a row.
Key Stages and Processes in General Construction
Successful general construction projects go through several crucial stages and processes, ensuring the safe and efficient development of the structures:
This is what these stages look like:
1. Site Preparation
Before construction begins, the site must be prepared. This phase involves clearing the land of any obstacles and hazards and ensuring a stable foundation for the project.
2. Foundation
The foundation is the anchor of any structure, providing stability and support. It’s created by laying concrete or other materials on the ground.
3. Framing Work
Framing work involves creating the structural framework of the building. This skeleton, often made of wood or metal beams, forms the building’s shape.
4. Roofing
The roof is essential for shielding the structure from weather elements. Roofing work includes installing shingles or other materials to ensure the building remains safe and dry.
5. Plumbing
Plumbing work focuses on installing the pipes and fixtures required for water supply and drainage systems, ensuring the essential flow of water within the building.
6. Electrical Work
Electrical work involves the installation of wiring and devices for power supply and lighting systems, enabling the building to function effectively.
7. Flooring
Flooring work entails laying down materials like tiles, hardwood, or carpet to create a comfortable and aesthetically pleasing floor surface.
8. Finishing Work
The finishing touches are crucial for aesthetics and functionality. This phase includes painting and decorating walls and ceilings to create a pleasing interior atmosphere.
9. Landscaping
Landscaping work focuses on the outdoor spaces surrounding the structure. It includes planting trees, flowers and creating features to enhance the structure’s overall appearance.
You might also like to read: Concrete Coring Procedure: All You Need To Know
The Bottom Line
Ultimately, a general contractor is instrumental in turning your construction project into a reality, delivering quality and adhering to regulations, all while bringing your vision to life. Their expertise and professionalism are critical for the success of your construction ventures.
Now that we know what is a general contractor, It is clear that their role is crucial, and it means that hiring the right individual to handle the project is as important, if not more.
To help you make the right decision, here are some tips that you can follow:
- verify their credentials, review their past work
- assess their reputation through online reviews
- carefully examine the contract and warranty terms.
To make things easier for you, you can contact us at Souffront Construction & Engineering (SCE).
Our team of skilled professionals is ready to kickstart your project, harnessing all the advantages that come with hiring a general contractor and resolving any challenges that may arise during the construction journey.
Just as a general contractor ensures that every aspect of your project aligns perfectly, we are committed to delivering flawless results that align with your objectives and aspirations.
Don’t hesitate to reach out to us and take advantage of our complimentary initial consultation. It’s an opportunity to discover more about what we can bring to your project.
Maintaining the condition of your commercial property is vital, and one effective way to stay on top of it is through regular basement inspections. These inspections play a crucial role in identifying moisture issues and damages and ensuring the structural integrity of your property’s foundation.
In this blog post, we delve into the significance of basement inspections and highlight why they should be a top priority for every business owner.
Discover the key insights that emphasize the value of proactive maintenance and how basement inspections contribute to a secure and well-maintained business environment.
But before diving into its benefits, let’s take a step back and ask the most important question: what is basement inspection?
What Is Basement Inspection?
Basement inspection is an important property evaluation test that involves assessing the condition of the basement in a commercial property to ensure its functionality, structural integrity, and overall safety.
It aims to determine whether the basement meets the necessary standards for business operations and provides a secure environment for employees and customers.
It is typically conducted by a certified basement Inspector or structural engineer who specializes in examining the basement area.
During a basement inspection, the expert carefully examines various aspects of the basement. They look for warning signs like cracks in the walls or floors, water damage, or signs of structural instability.
These issues, if left unaddressed, can lead to more significant problems such as compromised foundation, mold growth, or even potential collapse.
Why is Basement Inspection So Important?
Well, your basement plays a significant role in the overall foundation of your property. It supports the structure above and provides a space for essential utilities, storage, or even living areas.
Any problems or issues with the basement can have far-reaching consequences for your entire property.
For example, if there are any unaddressed issues, such as water damage, it can potentially compromise the foundation of your commercial property.
It can have serious consequences for the structural integrity of the entire building. If these issues are not dealt with promptly, they can lead to severe repercussions.
By conducting a thorough inspection, potential hazards and vulnerabilities can be identified early on.
This allows business owners like you to take proactive measures to address the issues, prevent further damage, and ensure the safety of your property, providing a secure environment for your employees and customers.
Who Is A Basement Inspector?
A basement Inspector is a professional who examines residential properties to assess their overall condition.
They are typically hired by prospective buyers or sellers to provide an unbiased evaluation of a property’s structural integrity, safety features, and general functionality.
Basement inspectors have specialized knowledge about various aspects of a property, including the foundation, roofing, plumbing, electrical systems, HVAC (heating, ventilation, and air conditioning), and more.
Basement inspectors play a crucial role in the real estate process, helping buyers make informed decisions about their potential investment.
They provide an objective assessment of the property’s condition, which can help buyers negotiate repairs or adjust the purchase price accordingly.
Qualifications To Consider When Hiring A Basement Inspector
When hiring a basement Inspector, it’s crucial to choose someone who is qualified and experienced, among many things.
Here are some key factors you should consider when hiring a basement Inspector:
1. Certification and Licensing
Check if the basement Inspector is certified or licensed in your area. Many jurisdictions have licensing or certification requirements for basement Inspectors, and it’s a good idea to ensure the inspector you choose meets these standards.
2. Knowledge and Training
Inquire about the inspector’s training and educational background. Ideally, they should have completed comprehensive training programs or courses related to property inspections.
They must have extensive knowledge of residential construction, building codes, and systems within a commercial property.
They should also be well-versed in the structural elements, electrical systems, plumbing, HVAC, roofing, and other components of a property.
Remember, continuing education is also important, as it ensures that the inspector stays updated with the latest industry practices and standards.
3. Professional Affiliations
Find out if the basement Inspector belongs to any professional organizations or associations, such as the American Society of Basement Inspectors (ASHI) or the International Association of Certified Basement Inspectors (InterNACHI). Membership in these organizations often indicates a commitment to professional standards and ongoing education.
4. Experience and Expertise
It is always recommended that you look for someone who has been working as a basement inspector for a significant amount of time and has conducted a number of inspections.
An experienced inspector is likely to have encountered a wide range of issues and has a better understanding of potential problems in different types of properties.
5. Insurance and Liability
It’s crucial to ask about the inspector’s insurance coverage. A reputable basement inspector should carry errors and omissions (E&O) insurance, also known as professional liability insurance. E&O insurance protects both the inspector and the client in case of any mistakes or omissions during the inspection process.
Commercial general liability insurance is also important to cover any accidental damage that may occur during the inspection.
6. Sample Reports
Request a sample inspection report to get an idea of the inspector’s thoroughness and clarity in documenting their findings.
It should include detailed descriptions of any issues found, along with clear photos and recommendations for further action.
The report should be easy to understand and provide a comprehensive overview of the property’s condition.
7. Reviews and References
Check online reviews and ask for references from previous clients.
Reading about other clients’ experiences can give you insights into the inspector’s professionalism, communication skills, and attention to detail.
Don’t hesitate to reach out to references directly to ask about their satisfaction with the inspector’s services.
Going through all these steps might feel like a chore but remember, hiring a qualified basement inspector is an investment in your business.
Taking the time to research and find the right professional ensures that you receive a thorough and accurate assessment of the property.
You might also like to read: Pre-Purchase Building Inspections: Seeing the Unseen Before You Buy
A Closer Look At The Basement Inspection Process
The basement inspection process involves a thorough assessment of the basement to identify potential issues and ensure its safety, functionality, and structural integrity.
Here is a general outline of the steps typically involved in a basement inspection:
1. Pre-Inspection Preparation
The inspector will gather the necessary tools, equipment, and documentation before beginning the inspection. They may review any available building plans or permits related to the basement.
2. Pre-Inspection Discussion
Before the actual inspection, have a discussion with the inspector to communicate any specific concerns or issues you may have noticed in your basement. This allows the inspector to focus on those areas during the assessment.
3. Exterior Inspection
The inspector will start by examining the exterior of the property, focusing on areas that can impact the basement, such as the foundation, grading, drainage systems, and exterior walls. They will look for signs of water penetration, cracks, or other structural concerns.
4. Interior Inspection
Moving to the interior, the inspector will examine the basement space thoroughly. They will assess the walls, floors, ceilings, and windows for signs of water damage, cracks, mold, or other structural issues.
5. Structural Assessment
The structural integrity of the basement is crucial for the overall stability of the property. The inspector will inspect the foundation walls, support beams, columns, and floor joists for any signs of shifting, settling, or damage. They may also assess the condition of load-bearing walls and evaluate any visible cracks.
6. Plumbing and Electrical Evaluation
The inspector will assess the plumbing and electrical systems in the basement. They will check for leaks, proper drainage, and functioning sump pumps and ensure that the electrical components are safe, up to code, and in good working condition.
7. Moisture and Mold Inspection
Basements are prone to moisture and mold problems. The inspector will check for signs of water damage, excessive humidity, condensation, or mold growth. They may use moisture meters or thermal imaging cameras to detect moisture levels or hidden mold behind walls or in hidden areas.
8. HVAC System Assessment
If your basement houses heating, ventilation, and air conditioning (HVAC) equipment, the inspector will evaluate its condition and performance. They will check for proper installation, ventilation, insulation, and any signs of malfunction or maintenance needs.
9. Documentation and Report
After completing the inspection, the inspector will compile their findings into a detailed report. The report will include a description of any observed issues, their severity, recommended repairs or further evaluations, and maintenance suggestions. It may also include photographs, diagrams, or measurements to support the findings.
10. Discussion and Explanation
The inspector will review the inspection report with you, explaining their findings and answering any questions you may have. They will provide guidance on the recommended actions to address identified issues and offer suggestions for maintaining a healthy and safe basement environment.
11. Follow-Up Support
A reputable inspector will be available for follow-up support should you require further clarification or assistance in addressing any concerns raised during the inspection.

Basement Final Inspection Checklist
During a basement inspection, a basement inspector thoroughly examines various aspects of the basement to identify any potential issues or concerns.
They examine the overall condition and functionality of the basement to make sure that it meets all safety standards.
Here is a basement final inspection checklist you can refer to and make sure that you don
1. Foundational and Structural Integrity
The inspector inspects the foundation walls, looking for signs of cracks, moisture intrusion, or bowing. They check for any structural issues that could compromise the stability of the basement.
2. Moisture and Water Intrusion
Moisture-related problems are common in basements.
The inspector looks for signs of water damage, such as water stains, mold, peeling of paint, mildew, musty odors, or efflorescence (white mineral deposits) on walls.
They also check for proper drainage systems, including sump pumps and French drains.
3. Plumbing and Sewage
The inspector examines the plumbing system in the basement, including water supply lines, waste lines, and drainage systems.
They check for leaks, water pressure issues, and signs of plumbing problems.
4. Electrical Systems
The inspector evaluates the electrical wiring and components in the basement. They look for proper grounding, working outlets, and safe electrical practices.
They also check for any exposed wiring or potential fire hazards.
5. Insulation and Ventilation
Proper ventilation and insulation are the two things that are crucial for maintaining a dry and comfortable basement.
The inspector will assess the ventilation system, including windows, vents, or exhaust fans, and the presence of a proper vapor barrier to ensure proper airflow.
They also check for insulation levels, including the insulation in the walls, ceiling, and pipes, to evaluate energy efficiency.
6. HVAC Systems
The inspector inspects the heating, ventilation, and air conditioning (HVAC) systems in the basement. They check for proper installation, functionality, and potential issues that could affect indoor air quality or temperature regulation.
7. Pest Infestation
Basements are susceptible to pest infestations, such as termites, rodents, or insects. The inspector will look for signs of pest activity, such as droppings and damage to wood structures or nests.
8. Radon Gas
Radon gas is a colorless, odorless, and radioactive gas that can seep into basements. The inspector may conduct a radon test to measure radon levels in the basement, as it is a potential health concern.
9. Safety Features
The inspector checks for the presence and functionality of safety features in the basement, such as proper lighting, handrails on stairs, smoke detectors, carbon monoxide detectors, fire extinguishers, and emergency exits.
10. Air Quality
The inspector evaluates the overall air quality of the property.
With openings like chimneys leading upward and pipelines and drain systems in the basement, germs and dirt can easily find their way in.
Without regular inspections, unhealthy air can rise up and affect your entire property, leading to the inhalation of polluted air and potential health issues.
11. General Condition
They evaluate the overall condition of the basement, including walls, floors, ceilings, windows, and doors.
The inspector looks for signs of damage, decay, or wear and tear that might need attention.
Important Note: The specific inspection procedures can vary depending on your region, local building codes, and the inspector’s expertise.
After the inspection, the basement inspector provides a detailed report outlining their findings, including any issues, recommendations for repairs or improvements, and potential safety concerns.
This information helps you make informed decisions about the basement and take appropriate actions to address any problems.
You might also like to read: Garage Safety Inspection: A Step-by-Step Guide to Get One Done (2023)

Will A Wet Basement Pass Inspection?
In most cases, a wet basement is likely to fail a standard inspection.
As discussed earlier, inspectors typically look for signs of water intrusion, dampness, mold growth, and structural issues.
A wet basement can indicate underlying problems with the foundation, drainage system, or waterproofing, which are important aspects of a property’s integrity.
During an inspection, a wet basement, which is basically a sign of water damage, can raise concerns about potential structural damage, mold growth, and the overall habitability of the basement.
These issues can affect the safety, health, and value of the property.
Important Note: It’s important to address any wet basement issues before putting a commercial property on the market or considering buying one.
In such cases, it is in your best interest to consult with basement waterproofing experts or foundation repair specialists.
They can help you identify the source of the moisture and provide appropriate solutions to resolve the problem.
By addressing the wet basement, you can increase the chances of a successful inspection and ensure a healthier and more desirable living space.
Common Causes of Basement Water Intrusion and Effective Prevention Methods
Based on all that we have discovered so far, it is safe to say that most of the basement problems originate from moisture/water intrusion.
So, it is best that we learn what are the common causes of water intrusion in basement and how to prevent it.
Causes of Water Intrusion in Basement
1. Poor Exterior Grading
Improper grading around the foundation of the property, where the ground slopes towards the basement, can direct water toward the foundation walls. This can cause water to seep into the basement through cracks or gaps.
2. Foundation Cracks
These cracks can form due to the settling of the foundation, hydrostatic pressure, or other structural issues.Cracks in the foundation walls or floor provide pathways for water to enter the basement.
3. Inadequate Waterproofing
If the exterior walls of the basement are not properly waterproofed, water can penetrate through the foundation walls and enter the basement. Over time, the waterproofing materials may deteriorate, compromising their effectiveness.
4. Poor Drainage Systems
Insufficient or malfunctioning gutters, downspouts, or French drains can lead to water pooling around the foundation, increasing the risk of basement moisture. If these systems are not directing water away from the property, it can seep into the basement.
5. Plumbing Leak
Leaking pipes or plumbing fixtures in the basement can contribute to moisture problems. Even small leaks can lead to significant water accumulation over time.
6. Condensation
High humidity levels in the basement can cause condensation on cool surfaces, leading to moisture problems. Lack of proper ventilation and insulation can exacerbate this issue.
7. Surface Water
Excessive rainfall, surface runoff, or inadequate drainage near the basement can result in water seeping into the basement through cracks or porous walls.
8. Window and Door Leaks
Improperly sealed basement windows and doors can allow water to infiltrate during heavy rain or flooding.
9. Hydrostatic Pressure
Water pressure from the ground surrounding the basement can push water through cracks or gaps in the foundation walls, causing moisture intrusion.
10. Underground Water Sources
If the basement is located in an area with a high water table or near underground springs or bodies of water, there is a higher risk of water intrusion.
Prevention Methods for Water Intrusion in Basement
1. Proper Grading and Drainage
Make sure that the ground around your property is sloped away from the foundation. This helps to divert water away from the basement walls.
Regularly inspect and maintain gutters, downspouts, and extensions to ensure they are directing water away from the foundation.
2. Foundation Waterproofing
Use a waterproofing sealant or membrane for the exterior foundation walls. This barrier helps to prevent water from penetrating the walls.
It’s best to consult with professionals for appropriate waterproofing methods and materials based on your specific foundation type.
3. Install a Sump Pump
A sump pump is a device that helps remove water that accumulates in a basement. It sits in a pit (sump) and automatically activates when water reaches a certain level.
Sump pumps are particularly useful in areas prone to flooding or high water tables.
4. Install a Backup Power System
You can also consider installing a backup power system for your sump pump to ensure it continues to function during power outages. This helps to prevent basement flooding even in adverse conditions.
5. Install a Drainage System
Consider installing a drainage system, such as a French drain or footing drain, around the perimeter of the foundation.
These systems collect and redirect water away from the basement walls, helping to prevent water buildup and pressure against the foundation.
6. Maintain Proper Ventilation
Good ventilation in the basement helps to reduce moisture levels. Make sure that vents are clear and unobstructed.
You can also consider installing dehumidifiers or using fans to improve air circulation and control humidity levels in the basement.
7. Insulate Pipes and HVAC Components
Insulate exposed pipes and HVAC components in the basement to prevent condensation and moisture buildup. Proper insulation reduces the potential for water damage and mold growth.
8. Seal Basement Windows and Entry Points
Inspect and seal any gaps or cracks around basement windows, doors, and other entry points. This helps to prevent water seepage during heavy rain or flooding.
9. Regular Maintenance
Regularly inspect the basement for signs of moisture, such as dampness, water stains, or mold growth. Address any issues promptly to prevent further damage and mitigate potential risks.
10. Professional Inspection
Hire a professional from time to time to conduct a thorough inspection of your basement for any potential vulnerabilities or areas of concern.
They can identify specific problem areas and provide recommendations for prevention or repairs.
How Long Does A Basement Inspection Take?
Typically, basement inspection takes around 1 to 3 hours, give or take.
Now, keep in mind that this is just a ballpark estimate, and it can vary depending on several factors.
If you have a relatively small and straightforward basement, the inspection might be wrapped up on the quicker side of things.
However, if your basement is quite spacious or has a complex layout with various systems to evaluate, it could take a bit longer.
If there are any specific concerns or suspected issues that need further investigation, like potential mold or structural problems, the inspection might take a bit longer.
In any case, it’s important to give the inspector the time they need to do a proper job and provide you with a comprehensive evaluation of your basement.
Remember, rushing through the inspection might mean missing out on potential issues that could cause headaches down the line.
So, be prepared to set aside a few hours for the inspection, and don’t hesitate to ask the inspector about the estimated duration based on the specifics of your basement.
That way, you’ll have a better idea of what to expect and can plan accordingly.
How Much Does Basement Inspection Cost?
Determining the cost of a basement safety inspection isn’t as simple as providing a fixed figure. Several factors come into play, including location, size of the basement, and the specific services included in the inspection.
On average, a professional basement inspection can range from $300 to $800 or more.
However, it’s important to note that this is just an approximate range, and the actual cost can be higher or lower depending on individual circumstances
The cost may also depend on whether you’re getting a standalone basement inspection or if it’s part of a larger commercial property inspection package.
Some inspection companies offer bundled services where the basement inspection is included along with the overall inspection, which can affect the total cost.
Additionally, if you require specialized inspections or tests, such as radon testing or extensive moisture analysis, these additional services may increase the overall cost.
To get an accurate estimate, it’s best to contact reputable commercial property inspection companies in your area, like Souffront.
They can provide you with a detailed breakdown of the costs based on your specific needs and the characteristics of your basement.
While the cost of a basement inspection may seem like an added expense, it’s a valuable investment in understanding the condition of your basement and identifying any potential issues.
By uncovering problems early on, you can address them promptly and potentially save yourself from more significant damage and costly repairs in the future.
Risks Of Having A Compromised Basement
Having a compromised basement can pose several risks and challenges for you.
Let’s discuss some of the potential issues you might face if your basement is compromised.
1. Structural Integrity
A compromised basement can affect the structural integrity of your entire property. If the foundation walls are cracked, bowed, or weakened, it can lead to further damage and instability throughout the property.
This can result in uneven floors, misaligned doors and windows, and even potential collapse in extreme cases.
2. Water Damage and Mold
One of the most common problems in compromised basements is water intrusion. Cracks in the foundation walls or floors can allow water to seep in during heavy rains or floods.
This can lead to water damage, including ruined belongings, warped materials, and the growth of mold and mildew.
Mold not only damages the basement’s structure but also poses health risks to your employees or clients, causing respiratory problems and allergies.
3. Decreased Property Value
A compromised basement can significantly impact the value of your property.
When potential buyers see signs of structural issues or water damage, they may hesitate to purchase the property or negotiate for a lower price.
A compromised basement can make selling your property a challenging task.
4. Pest Infestations
Gaps or cracks in a compromised basement provide entry points for pests like rodents, insects, and even snakes, depending on your geographical location.
These unwanted guests can cause damage to the basement’s structure and pose health hazards to the occupants.
5. Health and Safety Hazards
A compromised basement can create various health and safety hazards. If water is present or mold is growing, it can lead to poor indoor air quality, triggering allergies or respiratory problems.
Additionally, a weakened foundation or structural issues can put your business at risk of injuries or accidents.
6. Increased Energy Costs
A compromised basement often lacks proper insulation and sealing, resulting in energy inefficiency.
This can lead to higher heating and cooling costs as conditioned air escapes and outside air infiltrates the space.
The basement may feel uncomfortable, and your utility bills may increase.
7. Limited Use and Storage Space
A compromised basement may not be suitable for use as a livable space or for storage purposes.
The risk of water damage and mold growth restricts your ability to utilize the basement effectively, limiting your working space or storage options within your property.
Why Choose Souffront?
When it comes to the safety and integrity of your property, we understand that every detail matters.
That’s why at Souffront, we take pride in our team of skilled professionals who possess extensive experience and expertise in conducting thorough basement inspections.
Our experts have a keen eye for detail and are equipped with advanced technology and cutting-edge equipment to ensure precise and accurate assessments.
From identifying structural issues to evaluating moisture levels, we leave no stone unturned in uncovering potential concerns that could impact the stability and functionality of your property.
At Souffront, we go beyond just providing you with a report. We believe in fostering a partnership with our clients, taking the time to explain our findings, and offering practical recommendations to address any issues that may arise.
We prioritize clear communication and transparency, ensuring that you are well-informed every step of the way.
Choose Souffront for your basement inspection needs, and experience the peace of mind that comes from knowing your property is in the hands of skilled professionals dedicated to your safety and satisfaction. we are the most trusted for 40-Year Recertification Inspection
Contact us today to schedule an inspection.
When it comes to home inspections, one often overlooked area is the attic due to its inaccessibility, lower priority compared to other areas, and lack of buyer interest, but they play a crucial role in maintaining a well-functioning home.
From insulation and ventilation to potential issues like moisture, pests, and structural integrity, the attic can have a significant impact on energy efficiency, air quality, and overall comfort.
Whether you’re looking to improve insulation, prevent mold growth, or ensure proper airflow, a thorough attic inspection is the first step toward a healthier and more efficient living space.
In this guide, we’ll shed light on why attic inspections are a crucial aspect of assessing a property’s health and how it could make all the difference in your home’s safety, energy efficiency, and long-term maintenance.
Before we delve into the details, let’s start by understanding the basics: what exactly is an attic inspection, and how does it contribute to maintaining a healthy home?
What Is Attic Inspection?
Attic Inspection is the process of carefully examining your attic to assess its condition, identify potential issues, and ensure everything is in tip-top shape.
It involves a thorough examination of the attic area to identify any potential issues or concerns related to insulation, ventilation, moisture, structural integrity, pests, and other factors that can affect the overall health and efficiency of your home
During an attic inspection, a qualified inspector will visually inspect various components such as the roof structure, insulation, ventilation systems, electrical wiring, plumbing, and potential signs of damage or deterioration.
They may also use specialized tools, like a specialized camera and equipment, to gather additional information about the attic’s condition.
Why Is An Attic Inspection So Important?
Your attic might seem like a forgotten space tucked away above your living area. However, it plays a crucial role in maintaining proper insulation, controlling moisture levels, and promoting good airflow throughout the property.
Regular attic inspections are a crucial step toward maintaining your home and ensuring its overall well-being.
Identifying Potential Problems:
Conducting thorough attic inspections allows you to identify existing or potential issues that may require attention or repairs.
From water leaks and pest infestations to inadequate insulation and ventilation problems, the attic can harbor various troubles that, if left unaddressed, could lead to costly repairs and compromise the integrity of your entire house.
Energy Efficiency and Climate Control
A well-insulated and properly ventilated attic significantly contributes to energy efficiency. It helps regulate temperature, preventing heat loss in winter and heat gain in summer.
By assessing insulation levels, detecting gaps or damage, and ensuring optimal energy performance, attic inspections can lead to significant savings on your energy bills.
Maintaining a Healthy Living Environment
Attic inspections are crucial for maintaining a healthy home. Hidden moisture problems in the attic can foster mold growth, negatively impacting indoor air quality and posing health risks.
Regular inspections allow for the prompt identification and resolution of moisture issues, ensuring a clean and breathable living environment for you and your loved ones.
Enhancing Resale Value
A well-maintained attic with a clean bill of health can be a major selling point when it’s time to sell your property.
Attic inspections help homeowners, buyers, or sellers gain a better understanding of the attic’s current condition and make informed decisions regarding maintenance, energy efficiency, and potential upgrades.
Who To Call For Attic Inspection?
If you need an attic inspection, Home Inspectors are your go-to professionals. They are the pros who know their way around properties and can give you a thorough assessment of your attic’s condition.
They’ll check insulation, ventilation, structure, and wiring and keep an eye out for issues like mold, pests, or water damage.
Apart from home inspectors, there are some other professionals as well who you can call based on your specific needs:
Building Contractors
Building contractors often offer inspection services, including attic inspections. They can take a good look at your attic, spot any safety concerns or structural problems, and suggest repairs or improvements if needed.
Roofing Contractors
Attic inspections often involve assessing the condition of your roof from the inside. If you’re worried about roof leaks or overall integrity, a roofing contractor who offers inspection services would be your best bet.
Pest Control Professionals
If you suspect unwelcome rodents have taken up residence in your attic, calling pest control experts is the way to go.
They’ll do a thorough inspection, figure out the extent of the infestation, locate the entry points, and provide effective solutions to get rid of the rodents.
Energy Auditors
If you are specifically looking to assess energy efficiency in your attic, you can contact an energy auditor.
They’re experts at evaluating energy usage and can pinpoint areas where you can make improvements.
They’ll check insulation, ventilation, and sealings and even hunt down those pesky thermal leaks.
Qualifications To Consider When Hiring An Attic Inspector
When hiring an attic Inspector, it’s crucial to choose someone who is qualified and experienced, among many things.

Here are some key factors you should consider when hiring an attic Inspector:
Certification and Licensing
Check if the attic inspector is certified or licensed in your area. Look for relevant certifications or licenses that demonstrate their competence and adherence to industry standards.
Training and Experience
Inquire about the inspector’s training and experience in the field. Look for someone who has undergone specialized training in attic inspections and has a solid background in construction or building sciences.
Experience in conducting attic inspections is also valuable, as it allows the inspector to identify potential issues and provide accurate recommendations.
Knowledge of Building Codes and Regulations
Attic inspectors should have a thorough understanding of local building codes and regulations related to attics.
This knowledge ensures that they can identify any code violations or safety concerns during the inspection.
Experience
Consider the inspector’s experience in the field. Look for someone who has conducted numerous attic inspections and has a track record of identifying and addressing issues effectively.
An experienced inspector is more likely to have encountered a wide range of attic-related problems and can provide valuable insights.
Insurance Coverage
Ensure that the attic inspector carries appropriate insurance coverage. This typically includes professional liability insurance, also known as errors and omissions (E&O) insurance.
This coverage protects both the inspector and the client in case of any errors or omissions during the inspection process.
Commercial general liability insurance is also important to cover any accidental damage that may occur during the inspection.
Professional Affiliations
Find out if the attic inspector is affiliated with professional organizations or associations related to home inspections, such as the American Society of Basement Inspectors (ASHI) or the International Association of Certified Basement Inspectors (InterNACHI).
Membership in reputable associations demonstrates a commitment to upholding industry standards and ongoing professional development.
Sample Reports
Request sample inspection reports to get an idea of the inspector’s reporting style and thoroughness.
The report should be comprehensive and well-organized and include clear descriptions of any issues identified, along with supporting documentation such as photos or diagrams.
References and Reviews
Seek references from previous clients or read online reviews to gauge the inspector’s reputation and client satisfaction.
Positive feedback and testimonials can provide valuable insights into their professionalism, communication skills, and overall performance.
Attic Inspection Checklist
The attic inspection process involves a thorough assessment of the Attic to identify potential issues and ensure its safety, functionality, and structural integrity.
Here is an attic inspection checklist that you can refer to for your attic inspection.
Pre-Inspection Preparation
The inspector will gather the necessary tools, equipment, and documentation before beginning the inspection. They may review any available building plans or permits related to the attic.
Pre-Inspection Discussion
Before the actual inspection, have a discussion with the inspector to communicate any specific concerns or issues you may have noticed in your attic. This allows the inspector to focus on those areas during the assessment.
Safety Precautions
Before entering the attic, the inspector should prioritize safety measures. This includes wearing
appropriate personal protective equipment, such as a PPE (personal protective equipment) kit, gloves, a dust mask, and sturdy footwear. They may also carry a flashlight, as attics are often poorly lit.
Access Points
The inspector will locate and assess the accessibility of the attic. Common access points include hatches, pull-down stairs, or scuttle holes. They will ensure these entryways are secure and can be opened and closed properly.
Visual Examination
Once inside the attic, the inspector will visually examine the space, looking for any visible signs of issues. They will assess the overall condition of the attic’s structure, insulation, and ventilation. They might also check for signs of water damage, pests, or mold growth.
Structural Integrity
After the visual assessment, the inspector will carefully examine the attic’s structural components.
This involves checking for signs of sagging, damaged or inadequate framing and any indications of water intrusion or pest infestation that may compromise the attic’s integrity.
Insulation and Ventilation
Adequate insulation and ventilation are vital for energy efficiency and for preventing issues like moisture buildup and mold growth.
During the attic insulation inspection, the inspector will evaluate the type and condition of insulation, ensuring it meets local building codes. They will also assess the ventilation system to confirm proper airflow.
Electrical Wiring
Inspectors will inspect the electrical wiring present in the attic to ensure it is up to code and safely installed. They will check for exposed or damaged wiring, improper connections, and the presence of junction boxes where necessary.
Plumbing and HVAC
If applicable, the inspector will examine any plumbing or HVAC (heating, ventilation, and air conditioning) systems located in the attic. They will assess their condition and insulation and ensure they are functioning properly.
Roof and Chimney
Inspecting the attic provides an opportunity to assess the condition of the roof and chimney from the inside. The inspector will look for signs of leaks, water damage, or structural issues that may require attention.
Fire Safety
The inspector may check for the presence and condition of fire-resistant materials, such as fire-rated drywall or insulation, and ensure that proper fire safety measures are in place.
Pest Infestation
Attics are prone to pest infestations, including rodents and insects. The inspector will search for any evidence of infestation, such as droppings, nests, or chewed wires, and recommend appropriate measures for remediation. Attic inspection for rodents is crucial for maintaining your home’s integrity.
Additional Considerations
Depending on the specific property, the inspector may also evaluate other aspects like fire hazards, adequate insulation around recessed lighting fixtures, or potential fire-blocking issues.
Additional Tools
To perform a thorough inspection, inspectors may use tools like attic inspection cameras which we will get into detail later. These cameras provide a closer view of inaccessible or hard-to-reach areas, making it easier to identify potential issues without causing unnecessary damage.
Documentation and Report
After completing the inspection, the inspector will compile their findings into a detailed report.
The report will include a description of any observed issues, their severity, recommended repairs or further evaluations, and maintenance suggestions. It may also include photographs, diagrams, or measurements to support the findings.
Discussion and Explanation
The inspector will review the inspection report with you, explaining their findings and answering any questions you may have.
They will provide guidance on the recommended actions to address identified issues and offer suggestions for maintaining a healthy and safe Attic environment.
Follow-Up Support
A reputable inspector will be available for follow-up support should you require further clarification or assistance in addressing any concerns raised during the inspection.
Important Note: The specific items inspected during an attic inspection may vary based on factors like local building codes, the purpose of the inspection (e.g., general assessment or specific issue), and the expertise of the inspector.
What Is An Attic Inspection Camera Why Are Its Benefits?
During the inspection, an inspector has to rely on a multitude of tools to conduct a thorough inspection of your attic efficiently.
One of those handy tools is an attic inspection camera.
As the name suggests, an attic inspection camera is a tool used by professionals to examine and document the condition of the attic.
It is a small, portable camera equipped with a flexible cable or telescoping rod that allows it to access tight spaces and navigate through the attic easily.
The camera is typically connected to a monitor or a mobile device, enabling the inspector to view real-time footage or capture images and videos of the attic.
It comes with adjustable LED lights to illuminate the area and provide clearer visibility, especially in dark or poorly lit attics.
With the help of these cameras, inspectors can thoroughly inspect the attic without the need for physical access, which completely eliminates the extensive disassembly of certain, otherwise inaccessible, areas.
The camera’s footage can reveal various aspects, including insulation coverage, presence of pests or mold, condition of structural components, electrical wiring, and overall cleanliness.
With this, inspectors can identify potential issues and document findings for further analysis or reporting.

Infrared Camera for Attic Inspection
In addition to the features mentioned earlier, some advanced attic inspection cameras also come with infrared vision.
With infrared vision, inspectors can detect hidden issues that may not be visible to the naked eye alone, such as hidden moisture or insulation problems.
They can effectively identify areas of temperature variations and potential energy inefficiencies within the attic.
By detecting heat signatures, inspectors can identify insulation gaps, air leaks, or areas of inadequate ventilation that may lead to energy loss or increased heating and cooling costs.
Thermal imaging can also help in identifying moisture issues, as it can highlight areas with temperature differences that could indicate water intrusion, leaks, or condensation problems.
This can help inspectors pinpoint potential sources of mold growth or water damage.
With this invaluable intel, they can come up with effective strategies to solve the underlying problem.
How Much Does An Attic Inspection Cost?
Attic inspection costs can vary quite a bit depending on a few factors. Things like where you’re located, the size of your attic, how complex the inspection is, and the specific services you need can all affect the price.
On average, you can expect to pay anywhere from around $200 to $600 or more for an attic inspection. Some inspectors charge by the hour, while others have a set fee for the whole inspection.
Keep in mind that if you require additional services like mold testing or thermal imaging, there may be extra costs involved.
To get a more accurate estimate for your particular attic inspection, it’s best to reach out to local professionals in your area. They can give you a personalized quote based on the unique aspects of your attic and the specific services you’re looking for.
It’s always a good idea to shop around and compare prices to find the best value for your money.
How Long Does An Attic Inspection Take?
When it comes to the duration of an attic inspection, it depends on a few factors. Typically, a standard attic inspection can take anywhere from 1 to 2 hours.
Keep in mind that this is just an average estimate. If your attic is larger, has multiple levels, or requires additional tests or assessments, it might take a bit longer to complete the inspection.
Also, if the inspector discovers any significant issues during the inspection, they might need some extra time to evaluate and document those issues thoroughly.
To get a better idea of how long your specific attic inspection services might take, we’d suggest reaching out to the attic inspection professional you’re planning to hire.
They’ll be able to give you a more accurate estimate based on the size and complexity of your attic, as well as the scope of the inspection.
Remember, it’s always a good idea to allow enough time for a thorough inspection to identify any potential problems and ensure a comprehensive evaluation of your attic.
The Bottom Line
When it comes to your home, you deserve nothing but the best. That’s why our team of experts at Souffront is here to exceed your expectations and provide you with an attic inspection experience like no other.
Our team of highly qualified and certified experts brings a wealth of expertise and knowledge to every inspection. With backgrounds in construction and specialized training, we have a keen eye for detail and a deep understanding of attic dynamics.
We stay ahead of the game by keeping up with the latest building codes and regulations, ensuring that your attic inspection is not only thorough but also compliant with the highest industry standards.
At Souffront, your peace of mind is our top priority.
Our meticulous inspection reports provide you with a clear and comprehensive understanding of any issues found, complete with supporting documentation, so that you can make informed decisions with confidence.
But don’t just take our word for it. Our track record speaks for itself as our roster of satisfied clients continues to rave about our exceptional service and unwavering attention to detail.
We take pride in delivering thorough and comprehensive attic inspection services that leave no stone unturned. Let their testimonials be a testament to the quality and reliability of our work.
Contact us today for all your attic inspection needs and experience the Souffront difference firsthand.
Are you planning to build a new structure or develop a piece of land? If so, you need to make sure that the foundation of your construction project is solid and stable.
As the saying goes, “ A building is only as strong as the foundation it sits upon’, which is why soil sampling for construction is crucial for any project.
By testing the soil before construction begins, engineers can assess the quality of the soil and determine the appropriate foundation design for the specific site.
In this blog, we will explore the importance of soil sampling for construction and how it can help save time and money in the long run.
Whether you’re a builder or a homeowner, understanding soil sampling for construction can ensure that your project starts on solid ground.

What is Soil Testing
Soil testing is a process that involves analyzing soil to determine its physical and chemical properties.
It’s like giving the soil a check-up to see if it’s healthy and ready for its next big thing.
By collecting samples of soil and testing them with comprehensive laboratory analysis methods, soil sampling for construction reveals crucial information about the soil’s composition, nutrient content, pH level, and more.
This information is vital for verifying the suitability of soil for various applications, such as construction, agriculture, and environmental remediation.
So whether you’re building a new home or planting a garden, soil testing can help you ensure the success of your project by providing the necessary insight into the quality of the soil.
Why is the Soil Test for New Construction so Important?
Before beginning any construction project, it’s essential to conduct soil testing. But why?
Well, as mentioned before, the success of any construction project depends on the strength and stability of its foundation, which is directly affected by the quality of the soil.
Soil testing helps engineers understand the physical and chemical properties of the soil on a construction site, such as its bearing capacity, compaction, and drainage.
This information is crucial in determining the appropriate foundation design. It helps engineers to make sure that the building can withstand the weight of the structure and any external forces, making them earthquake-proof or flood-resistant.
In short, as we have mentioned before, soil testing is like a health check-up for the soil. It helps us to identify any potential problems before construction begins.
By taking this vital step, you can save time and money in the long run by avoiding costly foundation repairs and ensuring a safe and stable structure.
When Is It Done, And Who Does It?
Soil testing is a crucial step in construction and should ideally be done before starting any major construction work. Soil conditions can greatly impact the safety, stability, and durability of any structure.
So, if you’re planning a construction project, get the soil test done now itself. This will help you identify any potential issues with the soil that could affect the safety or longevity of your structure and allow you to take corrective measures before construction begins.
Depending on the scope and type of the construction project, a soil test might be necessary. In such cases, it’s always best to follow the regulatory requirements and get the necessary testing done as per their guidelines.
Now, who does it?
Soil testing for building a house is usually done by geotechnical engineers or soil testing laboratories. These professionals have the expertise and equipment to perform a variety of tests on soil samples to determine their properties and characteristics.
They can also provide recommendations on the best foundation design and construction methods based on the results of the soil tests. It’s important to choose a reputable and experienced soil testing service to ensure accurate results and reliable recommendations.
Types of Soil Testing Before Construction
We are now pretty familiar with the concept of soil testing before construction and why land testing for buildings is important. So, let us explore various types of soil testing for construction.
Moisture Test
Did you know that moisture in the soil can impact its weight-bearing capacity and even state the likelihood of a termite infestation?
Moisture refers to the amount of water present in soil and can be determined by calculating the soil’s water content. This crucial information is obtained by measuring the weight of a soil sample when moist and after it has been dried.
As a rule of thumb, lower moisture levels tend to state stronger soil. Various methods can be used to test for moisture content to help determine the percentage of water in the soil.
Soil moisture content is important for engineers and builders to design strong and durable foundations and structures. It also helps them to prevent termite damage.
Here are a few methods that are typically used for moisture testing:
Oven-Drying Method
When it comes to testing moisture content in the soil, the oven-drying method stands out as the most common and reliable.
The oven-drying method involves taking a moist soil sample and heating it in an oven at approximately 110 degrees Celsius.
After 24 hours, the dried sample is removed from the oven and weighed, allowing it to be compared to the weight of the original moist sample.

The following formula is used to determine the water content of a soil sample:
w= (M2-M3)/(M3-M1) * 100
where
M1= Empty container’s mass with the lid
M2= Container’s mass with wet soil and lid
M3= Container’s mass with dry soil and lid
The amount of soil sample required for this test varies depending on the particle size and gradation of the soil.
By conducting a sieve analysis, engineers can determine the appropriate quantity of soil needed for the test.
This information is vital for ensuring accurate results and can help builders and engineers design stronger foundations that can withstand external forces and avoid potential termite damage.
Radiation Method
Radiation isn’t just something from sci-fi movies; it’s also a real-life method for testing soil moisture content. Believe it or not, scientists can use radioactive isotopes to get the job done!
This method works on a simple principle: the amount of energy lost by the neutrons is directly proportional to the quantity of moisture in the soil.
By placing a device containing radioactive material, like cobalt 60, in a steel casing and lowering it into a borehole, scientists can accurately measure soil moisture content without even disturbing the soil.
Here’s how it works:
The radio-active material emits neutrons, which scatter as they encounter the hydrogen atoms in the soil’s water. This scattering causes the neutrons to lose energy, and the amount of energy lost is directly proportional to the amount of water present in the soil. A detector placed in another steel casing is calibrated to give an accurate reading of the soil’s moisture content.
While this method is incredibly useful for in-situ testing, it’s important to use caution when working with radioactive materials. Proper shielding precautions must be taken to avoid any potential radiation problems.
Despite the potential risks, the radiation method remains a valuable tool for engineers and scientists working to better understand the properties of soil and create stronger buildings and infrastructure.
Calcium Carbide Method
Calcium carbide method, also known as the speedy moisture tester, is a quick and easy way to determine the moisture content of soil using calcium carbide gas pressure.
This method works by measuring the pressure generated by the reaction between calcium carbide and water in a sealed container filled with soil.
The pressure is directly related to the soil’s moisture content and is read on a gauge. It’s important to note that the reading obtained is on a wet moisture basis (m) and needs to be converted into water content on a dry mass basis using a simple calculation.
Formula to convert wet moisture basis (m) into dry mass basis:
w = [m/(100-m)] * 100
With the Speedy moisture tester and a little bit of math, you can quickly and accurately determine the moisture content of soil for your construction or engineering project.
Alcohol Method
The alcohol method is a speedy way to measure the moisture content of the soil. It works on the same principle as the oven-drying method, but instead of heat, we use methylated spirit to dry out the wet soil.
While it may not be as precise as other methods, the alcohol method is a great choice for quick and easy field tests.
Just be aware that if your soil is chock-full of clay, gypsum, calcareous matter, or organic matter, this method may not be the best fit.
To calculate the percentage of water content in your soil, use this formula:
W = [(W2 – W3) / (W3 – W1)] * 100
where
W = the water content percentage
W1 = the mass of the dish in grams
W2 = the mass of the dish with wet soil in grams
W3 = the mass of the dish with dry soil in grams
Sand Bath Method
When you’re out in the field and need to determine the moisture content of the soil, the Sand Bath Method is here to save the day. No electric oven is required – just a tray of sand about 3 cm high and a container filled with wet soil.
Simply place the container on the sand bath and heat it up while stirring, with a few white papers on top of the soil. As the soil dries out, the papers will turn from white to brown, indicating that the soil is dry and ready for testing.
With the dry soil in hand, you can use the same equation as the oven-drying method to calculate the water content percentage, which is:
w= (M2-M3)/(M3-M1) * 100
where
M1= Empty container’s mass with the lid
M2= Container’s mass with wet soil and lid
M3= Container’s mass with dry soil and lid
Torsion Balance Method
The torsion balance method is a handy technique which perfect for soils that re-absorb moisture quickly after drying, providing highly accurate and rapid results in no time.
By weighing and drying your soil sample at the same time, the Torsion Balance method eliminates the need for multiple steps and time-consuming calculations.
Plus, with its calibrated balance, you can get a direct measurement of your soil’s water content with ease. Don’t settle for slow and inefficient methods – try the Torsion Balance method for quick and precise results.
After performing the Torsion Balance method, you’ll obtain the water content of your soil sample based on its wet weight, which is represented by w’. Using this value, you can then calculate the weight of water by using the formula:
w = w’ / (1 – w’)
With the torsion balance method, you can get the moisture content of the soil in just 15 to 30 minutes. Keep in mind that the test result can vary based on the soil type and the amount of moisture in it.
Pycnometer Method
The pycnometer method is fast and efficient, but it works best for coarse-grained soils whose specific gravity is accurately known.
So, what exactly is a pycnometer?
It’s a nifty little device that looks like a density bottle with a capacity of 900 mL. The bottle has a brass conical cap that serves as a cover, and a rubber washer is placed inside the cap to prevent water leakage.
To calculate the water content of the soil sample, scientists use the following formula:
w = (M2 – M1)/(M3 – M1) – (M4 – M1) x G
where
M1 = the mass of the empty pycnometer.
M2 = the mass of the pycnometer with wet soil.
M3 = the mass of the pycnometer and soil filled with water.
M4 = the mass of the pycnometer filled with water only.
G = the specific gravity of soil.
Atterberg Limits Test
The Atterberg limits are a set of measurements that are used to determine the critical water contents of fine-grained soil. These limits include the shrinkage limit, plastic limit, and liquid limit.
The water content of the soil plays a crucial role in determining its behavior and can place it in one of four states: solid, semi-solid, plastic, or liquid.
When the soil is in a solid state, it is dry and compact and doesn’t easily deform. In a semi-solid state, the soil has a slightly higher water content and can be molded but still retains its shape.
As the water content increases, the soil can reach a plastic state, where it can be easily molded and shaped, much like modeling clay. At the liquid limit, the soil behaves like a liquid, with little to no shear strength.
Understanding the Atterberg limits of a soil sample can provide valuable insights into how it will behave under different conditions.
For example, construction professionals and engineers can use this information to determine the suitability of a particular soil for building foundations or structures.
Liquid Limit Test
The liquid limit is an important property of soil that tells us at what point it starts behaving like a liquid while still retaining a small amount of shear strength.
To determine the liquid limit of a soil sample, a device called Casagrande’s liquid limit device is used.
In this device, a groove is made in the soil sample, and a standardized tool is used to strike it, causing it to close.
The number of blows required for the groove to close in just 25 strikes is recorded, and this number is known as the “N-value.”
Since getting exactly 25 blows in a single test can be challenging, 3 to 4 tests are typically conducted, and the N-value is determined for each test.
A semi-log plot is then drawn between the log of N-values and the corresponding water content.
The liquid limit of the soil sample is the water content at which N equals 25, as obtained from the plot.
The formula commonly used for the liquid limit test is:
LL = k * WN
If the liquid limit of the soil is too high, it may be unsuitable for building a stable foundation or structure.
Plastic Limit Test
When we talk about the plastic limit of soil, we’re referring to the point at which it starts behaving like a plastic material.
This is determined by measuring the moisture content of the soil at which it crumbles when it’s rolled into threads that are 3.22 mm in diameter.
There are established test methods for determining the plastic limit of soil, outlined in the ASTM D4148 standard.
These methods ensure consistency and accuracy in measuring the plastic limit of different soils.
Formulas used to determine the plastic limit of soil are
- Flow index, If = (W1-W2)/ log10(N2/N1)
where,
W1 = Moisture content in percentage corresponding to N1 drops and
W2 = Moisture content in percentage corresponding to N2 drops
- Plasticity Index, Ip = WL – WP
- Toughness Index = Ip/If
Shrinkage Limit Test
The shrinkage limit of soil refers to the amount of water that’s needed to fill all the tiny spaces between soil particles, leaving no more room for water to seep in.
It’s like when a sponge is completely saturated with water and can’t absorb anymore.
When the water content of the soil is reduced below the shrinkage limit, the volume of the soil won’t decrease any further.
This limit can be determined by using a formula that takes into account the relationship between the water content and the volume of soil.
Ws = [(M2 – M1)n – (V1 – V2) Pw / M2] * 100
where
M1 = initial mass
V1= initial volume
M2= dry mass
V2= volume after drying
Pw = density of water
Dry Density Test
Dry density is a fundamental property of soil that measures the weight of soil particles in a given volume of sample. It’s an essential parameter for engineers to determine the load-bearing capacity of soil and design foundations accordingly.
The dry density of soil is influenced by two factors – Void Ratio and Specific Gravity. Void Ratio is the ratio of the volume of voids to the volume of solids, while Specific Gravity is the ratio of the density of soil particles to the density of water.
The dry density test provides valuable information to classify the soil as dense, medium, or loose. It’s a crucial step in evaluating soil suitability for construction projects.
There are different methods to calculate the dry density of soil, such as The Core Cutter Method, Sand Replacement Method, and Water Displacement Method.
Each method has its unique advantages and limitations, and the choice of method depends on the specific requirements of the project.

Core Cutter Method
The core cutting method is a simple yet effective way to determine the dry density of soil.
Here’s how it works:
A cylindrical core cutter with specific dimensions is used to extract a soil sample. The weight of the soil sample is then measured and recorded for further analysis.
To determine the dry density, the water content of the soil sample is first calculated. Once that’s done, the dry density can be easily determined.
This method is commonly used by engineers to figure out the maximum dry density and optimum water content of compacted soil.
Sand Replacement Method
In this method, engineers first dig a hole in the ground to obtain a sample of the soil they want to test. The engineers then carefully fill the hole with uniform sand of known dry density. This helps them determine the volume of the hole since they know the mass and dry density of the sand they used to fill it.
Next, the engineers weigh the excavated soil sample and record its weight. From there, they can calculate the dry density of the soil using a formula that takes into account the volume of the hole, the weight of the excavated soil, and the weight of the sand used to fill the hole.
This method is particularly useful for large-scale projects, as it can provide a quick and accurate assessment of the dry density of soil without having to transport samples to a laboratory for testing.
Water Displacement Method
The water displacement test method is a handy technique for measuring the dry density of cohesive soil. This method requires a specimen of a particular shape, and it’s commonly used to evaluate the in-place dry density of soil.
To perform this test, the soil sample is first trimmed to achieve a uniform shape. Then, it’s coated with a water-resistant material, usually wax. This coating ensures that the sample is impervious to water.
Next, the volume of the soil sample is determined by measuring the volume of water displaced by the specimen. This volume, along with the weight of the sample, is used to calculate the dry density of the soil.
The formula used to calculate dry density with the water displacement method is
Dry Density=(M/V)/1+w
where
M = Mass of Wax
V = Volume of Wax
w = Water Content
Specific Gravity Test
The specific gravity test tells us the void ratio and degree of saturation of the soil. Basically, it gives us an idea of how much air and water are present in the soil.
Now, when it comes to using soil for construction, there are some specific things to look for.
One important factor is the specific gravity value of the soil, which should ideally be between 2.65 to 2.85.
If the value is lower than 2, it could mean that there’s a lot of organic matter and porous stuff mixed in with the soil.
On the other hand, a value above 3 might indicate the presence of heavy materials in the soil.
So, what you want for construction is soil that has low amounts of organic matter, porous materials, and heavy substances.
That way, you can make sure that the soil is strong and stable enough to support buildings and other structures.
Compaction Test (Proctor’s Compaction Test)
The compaction test, also called the proctor’s compaction test, is used by engineers to land testing for buildings and study how soil compacts when air voids are removed by pressing it together.
The test results reveal two important values: the maximum dry density and the optimum water content of the compacted soil.
These values are crucial in determining how to compact the soil efficiently and effectively for construction purposes.
Process of Soil Testing for Construction
Basically, the engineers arrive at the site with their tools and team and start digging holes in the soil to collect samples.
These holes may not always be deep and can be easily dug with hand tools, but sometimes, depending on the soil type, they may need to dig a hole as deep as 7-10 feet.
Once the samples are collected, they are taken to the geotechnical labs, where they are tested for various factors like composition, reactivity, salinity, moisture, and much more.
Based on the test findings, the soil engineer(s) will then make recommendations that could range from the required depth for the foundation to changes in the building’s entire design.
It’s important to remember that the strength and stability of a building can be drastically affected by the properties of the soil.
So, it’s crucial to follow the soil test report’s directions and recommendations religiously while making the construction plan to ensure the safety and longevity of the building.
Tackling the Tough Results of a Soil Test with Smart Solutions!
Your soil test report might reveal the presence of clayey soil or sand, and in such cases, it might not be wise to choose a simple rubble foundation for your house.
But what can you do? Let’s take a look at some possible outcomes and solutions based on your soil test results.
Clay
If your soil test report indicates the presence of clay in the soil, you might encounter some issues. The bearing capacity of saturated clay is typically low, resulting in weak foundations.
However, you can address this issue to a certain extent by using compaction techniques to remove air from the soil pores. For this type of soil, it’s more appropriate to use deep foundations.
Another issue you might face with clay soil is its low shear strength, which means it can’t sustain much stress when wet.
This results in a high possibility of soil consolidation in soft clays. To address this problem, you can try lowering the water table, pre-loading the soil, or driving piles to rock.
Additionally, swelling can occur in clay, which can alter the formation of the soil and cause foundation expansion or swelling.
To prevent this from happening, you can maintain a constant water table, treat or stabilize the soil, or include swell pressure in the design.
Another option is to mechanically change the nature of the soil, but that might be an expensive solution.
While clay can pose a challenging problem for your project, its nothing that can’t be taken care of with the right strategy.
Sand
Have you ever noticed that sometimes foundations of buildings tend to settle excessively in wet and loose soils? This can lead to differential settlement, a serious issue.
But don’t worry; there are ways to resolve this problem.
One way is to compact loose sands. It will help to some extent. Another method is to lower the water table, which results in sand densification.
However, sandy soils come with their own challenges. For example, the confining pressure of sand is usually low. This affects the bearing capacity of the foundation.
To counter this, deep foundations are the way to go. The compaction of sand can also improve the bearing capacity as it increases cohesion and friction.
Overall, while sand in the soil presents some challenges, there are effective solutions available to address them.
With the help of appropriate techniques and strategies, you can ensure that your foundation remains strong and stable, even in the presence of clay or sand.
So don’t let a challenging soil test result discourage you – with the right approach, you can build a solid foundation for your project.
Final Thoughts
Soil testing is an essential step that cannot be overlooked when it comes to construction. Some contractors may skip a soil test for house construction to save money or because they don’t realize how important it is. This can be a problem.
This can be a dangerous mistake, as building on unstable soil can have disastrous consequences.
In fact, soil testing is so important that many governments around the world have made it a legal requirement before construction can begin.
This is because soil conditions can vary greatly even within a small area, and it’s essential to know what you’re building on to ensure the safety of the project and the people who will be using it.
Ignoring soil testing can be dangerous, and frankly, it’s not worth the risk. That’s why it’s important to work with a reliable and trustworthy construction company like Souffront .
We understand the importance of soil testing and can guide you through the process to make sure your project is safe and secure.
So, invest your time and money wisely, and let us take care of all your construction worries. Contact Souffront today for the right information and expert guidance.
What Is Core Drilling In Construction
In the construction industry, experts use the concrete coring procedure as a crucial technique for extracting cylindrical cores or samples from concrete structures, including walls, floors, ceilings, and pavements.
This process uses a specialized tool called a core drill, which comes equipped with diamond-tipped cutting tools.
You may wonder why we specifically choose diamond-tipped tools for this task.
The reason lies in the remarkable hardness and durability of diamonds, which make them ideal for cutting through tough materials like concrete.
The core drill securely attaches the diamond-tipped bits and rotates them at high speeds, effectively grinding away the concrete as they penetrate the surface.
With the use of diamond-tipped tools and a careful approach, core drilling offers a reliable and effective means of examining concrete structures while maintaining their integrity.
It allows engineers, architects, and inspectors to gather essential information about existing structures, perform necessary tests, and make informed decisions regarding repairs, renovations, or new construction projects.
Applications of Concrete Core Drilling
Now that we know what core drilling is, let’s learn more about its applications. There are several situations where concrete coring comes in handy.
Test Integrity and Strength of Concrete
One common application is in construction projects where the integrity and strength of the concrete need to be assessed.
By extracting a core sample, engineers and inspectors can examine the concrete’s composition, look for any signs of deterioration or damage, and determine if it meets the required specifications.
Examining Existing Structures
Concrete coring is also beneficial when examining existing structures.
Let’s say there’s a building with a suspected issue, such as concrete degradation or cracks. By extracting core samples from the affected areas, experts can analyze them to identify the root cause of the problem.
This helps in planning and implementing appropriate repairs or maintenance strategies.
Material Testing
In construction projects, moreover, it’s crucial to ensure that the concrete used meets the required strength and durability standards.
By extracting core samples, concrete can be analyzed for compressive strength, moisture content, chemical composition, and other properties to ensure compliance with design specifications and industry standards.
Plumbing and Electrical Installations
Core drilling is commonly used to create holes in concrete walls, floors, and ceilings for the installation of plumbing pipes, electrical conduits, and HVAC systems.
These holes allow for the passage of necessary utilities while maintaining the structural integrity of the concrete.
Renovations and Upgrades
Concrete coring is also used in situations where new installations or modifications are planned within existing concrete structures.
For instance, if you want to install a new plumbing line or add electrical conduits, coring provides a way to create precise channels without damaging the surrounding concrete.
Core drilling also facilitates the installation of anchor bolts for securing heavy equipment or structures to the concrete.
Demolition and Removal
In situations where concrete structures or elements need to be demolished or removed, core drilling is used to create precise openings for demolition charges or to cut and remove concrete sections.
This controlled method helps minimize damage to surrounding areas and enhances safety during the demolition process.
Sewer and Drainage Systems
Furthermore, core drilling is used in the installation of sewer and drainage systems in concrete surfaces.
It helps in creating access points, cleanouts, or tie-ins for connecting pipes to the main sewage or drainage network.
How Does It Work?
We have discussed about core drilling and its benefits.
However, to truly understand its ins and outs, you need to familiarize yourself with the process.
Here is all you need to know about it:
Concrete coring works by using a specialized core drilling machine to create cylindrical openings or cores in concrete structures.
Concrete core drilling requires the use of a diamond concrete drill bit. These drill bits consist of steel tubes that are embedded with industrial diamond pieces.
The diamond provides the necessary hardness and abrasiveness to effectively cut through concrete.

Drilling Process
To perform the drilling, the diamond core drill bit is mounted onto the shaft of the drilling machine. It is then securely attached to the structure that needs to be drilled into.
The drilling machine provides the power and rotational force required for the drill bit to penetrate the concrete.
During the drilling process, as the diamond core drill bit rotates at high speeds, it grinds away the concrete material, creating a hole. The drill bit is designed with a hollow center, which allows for the collection of the concrete “slug” or core.
Extracting The Core
Once the drilling process is complete, the core drill bit is carefully removed from the hole. The core of concrete can then be extracted from the drill bit.
This core is essentially a cylindrical sample of the concrete that was drilled, and it retains the shape and characteristics of the surrounding structure.
Examining The Core
The extracted cylindrical shaped core sample can now be examined and analyzed to assess the stability, composition, and strength of the concrete and the overall structure.
Things You Need To Know About Concrete Coring
- While concrete core drilling is primarily used for concrete, it can also be used to cut through other materials, including porcelain tile, limestone, rock, granite, fiberglass, and even ice.
- In the process, before commencing any drilling work, several factors must be considered, such as the type and strength of the concrete being drilled, the presence of reinforcement bars in the structure, and the implementation of necessary precautionary measures throughout the drilling process.
- It is crucial to scan the area thoroughly. This preliminary scan ensures that there are no obstructions, such as rods or conduits, that could interfere with the drilling process.
Companies like Souffront specialize in concrete scanning services, guaranteeing accurate detection of any hidden objects or structural elements within the concrete.
You might also like to read: The Ultimate Guide to Concrete Loading Dock Repair
What Are The Benefits of Concrete Coring?
Concrete coring offers several benefits in various applications. Here are some of the key advantages of concrete coring:
Clean And Precise Drilling
It provides accurate and clean holes, ensuring precise measurements and minimal damage to the surrounding concrete.
This is crucial when you need to maintain the structural integrity of the concrete while creating openings.

Extract Samples for Testing
Core drilling allows for the extraction of samples for testing purposes.
For instance, engineers may need to analyze the strength or composition of the concrete in a building to ensure its stability or assess its condition for repairs or renovations.
By drilling cores, they can extract samples and examine them in the lab with relative ease.
Important Note: It is crucial that all the core drilling codes and specifications are met to get reliable results.
Non-Destructive Testing
Concrete coring allows for non-destructive testing of existing concrete structures.
Engineers and technicians can evaluate concrete strength, durability, and composition non-destructively through core samples, avoiding significant damage.
This enables informed decision-making regarding repairs, renovations, or new construction projects.
Quiet and Dust-Free
Core drilling is a relatively quiet and dust-free method compared to alternative techniques like using a jackhammer or other heavy equipment.
This makes it more suitable for indoor applications, where noise and dust can be major concerns.
You might also like to read: Concrete Sewer Pipe Repair: The Ultimate Guide to Fixing Your Sewage System
Why Souffront is the Best Choice for Your Concrete Core Drilling Needs
When it comes to concrete core drilling, Souffront Construction & Engineering (SCE) stands out as a trusted and reliable partner.
At Souffront, we take pride in our team of skilled professionals who have extensive experience and expertise in concrete core hole drilling. Equipped with advanced technology and cutting-edge equipment, our team ensures efficient and precise drilling with minimal disruption to your project.
Contact us today and let our experienced team assist you in achieving precise and efficient drilling, providing the foundation for the success of your construction project. Also, we are the most experienced 40-Year Recertification Inspection inspectors.
When it comes to our homes, there are few things more important than our sewer systems. These networks of pipes carry waste and wastewater away from our homes and businesses, keeping our communities healthy and clean. However, like any artificial system, sewer pipes can break down over time, leading to leaks, blockages, and other issues that can be both costly and disruptive. That’s where concrete sewer pipe repair comes in.
Advanced techniques and materials make it possible to swiftly and effectively repair severely damaged sewer pipes. This eliminates the need for costly and time-consuming excavation.
This blog will delve into concrete sewer pipe repair, explaining its workings and the benefits it offers to your community.
So whether you’re a homeowner, a business owner, or a public works manager, we have got you covered.
Let’s dive in and learn the steps to keeping your sewer system running smoothly for years to come.
What is a Concrete Sewer Line?
First things first, let’s discuss what is a concrete sewer line.
Concrete sewer lines consist of reinforced concrete pipes used in sewage systems, present in both municipal and residential areas.
They’re really strong and durable, plus they don’t corrode easily. That’s why they’re often used underground for sewer systems.
There are many different sizes and shapes of concrete sewer pipes available to suit different flow requirements and system designs.
How to Tell If You Need Concrete Sewer Pipe Repair: Common Signs to Look Out For
Like most problems, there are a few signs that might indicate that your sewer line is in need of repair.
- Foul Odors: If you notice a strong sewage smell around your property, it could be a sign of a sewer line issue.
- Slow Drains: If your sinks, toilets, or showers are slow to drain or are backing up, it could be a sign that your sewer line is blocked.
- Lush Patches of Grass: If there are unexplained patches of extra green and lush grass in your yard, it could be due to a leak in your sewer line.
- Water Damage: If you notice water stains, mold, or mildew in your basement or lower levels of your home, it could be a sign of a leaking sewer line.
- Strange Noises: If you hear gurgling, bubbling sounds when you use your plumbing fixtures or the sound of leaking running water, it could be a sign of a sewer line issue.
- Cracking in the Foundation: If you’ve observed cracks or buckles inside on the floors or walls, or outside on your foundation’s lower portions, you may have a slab leak. This could be a big problem, as it can actually compromise the overall strength and stability of your foundation.
- An Unusually High Water Bill: If you’re constantly getting a high water bill, it’s a pretty good sign that there might be a leak somewhere in your house. However, just because your water bill is high doesn’t necessarily mean that there’s a slab leak.
If you notice these signs, don’t hesitate. Reach out to a professional plumber or concrete sewer pipe repair specialist promptly. This prevents further damage and addresses the issue effectively.
Signs of Structural Damage Caused by Broken Sewer Pipe Leakage
Now you might think, how dangerous can a water leak be?
Although a damaged sewer pipe or water leakage might appear minor, it’s far more serious than it seems. The implications are more significant than you can imagine.
As previously mentioned, even a small water leakage can gradually impact and weaken your home’s foundation. It can compromise your home’s structural integrity.
Let us explain this.
If the land your home is built on contains clay in the soil, the clay in the soil can absorb the leaked water from the damaged sewer line. It can effectively increase the volume of the soil by up to 10%.
This increase in the soil’s volume can put enough pressure on the foundation to lift it, and consecutively damage it.
If you see any signs mentioned below, there is a high probability that your home has structural damage from water leakage.
- There are cracks in the walls that extend from the floor upwards.
- The tiles or concrete flooring have cracks in them.
- Some areas of the flooring are raised and have a dome-like shape.
- The timber boards are warped or make squeaking sounds when walked on.
It goes without saying that if you see any of these signs, we highly recommend that you take steps to fix the problem as soon as possible. If left unchecked, it can cause not only structural damage but health hazards as well.
You might also like to read: How structural inspections can prevent accidents and grow building life
What’s Involved in a Concrete Sewer Pipe Repair/Replacement?
Replacing a sewer pipe is a big job that involves a lot of work and a significant investment. Before you dive into a sewer pipe replacement project, it’s important to understand what it’s going to take.
Step 1:
First, you’ll need to hire a plumbing specialist to assess the situation and determine whether or not a full replacement is necessary.
They’ll inspect your pipes and use cameras to determine the extent of the damage and where it’s located.
Once they’ve determined that a replacement is necessary, they’ll provide you with an estimate of the cost.
Step 2:
The next step is to prepare your property for the work. This may involve obtaining permits from your local government and coordinating with your neighbors if the work will impact their property as well.
You’ll also need to clear the area around the pipes to make it easier for the plumbing specialists to access them.
When the work begins, the first step is to excavate the area around the pipes. This may involve digging up your lawn or driveway, and it can be quite messy.
Once the area is cleared, the old pipes will be removed, and new pipes will be installed. The plumbing specialists will then connect the new pipes to your home’s plumbing system and the city’s sewer system.
Step 3:
Finally, the area around the pipes will be backfilled, and any landscaping or paving that was removed will be replaced. The plumbing specialists will then test the new pipes to make sure everything is working properly.
You might also like to read: The Importance of Electrical Home Safety Inspections and How to Ensure Your Family’s Protection!
Overall, a sewer pipe replacement is a complex and involved process that requires the expertise of a trained plumbing specialist.
But, once the work is complete, you’ll have peace of mind knowing that your sewer system is working properly, and you won’t have to worry about any unpleasant surprises in the future.
Steps You Need to Take Before Choosing a Concrete Sewer Pipe Repair Strategy
When you’re dealing with drain or sewer line issues, you’ve got a few options for fixing the drain repair under the slab.
But before you start, it might be worth considering hiring a leak detection specialist to find the leak and provide you with CCTV footage.
These pros have all the latest equipment and can accurately pinpoint the problem, which means less guesswork and patching up of pipes.
If you’re dealing with collapsed drainage or sewer pipes under slabs, a CCTV or infrared camera inspection can survey the pipes and identify the damaged area.
Some repairers might tell you they need to do their own inspection before giving you a quote, but that might mean extra charges for you.
So, it’s a good idea to have your own report and footage of the damage to keep costs down.
When you call for a quote, ask if it’s a free service. If they want to charge for an inspection, let them know you already have recent, professional footage of the damage and that you want them to quote based on that.
It’s likely they’ll need to do their own inspection before starting work, but that can come later.
Also, keep in mind that the people giving you quotes can offer a lot of helpful information about the different repair methods.
Ask them about the pros and cons of their approach and compare that to what you find on the internet.
This will help you make an informed decision about the best way to fix your problem.
You might also like to read: The Ultimate Guide to Concrete Restoration Process and Methods
Methods For Repairing A Broken Sewer Line Under A Slab
There are several widely used methods that you can choose from for your concrete sewer pipe repair.
Here are some of the best methods in use for you to choose based on your specific needs.
Traditional (Open Trench) Sewer Line Replacement
Traditional pipe replacement typically requires excavating a ditch along the entire length of the pipeline, removing the old pipes, and installing the new ones.
One advantage of this method is the ability to inspect each pipe individually after replacement, ensuring proper installation and minimizing the risk of future failures.
Although this approach is the easiest way to ensure that the installation has been done correctly and that the new pipe is in the right position, it may not be the most cost-effective solution.
For instance, if the sewer pipe runs under a building, the traditional approach may not be the best option since everything from the building to the landscape would need to be replaced.
In such cases, it would be wise to consider other methods of pipeline repair that are less invasive and more cost-effective.
Trenchless Sewer Repair
Trenchless concrete sewer pipe repair is a method of fixing pipes without the need for digging trenches or ditches.
In fact, it’s often considered the best approach for pipeline repair due to its non-invasive nature and cost-effectiveness.
There are several types of trenchless repair methods available.
CIPP (Cured-In-Place Pipe)
CIPP is a pretty cool technique that’s used to fix older pipes in a seamless way. Basically, it involves inserting or pulling a polyester or fiberglass liner into a damaged pipe.
This liner can either reinforce the existing pipe or create an entirely new piping system.
To do this, the process usually starts from a manhole or an excavation point. Once the liner is in place, it can be inserted using water or air pressure.
As the resin in the liner cures, thanks to the air pressure or heated water, it forms a super tight-fitting and joint-less replacement pipe.
This new pipe is not only corrosion-resistant but also leaves you with a strong inside surface for your existing pipe system.
Pipe Bursting
Pipe bursting is a method used to replace sewer lines by breaking apart the original pipe with a special tool called a bursting head.
Here’s how it works:
First, two small holes are dug at the start and end of the pipe so that we can access the existing sewer line. Then comes the bursting head.
The bursting head is pushed through the existing pipe run, and as it moves forward, it starts breaking apart the old sewer pipe into fragments.
But here’s the cool part: It also pushes those fragments away from the area, clearing the path for the new pipe.
While the old pipe is being shattered and pushed away, the new pipe is simultaneously pulled into place.
So, by the end of this process, you’ve got a brand new sewer line in place without having to dig up the entire area.
Directional Drilling
Directional drilling is a pretty neat method used for replacing sewer pipes. Instead of digging up the existing pipeline, this technique involves creating a new tunnel several feet below it.
Here’s how it works:
To start off, a horizontal directional drilling machine is used. It bores into the ground, creating a pathway for the new sewer pipe. The machine then continues drilling horizontally along the entire length of the pipe that needs to be replaced.
As the drilling takes place, any dirt and debris that are encountered along the way are removed from the tunnel. This ensures a clear path for the new pipe installation.
Once the tunnel is ready, the new pipe is inserted and connected to the existing pipe network. This allows for a seamless transition between the old and new pipes.
Depending on the situation, the old piping can either be removed completely or left in place. It really depends on the specific project and the requirements.
Sliplining
Pipe insertion is a clever method for installing a new pipe system into an existing line by either pulling or pushing it through. The specific technique used depends on factors like the length and material of the pipe.
Here’s what you need to know:
When it comes to traditional slip lining, an important step is excavating a lead-in trench for the installation. This provides the necessary space to work with.
For shorter sections of pipe, they can be joined together using special gasket joints and then welded into place.
These joints have a clever design that allows for flexibility while maintaining a secure connection. You can choose between flexible and rigid mechanical gaskets to suit your specific needs.
Fold and Formed Pipe
As the name suggests, this technique involves folding the old pipe to make way for the new one.
There are two common approaches for pipe folding: rolling the pipe or fusion welding it together before installation.
Regardless of the method chosen, the new pipe is pulled into the existing pipe, similar to traditional slip lining.
Once the new pipe is in place, it’s time for the magic to happen. The folded pipe is then expanded back into its original shape, creating a close fit with the existing pipe.
To speed up the pipe expansion process, air pressure and heat may be applied, just like in the CIPP method.
This ensures a secure and seamless connection between the old and new pipes.
Coatings
When it comes to manhole rehabilitation, coatings play a crucial role. These coatings have evolved over time and now come in specialized compounds tailored for various environments, such as cement and polymer coatings.

Preparation is key to ensuring successful coating application. It all starts with having a clean and sound substrate, regardless of the coating type.
To achieve this, high-pressure washing is necessary. This process thoroughly cleans the pipes and removes any loose materials, grease, or other foreign substances from the walls of the manhole.
By properly preparing the substrate and ensuring a clean surface, the coating can be applied effectively. This helps protect and enhance the manhole’s condition, promoting longevity and durability.
Plumbing Rerouting
Rerouting plumbing lines involves creating new plumbing lines within existing houses. There are a few situations where rerouting becomes necessary.
For instance, if you’re adding or renovating plumbing installations like your bathroom or kitchen, you may need to reroute the plumbing lines to accommodate the new layout.
Rerouting is also helpful when it comes to replacing pipes that have been damaged in hard-to-repair locations, such as beneath the concrete slab.
Instead of going through the complex and disruptive process of repairing those specific sections, rerouting allows for the installation of new pipes in more accessible areas.
By rerouting the plumbing lines, you can ensure that your plumbing system remains efficient, functional, and up-to-date.
It’s a flexible solution that gives you the freedom to make changes to your plumbing layout or address pipe damage without resorting to extensive repairs in challenging locations.
The Cost of Concrete Sewer Pipe Repair
Repairing a sewer line under a slab or replacing a sewer line under a slab can be expensive, typically costing between $1,100 and $4,100.
The total cost depends on several factors in, such as the materials used, accessibility, the extent of the repair needed, and the cleanup required afterward.
For instance, if the repair work does not require a lot of excavation, the cost usually falls between $60 and $250 per foot.
But if you need to replace or repair a sewer line that’s located under a concrete slab, the cost can go up to $150 to $200 per foot.
The cost of replacing a sewer line can range from $3,000 to $25,000, whereas a repair job can cost between $1,000 and $3,000, excluding any cleaning charges.
For a clearer picture, repairing a collapsed sewer line can range from $50 to $250 per foot in cost.
Removing tree roots from the line can cost $100 to $600 (not including repair costs), repairing a cracked sewer pipe can cost between $50 to $250 per foot, and cleaning out a clog usually costs between $200 and $300.
One way to avoid these high costs is to make sure your sewer pipes are well-maintained.
Find a reliable plumbing professional in your area who can perform regular maintenance on your pipes and septic system to ensure they are in good working order and avoid costly repairs in the future.
How to Protect Your Sewer Lines?
As the saying goes, precaution is better than cure. So, why not take precautions to prevent you from the headache of repairing or replacing your sewer system?
Here are a few steps you can take to take care of your sewer system:
Yearly Sewer Line Inspection
This is one of the best precautions out there. Yearly inspections can help you detect an issue, if any before it escalates.
It can detect and resolve issues like corrosion and blockages and maintain and keep your sewer lines clean.
Remove Nearby Trees
Trees that are above or near your sewer system can damage the pipeline as their roots grow. So, it’s better to remove them before any issue arises.
It should be noted that tree root invasion is often caused by already-existing cracks or breaks in the sewer line.
However, it is recommended to remove them beforehand. In case of future cracks or breaks, removing trees protects your sewer system from root invasion, preventing additional damage.
Proper Use of Your Sewage System
We often tend to dispose of any waste by flushing it through the toilet. Although it makes things easier for us for the moment, it isn’t safe for your sewage system.
Always remember to dispose of only human waste and toilet paper through your sewage system. Any other waste can cause blockage and result in pipe cracks and breaks.
Report Any Problems
If you face any issues, even minor ones like slow drainage, you should always report and address the issue as soon as possible.
The issue might seem insignificant at the time. Nevertheless, it has the potential to escalate into a larger problem, eventually costing you significant time and money.
Backwater Prevention Valve
It is a type of valve that can be installed in the basement of your home or any other structure.
As the name suggests, it prevents any backflow and makes sure that sewage goes out and does not come back in.
Why Souffront is the Best Choice for Your Concrete Sewer Pipe Repair Needs
At Souffront Construction & Engineering (SCE), we understand the importance of reliable and efficient sewer systems for homes and businesses.
That’s why we offer top-of-the-line concrete sewer pipe repair services that are designed to ensure long-lasting results.
Our team of experienced professionals is equipped with the latest technology and techniques. They can repair concrete sewer pipes quickly and effectively without causing unnecessary disruptions or damaging your property.
With Souffront, you can trust that your concrete sewer pipe will be repaired to the highest standards. This guarantees a safe and reliable sewer system for your property.
Contact us today to learn more about how we can help you with your concrete sewer pipe repair needs.
In our technologically advanced society, we are all highly dependent on appliances. To use these appliances, we rely heavily on electricity to power our daily lives.
But are you aware of the electrical hazards that could be lurking within the safety of the walls of your home?
Electrical fires and shocks can pose a significant threat to your family’s safety and well-being, and unfortunately, many homeowners, like we were once, are unaware of the risks until it’s too late.
That’s where electrical home safety inspections come in.
These comprehensive assessments can help identify potential hazards before they become major problems, ensuring that your home is a safe and secure place to live for you and your family.
In this blog, we’ll explore the importance of electrical home safety inspections, what to expect during the inspection process, and how to ensure that your family stays safe and shock-free for years to come.
What is Electrical Home Safety Inspection, and Why It Is Important for Your Home?
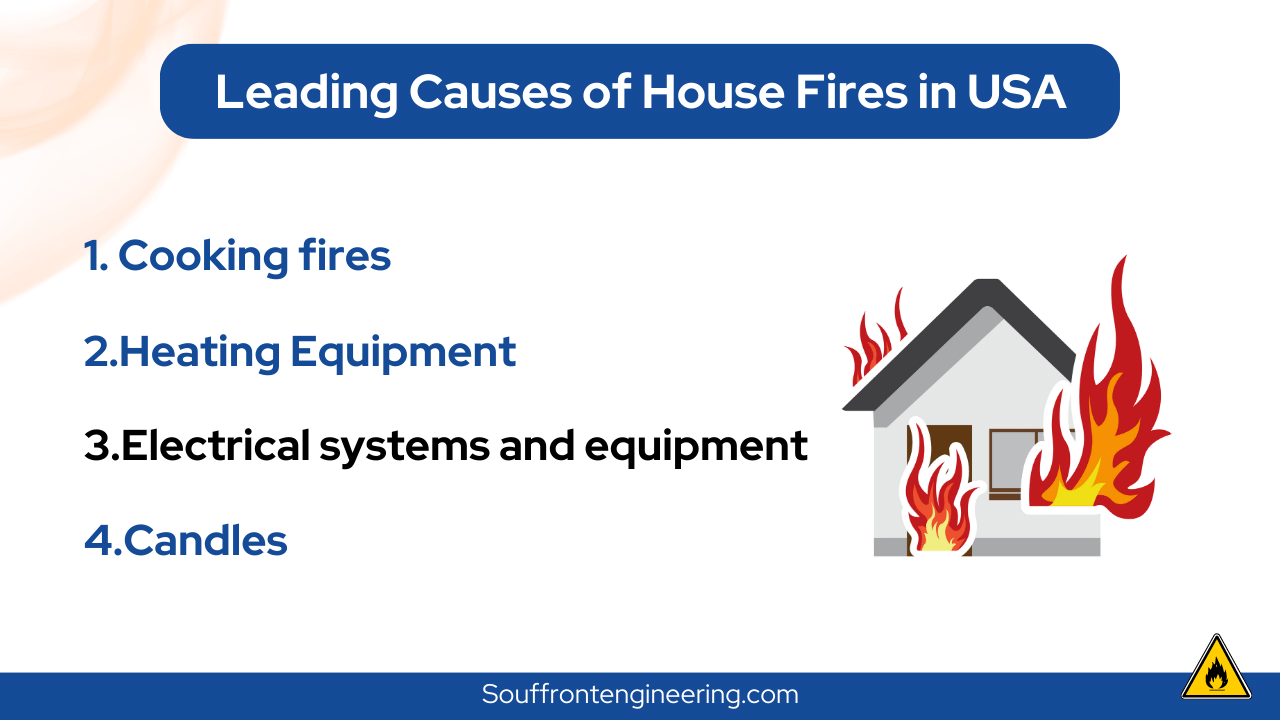
Information Sorce
So, what exactly is an electrical home safety inspection?
An electrical home safety inspection is a thorough examination of all the electrical systems that are installed in your home to make your life easier.
To keep using these systems efficiently and, most importantly, safely, it’s essential to make sure that your electrical wiring, circuits, and appliances are safe to use and meet the required safety standards.
Now, the million-dollar question, “Why do I need an electrical safety inspection?”
Well, the answer is simple: to protect your home and your loved ones. Electrical issues can be dangerous and even life-threatening if left unchecked.
During an electrical safety inspection, a qualified electrician will examine your electrical system, including outlets, wiring, and circuit breakers.
They will look for any potential electrical hazards, such as outdated wiring or overloaded circuits, and make recommendations for repairs or upgrades to keep your home safe.
By scheduling an electrical safety inspection, you can have peace of mind knowing that your home’s electrical system is in good shape and that you’re taking the necessary steps to keep your family safe.
You might also like to read: Garage Safety Inspection: A Step-by-Step Guide to Get One Done (2023)
When Should You Schedule a Home Electrical Safety Inspection?
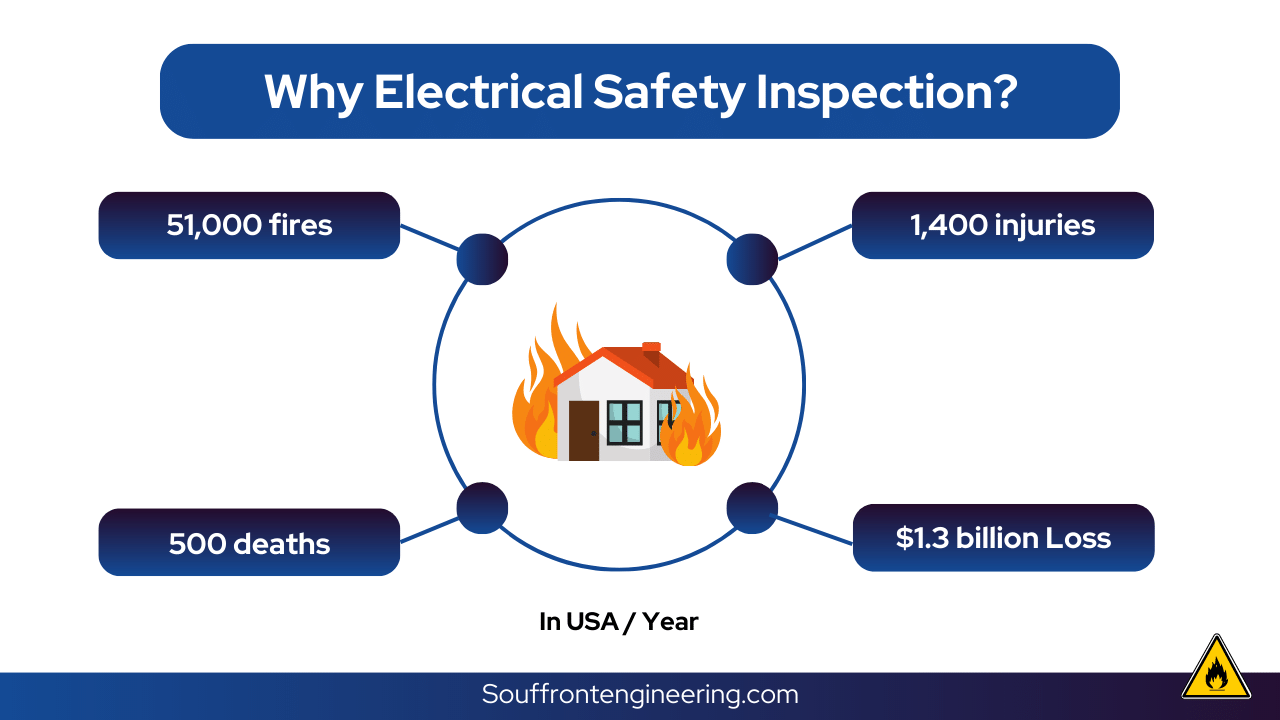
Information Source
There are a few key scenarios when it’s the best bet to have your system checked out by a qualified electrician.
Schedule an Electrical Safety Home inspection Before Moving In
First and foremost would be the time you’re moving into a new home. It’s always a good idea to have an electrical safety inspection done before you move in.
This will give you the assurance you need to know that you are moving into a safe home.
Schedule an Electrical Home Safety Inspection Before Any Major Home Renovations or Additions
If you’re planning any major renovations or additions to your home, you should have an inspection done before you start any work.
It ensures that your electrical system can handle the extra load and that any new wiring or circuits are installed correctly.
Schedule an Electrical Home Safety Inspection for Older Homes or Those Lacking Recent Inspections
If you live in a home that is older than 25 years old or hasn’t had an inspection done in several years, it would be a smart move at your end to schedule one.
Outdated wiring and electrical systems can be dangerous, and an inspection can identify any potential hazards and recommend necessary upgrades.
Schedule an Electrical Home Safety Inspection to Troubleshoot Electrical Issues
If you’re experiencing any electrical issues, such as flickers, frequent tripped breakers, or power outages, it’s time to schedule an inspection.
These issues can be a sign of a larger problem, and an inspection can identify the root cause and prevent more serious issues that may arise down the road.
You might also like to read: Pre-Purchase Building Inspections: Seeing the Unseen Before You Buy
Your Comprehensive Home Electrical Safety Inspection Checklist
Now that we know why electrical home safety inspection is important, you are going to need a checklist to get you started.
But before we begin, let us give you a quick reminder that safety should always be your top priority when dealing with electricity. One wrong move can lead to a dangerous situation.
So, it’s always in your best interest to consult with a qualified electrician rather than doing it yourself.
Now, let’s get started with the checklist:
- Check the electrical panels: Make sure that the electrical panels are properly labeled and that there are no signs of damage or rust. Also, check if the circuit breakers are functioning correctly and not showing signs of tripping.
- Inspect the outlets and switches: Check for any loose or damaged outlets or switches. Ensure that they are not overloaded with plugs or have any signs of burn marks or discoloration.
- Look for exposed wiring: Check for any exposed wiring in your home. Exposed wiring can pose a significant risk of electrocution or fires, so it’s essential to address this immediately.
- Test the GFCI outlets: GFCI (Ground Fault Circuit Interrupter) outlets are designed to prevent electrical shock. To test them, press the “test” button and ensure that the outlet trips off. Then, press the “reset” button to turn it back on.
- Check the smoke and Carbon Monoxide (CO) detectors: Smoke/CO detectors are critical in alerting you to potential fires. Make sure they are functioning correctly and have fresh batteries.
More things to check.
- Check for overload: Ensure that no circuits are overloaded with appliances or electronics. Overloading circuits can cause overheating, which can lead to fires.
- Inspect electrical cords: Check all electrical cords for any signs of damage, including fraying or cracking. Damaged cords can cause electrical shocks or fires.
- Check the lighting: Ensure that all light fixtures are securely fastened and not showing any signs of damage. Also, replace any burned-out light bulbs.
- Check the outdoor electrical system: Inspect outdoor electrical outlets, lights, and wiring for any signs of damage or wear and tear. Make sure they’re weatherproof and in good condition.
- Verify grounding – Check to make sure that all your outlets are properly grounded. You can use a simple outlet tester to do this.
- Look for signs of pests – Rodents and other pests can cause damage to electrical wires, so keep an eye out for any signs of infestation, such as droppings or gnaw marks.
- Strange Smells: If you detect any strange smells during an electrical home safety inspection, take action immediately. Turn off the power to the affected area and contact an electrician to address the issue.
How Much Does an Electrical Safety Inspection Cost?
Now, only one question remains, how much does an electrical safety inspection cost?
Ensuring the safety of your home is priceless, but it’s natural to wonder about the cost of an electrical home safety inspection.
Well, the answer to this question isn’t as straightforward as you would have hoped. Electrical home safety inspection costs can vary depending on a number of factors, including the size and complexity of your home’s electrical system.
While a basic inspection can cost between $200 to $500, a more detailed inspection can cost upwards of $1,000 or more.
We recommend that you should always contact a licensed electrician or electrical contractor in your area to get an accurate estimate based on your specific needs.
Remember, investing in a proper electrical home safety inspection can save you money in the long run and, most importantly, ensure that your home is safe and secure for you and your loved ones.
Why choose Souffront?
After all that we have discussed so far, now you know what electrical home safety inspection is and why it is important for the safety of your home and your loved ones.
The only thing left to do is to get you started.
You must be wondering where you can find such professionals whom you can trust with your home. Well, Look no further than Souffront Construction & Engineering (SCE) to save the day!
Our team of certified electricians has years of experience and expertise in identifying potential hazards and recommending solutions to keep your home safe.
We use state-of-the-art equipment to thoroughly inspect every aspect of your electrical system, from the wiring and outlets to the circuit breakers and panels.
But that isn’t all that matters, is it?
What truly sets us apart is our commitment to customer service. We understand that electrical safety is a serious matter. We take the time to explain our findings and recommendations in a clear and easy-to-understand way.
To make things even better, we also offer competitive pricing and flexible scheduling to fit your needs.
Instead of searching for “electrical safety inspection near me” on Google next time, why not give our team of expert electricians a call?
John Souffront is a seasoned leader in the construction and engineering industry, with over a decade of experience at the helm of Souffront Construction & Engineering. Known for his unwavering commitment to excellence and innovation, John has propelled his firm to the forefront of the field, delivering cutting-edge solutions for complex projects around the country.