
How Long Does Concrete Resurfacing Last? (Must-Read)
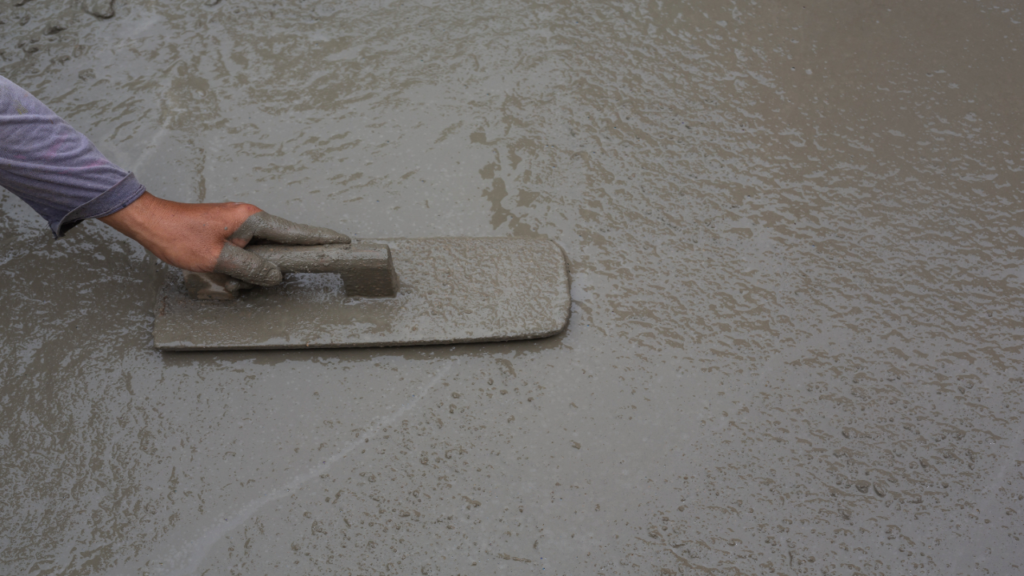
Concrete surfaces, like driveways and patios, inevitably wear down over time, leading many homeowners to consider resurfacing as a cost-effective alternative to replacement. But how long does concrete resurfacing last? Many factors influence the lifespan of concrete resurfacing, including the quality of materials, the expertise of the installer, and ongoing maintenance. Understanding these variables is crucial for determining whether concrete resurfacing suits your needs and budget. Let’s get into the details. What is Concrete Resurfacing? Concrete resurfacing is a process of giving a new lease of life to old, worn-out concrete surfaces, such as driveways, patios, or even indoor floors. It involves applying a thin cementitious (cement-based) material layer over the existing concrete surface, effectively resurfacing it with a fresh, new layer. Think of it as putting a new coat of paint on an old piece of furniture—revitalizing its appearance and breathing new life into it. However, instead of paint, concrete resurfacing uses a specialized mixture of cement, polymers, and other additives to create a durable, long-lasting surface that can withstand foot traffic, weather conditions, and general wear and tear. One key advantage of concrete resurfacing is that it’s a cost-effective alternative to completely tearing out and replacing the old concrete, which can be messy, time-consuming, and expensive. It’s like giving your old concrete a facelift rather than undergoing a complete reconstructive surgery. How Long Does Concrete Resurfacing Last? With an excellent resurfacing job, the concrete can last between 8 and 20 years, depending on various factors. Think of it as a fresh coat of paint for your concrete – with the proper preparation, high-quality materials, and regular cleaning, you can keep it pristine for years. However, if neglected, subjected to harsh weather conditions or high traffic, the surface may show signs of wear and tear sooner. Little but consistent efforts will go a long way in ensuring your concrete stays beautiful for many outdoor gatherings and backyard barbecues to come. Now, let’s understand the factors that impact the lifespan of a resurfaced concrete. Factors that Impact the Lifespan of a Resurfaced Concrete Maintenance Level Regular cleaning and maintenance can help remove dirt, debris, and contaminants that accumulate on the surface over time. This prevents the buildup of abrasive materials that can accelerate wear and tear. Periodic inspections and prompt repair of any cracks, spalls, or other defects in the resurfaced concrete are essential to prevent further deterioration and minimize the risk of moisture infiltration or structural damage. Additionally, apply protective coatings or sealers to enhance the surface’s resistance to wear, abrasion, and chemical exposure, further prolonging its durability and lifespan. These coatings act as sacrificial layers, taking the brunt of the wear and tear, and can be reapplied as needed to maintain the concrete’s integrity. Skill of the Contractor Experienced contractors who follow industry best practices and adhere to the manufacturer’s instructions are more likely to deliver a high-quality installation. Proper surface preparation techniques, such as shot blasting or scarifying, are essential for creating an ideal surface profile and ensuring optimal adhesion between the substrate and the resurfacing material. Inadequate surface preparation can lead to poor bond strength and premature delamination or debonding. Additionally, the mixing, application, and curing processes must be executed correctly to achieve the desired performance and durability of the resurfacing material. Factors such as proper mixing ratios, application techniques, and adherence to specified curing times and conditions can significantly impact the final quality of the concrete. Also read: Termite And Moisture Inspection: Everything To Know In 2024 Surface Condition Before Resurfacing If the underlying surface is severely deteriorated, with extensive cracking, spalling, or delamination, it can compromise the adhesion and bond strength between the resurfacing material and the substrate. This poor adhesion can lead to premature failure, delamination, or debonding of the resurfaced layer, significantly reducing its lifespan. Conversely, if the existing concrete surface is in relatively good condition, with only minor surface defects or wear, proper surface preparation techniques, such as shot blasting or mechanical abrasion, can create an ideal surface profile for optimal bond strength. This strong adhesion between the substrate and the resurfacing material ensures a seamless and durable installation, maximizing the lifespan of the resurfaced concrete. Quality of Resurfacing Materials Materials with high compressive and tensile strengths, resistance to abrasion and impact, and impermeability to moisture and chemical penetration will enhance durability and longevity. For example, polymer-modified cementitious overlays offer superior adhesion, flexural strength, and resistance to cracking, making them suitable for high-traffic areas or environments with thermal cycling. Epoxy and polyurethane-based resurfacing systems provide excellent chemical and wear resistance, making them ideal for industrial or commercial applications exposed to harsh chemicals or heavy loads. Also, the compatibility of the resurfacing material with the existing concrete foundation is crucial to prevent delamination or separation over time. Amount of Usage and Traffic High-traffic areas or those subjected to heavy loads, such as industrial floors, loading docks, or parking garages, will experience more significant wear and tear, potentially leading to surface degradation, cracking, and faster deterioration. The type of traffic also plays a role. Areas exposed to heavy vehicular traffic, especially from vehicles with steel wheels or tracked vehicles, will experience more abrasion and impact damage than pedestrian or light vehicular traffic. Proper load-bearing capacity and the selection of abrasion-resistant resurfacing materials are crucial in such high-traffic or heavy-load applications. Implementing traffic management strategies, such as designating specific areas for different types of traffic or limiting access to certain areas, can help minimize excessive stress on the resurfaced concrete and extend its lifespan. Climatic Conditions Extreme temperatures, freeze-thaw cycles, and exposure to UV radiation can cause thermal stresses, cracking, and deterioration of the resurfacing material over time. In cold regions, de-icing salts or chemicals on the resurfaced concrete can accelerate corrosion, scaling, and surface deterioration, reducing the overlay’s lifespan. Similarly, the resurfacing material may be prone to drying shrinkage cracks or moisture loss in hot and arid climates, compromising its integrity and durability. Selecting resurfacing materials specifically designed to withstand the local climatic conditions is essential.
How to Resurface a Concrete Patio? (A Step-by-Step Guide)

Has the concrete patio outside your property lost its shine? Is the dull and cracked appearance making your property less appealing? If you’re facing this problem, this guide is for you. Today, we’ll learn how to resurface a concrete patio and make it aesthetically appealing and sturdy. The resurfacing process can turn it into a stunning and functional area, whether it’s cracked, stained, or general wear and tear. Let’s get started. How to Resurface a Concrete Patio? Clean the Concrete The first step to revamping your concrete patio is a thorough cleaning. You would need a pressure washer for this. But before using it, choose a 25-degree fan tip attachment and maintain a safe distance of 6-8 inches from the surface. This focused stream effectively removes dirt, grime, and stubborn rust stains. As the water washes away years of buildup, look for loose or flaking concrete. These areas might require more TLC (or tender loving care). For minor issues, a wire brush or putty knife can help remove problematic patches. However, consider calling a professional for repairs if the damage is extensive or involves large, crumbling sections. Repair/Fix Any Cracks in the Concrete Once you have cleaned the concrete, it’s time to tackle any cracks, holes, or uneven surfaces. After the concrete dries completely, select a patching material suitable for the size and depth of the imperfections. A pre-mixed concrete patching compound is user-friendly for minor cracks and shallow pits. Apply it with a trowel or putty knife, ensuring a smooth and level finish that matches the surrounding concrete as closely as possible. You might need a cementitious patching material that requires mixing with water for larger or deeper gaps. Always follow the manufacturer’s instructions for proper mixing ratios and application techniques. Remember, a strong bond is essential, so ensure good adhesion between the patch and the existing concrete. Use a Bonding Agent This step is crucial for projects involving cement-based overlay materials like stamped concrete or micro-topping. It acts as a bridge, creating a stronger bond between the existing concrete and the new overlay. After your patches have completely cured (refer to the manufacturer’s recommended drying time), it’s time to apply the bonding agent. Many of these products contain latex or polymers, which enhance the adhesive properties, ensuring the overlay adheres seamlessly to the concrete base. There are several ways to apply the bonding agent, with rolling being the most common method. For optimal coverage, use a roller with a ⅜-inch nap. Remember to pay close attention to the manufacturer’s instructions. Some bonding agents require a specific tackiness before applying the overlay, so timing is key. Mix the Materials If applying a stamped overlay or micro-topping, carefully review the manufacturer’s instructions on the product packaging. This is crucial as the specific chemical makeup of the overlay material may dictate a limited working time before it hardens, making further adjustments difficult without causing damage or compromising its integrity. The typical process involves: Emptying a bag of dry overlay mix into a seven-gallon bucket. Measure and add the specified amount of water. Potentially incorporating additional additives like liquid or powdered pigments for coloration. Thorough mixing is essential, often achieved using a power drill equipped with a mixing paddle attachment. Adhere to the mixing guidelines provided on the packaging to avoid introducing air bubbles into the mixture. Trapped air can alter the chemical reaction and create voids within the overlay, potentially weakening the final product’s sturdiness. Apply the Material There are two options that you could use. Option 1: Cement Overlay Prepare the base: Ensure your patio is clean and ready for the new layer. Pour and spread: The cement mix is your star here. Pour it directly onto the patio and use a trowel for even distribution. Think thin layer, around ¼ to ⅜ inch thick. Smooth finish: Work the surface to achieve a level and polished result. Option 2: Stain or Epoxy Paint Read the manual: Each stain or paint has specific instructions. Follow them closely for the best outcome. Roller or sprayer: Choose your application tool based on the product and your preference. Watch the weather: Hot and windy conditions can dry the stain or paint quickly. Work in manageable sections to avoid unevenness, ensuring a seamless final look. Important tip: Existing cracks or control joints in your patio may need attention. Whether you’re using an overlay or a coating, ensure these lines are continued through the new surface to prevent future cracking. Apply the Finish to the Cement Overlay Material The finishing process is delicate, as mistakes during this phase can leave permanent marks on the rapidly hardening cement surface. Accidental scratches from tools or debris, like leaves or sticks, falling onto the wet cement are common mishaps. You must know how to rectify these minor accidents, which tend to occur at the most inconvenient moments. For those applying a cement overlay, this stage is where creativity comes into play. Stamping patterns into the cement or employing techniques like brooming or swirl troweling adds texture and visual appeal. These textures not only enhance the aesthetics but also improve safety by providing better traction. This stage demands experience and skill, so if you lack the necessary knowledge, it’s best to hire a professional. They can save you time and energy and ensure an amazing final result. Apply the Sealer After the cement overlay or stain/epoxy paint has fully cured, typically within 24-48 hours, it’s time to protect your hard work with a sealer. This critical step safeguards the new surface from stains, UV damage, and premature wear. Choose a sealer suitable for exterior concrete patios, such as an acrylic or polyurethane-based product. Read the manufacturer’s instructions carefully and follow the recommended application method – rolling, spraying, or using a squeegee. Apply the sealer in thin, even coats, allowing each coat to dry completely before applying the next. Depending on the product and the desired level of protection, you may need two or three coats. During application, ensure adequate ventilation and wear protective gear like gloves and a respirator mask. Avoid applying the sealer in direct sunlight or extreme temperatures, as this can affect its performance. Once the sealer has fully cured, typically within 24-48 hours, your resurfaced concrete patio is ready to withstand the elements
How to Restore Faded Stamped Concrete? Explained

Stamped concrete is a popular paving solution that mimics the appearance of various materials such as brick, stone, or wood but with the durability and low maintenance requirements of concrete. However, due to various factors, the vibrant colors and patterns of stamped concrete can fade over time. Fortunately, there are ways to restore the faded stamped concrete to its original beauty. In this blog, we will learn how to restore faded stamped concrete, what causes it to fade, and when you should hire an experienced person/team to do this work. What Causes a Stamped Concrete to Fade? Various reasons can cause concrete to fade. We’ll be discussing the most prevalent ones. UV Rays from the Sun The fading of stamped concrete due to UV rays from the sun is primarily caused by the breakdown of pigments within the concrete. Ultraviolet rays are particularly potent in regions with intense sunlight or where surfaces are continuously exposed to direct sunlight throughout the day. Over time, these powerful rays degrade the color pigments, resulting in a dull and washed-out appearance. UV exposure can significantly impact the aesthetic appeal of the concrete, making proper protection against sunlight essential for maintaining vibrant colors and structural integrity. Weather Elements Play an Active Role Stamped concrete is resilient but can be affected by harsh weather conditions like rain, snow, and strong sunlight. The freeze-thaw cycles common in colder climates pose a significant threat. During these cycles, moisture seeps into tiny cracks formed as the concrete expands and contracts, accelerating the fading process. This repeated exposure weakens the surface, potentially leading to more severe damage over time. As discussed in the previous point, UV rays can cause the color pigments to degrade and fade the concrete. Improper Sealing or Maintenance Proper sealing and maintenance are critical factors in preserving concrete’s color and durability. Inadequate or incorrect sealant application leaves the surface vulnerable to UV rays, moisture, and other environmental stressors contributing to fading. Over time, if the sealant wears off or breaks down, the concrete loses its protective barrier, allowing the elements to degrade the surface more rapidly. Use of Incorrect Staining Products or Methods Choosing the right staining products and techniques is essential for achieving durable and evenly colored stamped concrete surfaces. Incorrect products or application methods can result in uneven coloration, premature fading, or even damage to the concrete itself. It’s crucial to adhere strictly to manufacturer guidelines, ensure the material complies with the ASTM standards, and use stains specifically formulated for stamped concrete. Now that we know the causes, let’s understand how to restore faded stamped concrete. How to Restore Faded Stamped Concrete? At this stage, you’ll have to follow multiple steps, each done exactly as mentioned below, to restore the concrete’s shine and appeal. Step 1: Cleaning and Preparation Any dirt, grime, or debris left behind can interfere with the adhesion and effectiveness of the new stain or sealer, leading to disappointing results. A clean slate is essential for achieving a uniform, vibrant finish. Several effective methods for cleaning stamped concrete include pressure washing and wet/dry vacuuming. Pressure washing can efficiently remove stubborn stains and buildup, but using the appropriate pressure and technique is essential to avoid damaging the surface. Wet/dry vacuuming is another option to effectively remove loose debris without risking etching or eroding the concrete. Once the cleaning process is complete, allowing the surface to dry completely is imperative before proceeding with any restaining or recoloring efforts. Moisture trapped beneath the new stain or sealer can lead to bubbling, peeling, or other adhesion issues, compromising the final result. You might also want to read: Why Garage floor resurfacing is best option for you? Step 2: Restaining or Recoloring Options Acid Stains These stains react chemically with the concrete, creating a permanent, variegated finish penetrating deep into the surface. Applying acid stains requires careful preparation and proper safety precautions. The concrete surface must be thoroughly cleaned and etched to ensure proper penetration. The stain is then applied in multiple coats, allowing each coat to react and dry before applying the next. Water-Based Stains Water-based stains offer a more user-friendly alternative to acid stains, making them a popular choice for DIY projects or a more straightforward application process. Depending on the desired look, these stains come in various colors and can provide a semi-transparent or opaque finish. Water-based stains are typically applied using a sprayer, roller, or brush, and multiple coats may be required to achieve the desired color depth. Proper surface preparation is still essential, and the concrete should be clean and free of any contaminants that could interfere with adhesion. Tinted Sealers Tinted sealers offer a convenient solution for refreshing the faded stamped concrete color without needing a separate staining process. These sealers contain pigments that tint the concrete while providing a protective barrier against future fading and wear. Before applying a tinted sealer, the concrete surface must be thoroughly cleaned, and any existing sealer must be removed or properly deglossed to ensure proper adhesion. The tinted sealer is typically applied in two or more thin coats, allowing each coat to dry completely before applying the next. You might also want to read: Top Concrete Crack Repair Methods You Must Know Of Step 3: Changing the Color of Stamped Concrete When attempting to change the color of stamped concrete, it’s helpful to understand basic color theory. You’ll need to use the existing concrete tone’s opposite or “negative” color to neutralize or cancel it out. For example, if your concrete has a reddish hue, you’ll want to apply a green-based stain or tint to counteract that warmth. However, before committing to a new color scheme, test your chosen stains or tints on a small, inconspicuous concrete area. This will give you a better idea of how the colors will interact with the existing surface and allow you to make any necessary adjustments before tackling the project. Step 4: Sealing the Surface After cleaning, restaining, or recoloring the concrete, it’s essential to seal the surface properly. Sealing not only preserves the vibrant new color but
What is the Difference Between Concrete Spalling And Scaling?
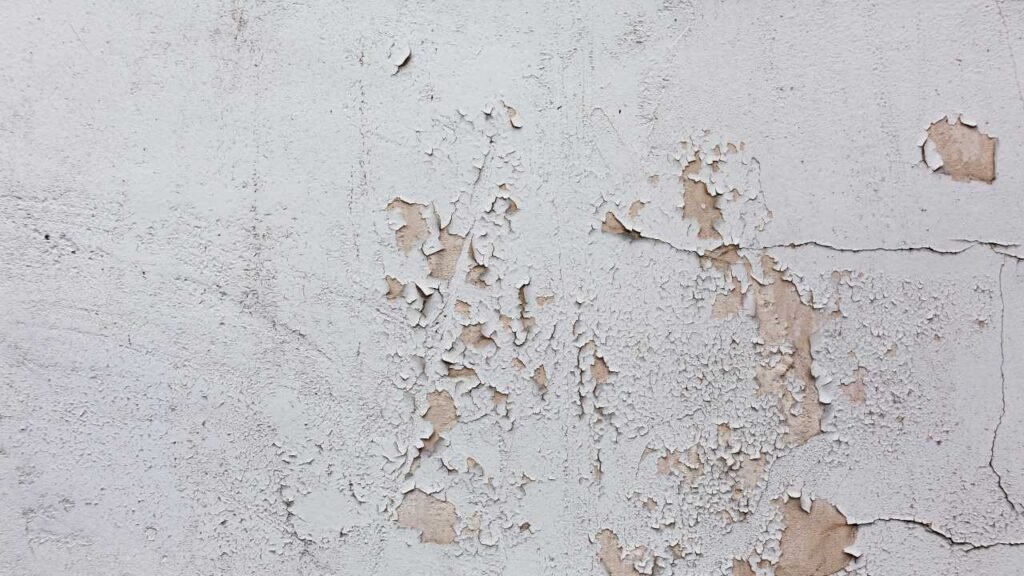
Concrete is a durable and versatile material, but it’s not immune to deterioration. Two common forms of concrete damage are spalling and scaling. While both involve the surface layer of concrete breaking away, they have distinct causes and characteristics. So, let’s understand the difference between concrete spalling and scaling, going further into the factors that contribute to each of these phenomena. Concrete Scaling vs Spalling Factor Concrete Spalling Concrete Scaling Definition The deterioration of concrete due to moisture and pressure causes surface layers to break away into flakes or layers. The loss of surface mortar or aggregate in concrete, often caused by freeze-thaw cycles or deicing chemicals. Causes – Freeze-thaw cycles – Corrosion of reinforcing steel – Poor concrete mix or placement – Chemical exposure – Freeze-thaw cycles – Use of deicing salts – Inadequate air entrainment – Poor finishing or curing Appearance – Flakes or layers of concrete breaking away – Exposed aggregate and reinforcement – Rust stains from steel corrosion – Surface mortar loss exposing aggregate – Scaling or peeling of the top layer of concrete – Exposed, rough surface Depth of Damage Can range from surface spalling to deeper structural damage Typically affects the surface layer of the concrete Impact on Structure May compromise structural integrity and durability Primarily affects aesthetics and surface durability Prevention – Proper concrete mix design – Adequate curing and protection – Surface sealers or coatings – Adequate air entrainment – Proper finishing and curing – Avoidance of deicing salts or chemicals Repair Methods – Patching or overlaying damaged areas – Corrosion control and reinforcement repair – Surface grinding or shot blasting – Patching and resurfacing What Causes These Phenomena to Occur? 1. Concrete Spalling Let’s look at some of the most common causes of concrete spalling – Freeze-Thaw Cycles A freeze-thaw cycle occurs when the air temperature drops low enough to freeze the water and then increases enough for it to thaw again (i.e., convert it back to liquid form). For those who don’t know, concrete is porous, which means that water can easily make its way inside. Once water goes inside and freezes, it expands and puts pressure on the surrounding concrete, ultimately leading to spalling. This is why you’ll usually witness spalled concrete in colder regions. Chemical Exposure Deicing agents like sodium chloride (NaCl) are used to melt ice and snow on pavements and structures. However, the chloride ions from these agents can penetrate into concrete and initiate corrosion of the embedded steel reinforcement bars. As the reinforcement corrodes, it expands in volume, generating internal stresses that eventually lead to cracking, delamination, and spalling (flaking off) of the concrete cover. Spalling compromises the structural integrity and durability of the concrete structure over time, necessitating costly repairs or replacement. Other chemicals, such as sulfuric acid or harsh cleaning solutions, may also cause spalling. Poor Quality Concrete and Installation This is a given. Poor-quality products always rot first compared to better-quality ones. Not all concrete is equal in terms of concentration, quality, and depth. High-quality concrete will be more durable than low-quality concrete, so you’ll usually find spalling in such cheap, low-quality concrete. However, it should be noted that spalling concrete can occur if the concrete is not properly installed, regardless of the quality. Suppose a concrete slab is poured with insufficient consolidation. Despite using high-quality concrete, voids can form around the rebar if the mixture is not properly vibrated during placement. Over time, this void space may lead to water intrusion and corrosion of the reinforcement, ultimately causing the concrete to spall. You might also want to read: Concrete Spalling: Cause, Prevention Measures, Repair & More 2. Concrete Scaling In addition to freeze-thaw cycles, here are some other major causes for scaling of concrete – Excessive Use of Deicing Salts Deicing salts reduces the melting point of water and prevents ice from forming. The excessive use of such salts (for example, sodium chloride) can increase the concrete saturation and boost the freeze-thaw cycles, leading to increased damage and causing concrete scaling. Lack of Air Entrainment Inadequate air entrainment is one of the primary reasons for scaled concrete. Air-entrained concrete contains small air bubbles that act as a pressure relief mechanism during freeze-thaw cycles, handling the process better. However, without these bubbles, the water expanding inside the concrete can increase the pressure, causing the top layer to crack or come off. Improper Concrete Mix Design The type of concrete used plays a crucial role in preventing scaling. If the concrete used is weak or mixes in too much water compared to the cement, affecting the water-cement ratio, this will allow the water to seep in more easily and more likely lead to scaling. To prevent this, you must use the right concrete mix, i.e., have the correct balance of water and cement, and more importantly, use good-quality aggregates. This will lead to the concrete lasting longer and not scaling easily. Improper Finishing Techniques It’s very important to get this right. If the finishing techniques are not properly implemented, water can get stuck inside, weakening the structure internally and making it easier to scale. It’s advised to follow proper finishing techniques and let any extra water evaporate before applying the final touches to the concrete to prevent it from weakening and making it vulnerable to damage. Read also: How to Restore Faded Stamped Concrete? How to Repair Concrete Spalling? To fix spalling concrete, follow the process mentioned below – Prep the Area: First, use a chisel or wire brush to remove loose pieces and debris from the damaged concrete area. Then, clean out any cracks or holes thoroughly. This prep work ensures proper bonding for the repair material. Check for Hollow Sounds: Gently tap around the affected area with a hammer. If you hear hollow sounds, it means the underlying concrete is deteriorated. Break out and remove any loose chunks to create a solid base for repairs. Examine the Reinforcements: Inspect any exposed steel reinforcements like rebar for rust or corrosion. If it’s minor, clean it off with a wire brush and apply a protective epoxy coating. For significant damage, replace
Termite And Moisture Inspection: Everything To Know In 2024

Believe it or not, termites are the biggest enemies of your home. So much so that by the time you notice a termite infestation, they’d already have caused costly damage. To put this in a dollar figure, homeowners spend over five billion dollars every year simply to eradicate termites from their property and undertake essential repairs. The worst part is that your insurance provider doesn’t cover your home for termite damage. But what if I told you that there’s a cost-effective way to not only detect a termite outbreak early but also avoid it altogether? Yes, that’s true; all you’ve got to do is schedule a termite and moisture inspection every once in a while. Moreover, you can even get one such inspection to protect your investment while you’re looking to buy or rent a property. You can think of it as a home inspection that you schedule every once in a while to keep your home’s major systems in top shape. Now, if you’re wondering what’s more to termite inspections and how you can get one, you’re at the right spot. Read on, as I’ve detailed everything you should know about these inspections, along with my own insights. Termite and moisture inspection: What is it all about? Before we get into the details of termite inspections, let me first answer a basic yet essential question: What is termite inspection? As the name suggests, a moisture and termite inspection is a thorough examination of your home from the inside out and is done to detect termite infestation. Here, licensed termite inspectors will analyze every area of your home using their special skills and tools to detect termites and the extent of the problem. For instance, a termite inspector will assess your home’s foundation, basement, crawl space, walls, roofs, etc., to name a few. Also, they will pay special attention to the wooden structures such as walls, doors, decks, etc., since wood is most vulnerable to termite invasions. Furthermore, an inspector will assess the extent of moisture in the wooden components. That’s because less than usual moisture signals termite presence. Finally, you’ll receive a termite inspection report, which, like a home inspection report, will detail the findings of the termite inspection. Note: A termite inspection is different from a home inspection When we talk about a termite inspection, you may confuse it with a regular property inspection. If not, you might think it is a part of your periodic home inspection. But let me tell you that none of it is true. You see, an inspection for termite detection is completely different from a general building inspection. That’s because not only are the areas inspected different for the former, but so are the inspectors who need to have a termite license. Meaning if you want to schedule a termite inspection in your Florida home, you should only hire an inspector with an FL Termite License. Simply put, you can’t hire general contractors, architects, engineers, etc., for termite inspections unless they’re trained professionals with a termite license. Looking for a 40/50 year recertification inspection instead? Get in touch with our 40 year recertification experts and receive a free inspection quote. How is a termite inspection done? Now that you know what a termite and moisture inspection exactly is, you might well be curious as to how it is done. Well, for starters, you’ll have to schedule an inspection with a termite inspector, who will then visit your property. Herein, it is essential that you give your inspector the time and space they need for a seamless inspection. So, I suggest you schedule an inspection on a convenient date. Now, on the date of inspection, the termite inspector will examine both the interior and exterior components of your home, looking for potential termite incursion. For instance, mud tubes are an obvious sign of termite infestation. Moreover, depending on the type of mud tube, there could even be the possibility of dry wood and subterranean termites being present. As such, you can expect the termite inspector to look for these signals, among others. How to prepare for termite inspection? In order to obtain the best results out of termite inspections, you may have to prepare your home for the inspection. That’s because, although inspectors usually don’t require such advance preparations, by doing so, you’ll create the best conditions for termite detection. So, how do you prepare for an upcoming inspection? To start with, you can remove items from the attic, crawl space, garage, etc., as this will ensure easy access to these areas during the inspection. You see, these areas are considered crucial for detecting termites. And easy access means there are greater chances of identifying even the earliest signs of termite damage. All in all, here’s what you can do to provide termite inspectors an uninterrupted access: Attic – Remove all such objects from the attic that can prevent the inspector from accessing the roof. Crawl space – While crawl spaces don’t usually have items, I still suggest you recheck the area for items and remove them. Garage – Talking about items in the garage, my advice is that you remove such objects that block access to expansion joints. Also, you should remove items that are closer to the walls. Deck or patio – Remove deck furniture or any other item away from the walls. Outer walls and fences – Remove the tree branches or plant growth from the walls and fences. You might also want to read – The Ultimate Guide To Attic Inspections. What does a termite inspection expert look for? Having seen the basics of termite inspections, you might wonder what a termite inspector will look for in your home. To give you an idea, inspectors will look for signs of termite infestation that you can not identify yourself. For instance, they will examine the flooring, walls, baseboards, etc., and determine if there are termites. Overall, here are the things that your termite inspector will be on the lookout
Bid Package Construction: A Complete Guide

When it comes to growth and profitability in the world of competitive businesses and industries, winning contracts through competitive bidding is crucial for your business. Whether you’re a seasoned professional or new to the game, the key to success lies in creating a compelling bid package. A well-structured bid package is your ticket to stand out in a crowded marketplace, win over clients, and secure projects that can propel your organization forward. However, bid package construction goes beyond mere paperwork; it’s a strategic art that combines planning and clear communication. In this blog, we’ll explore the essentials of bid package construction. We’ll cover fundamental elements, stress the importance of effective communication, and provide strategies for tailoring your approach to meet specific bid requirements. But before we learn about construction bid package, we first need to understand what’s a bid and how do bids work. What’s a Bid, and How Do Bids Work? A bid is a proposal that a contractor submits to a project owner or their representative to compete for a construction project or service. These bids include information about the contractor’s qualifications, costs, and timeline for the project. Bids work by creating a competitive environment where the owners (such as government agencies, private companies, or individuals) can compare and evaluate different proposals and select the best one for the project. The construction bidding process typically involves 9 steps: 1. Project Advertisement The owner or client publicly advertises the construction project with a request for proposal (RFP), providing detailed project specifications, drawings, and any other relevant information. This advertisement can be done through various means, including newspapers, online platforms, or industry-specific publications. 2. Prequalification In some cases, the owner may require contractors to go through a prequalification process. This process assesses the financial stability, experience, and capabilities of potential bidders. Only prequalified contractors are allowed to participate in the bidding process. 3. Bid Documents The owner or their representative provides bid documents to interested contractors. These documents typically include: 1. Project plans and specifications: Detailed drawings and written descriptions of the project’s scope, materials, and quality standards. 2. Bid forms: Standardized forms that bidders must complete, providing their proposed costs, schedules, and other project-related information, including bidding drawing, and bill of materials or bill of quantities.. 3. Instructions to bidders: Guidelines on how to prepare and submit a bid, including the deadline and required documentation. 4. Contract terms and conditions: The terms and conditions that will govern the construction project, including payment terms and dispute resolution mechanisms. 4. Site Visits Contractors may have the opportunity to visit the project site to assess the conditions, which can help them refine their bids. 5. Bid Preparation Contractors prepare their bids, which typically include: Bid price: The total cost of the project, including materials, labor, equipment, and overhead expenses. Schedule: The proposed timeline for completing the project, including key milestones. Qualifications: Information about the contractor’s experience, capabilities, and references. Subcontractor bids: If applicable, the contractor may also include bids from subcontractors for specific parts of the project. Bonds and insurance: Proof of the contractor’s ability to meet bonding and insurance requirements. Any alternative proposals: Contractors may suggest alternative approaches or materials that could reduce costs or improve project efficiency. 6. Bid Submission Bidders must submit their proposals by the specified deadline. The bids are usually sealed to maintain confidentiality. 7. Bid Opening When it’s time to see what everyone brought to the table, the owner or their representative opens the bids publicly. The bid prices are read aloud and recorded. This process ensures transparency and fairness. 8. Bid Evaluation After the bids are out in the open, the owner evaluates the bids based on various criteria, such as price, schedule, qualifications, and any alternative proposals. The lowest bid is not always the winning bid, as other factors are also considered. 9. Award of Contract The owner selects the winning bid and awards the contract to the chosen contractor. This decision is typically based on a combination of price and other relevant factors. The selected contractor is then expected to sign a formal contract and begin work on the project. Note: The bidding process may vary depending on the type of construction project, local regulations, and specific project requirements. You might also like to read: What is A General Contractor? (Everything Uncovered) Construction Bid Specifications Construction bidding specifications are a project’s instruction manual for contractors. They lay out all the details about what’s needed, how big it is, and what materials to use. This helps both the project owner and the contractors. Here’s what’s usually in these bid specs: Project Drawings: These are like pictures showing how the project should look. They help contractors see the size and features and figure out how much stuff and work is needed. Project Specifications: This is the written part that explains exactly what the project needs. It talks about the materials, how things should be done, and making sure everything is safe and meets the rules. Project Reports: These are extra papers with more info about the project. They might talk about the ground, the environment, traffic, or if it’s even possible to do the project. This helps contractors plan better. Draft Contract: This is like the early version of the legal agreement between the project owner and the contractor. It talks about how the project will happen, how much it will cost, and what rules everyone has to follow. The project owner sends out all these details in a bid package, and contractors who want to work on the project look at this package and send in their bids. It’s like following the rules of a game to make things fair and clear for everyone involved in the construction project. General and Supplemental Conditions of Bid Package In a bid package, you find important details about how a project will be run. This includes general conditions, which are the rules everyone needs to follow. They cover things like: Project
6 Steps For Maintaining Your Seawall

As much luxury and tranquility as seafront homes offer, they’re also vulnerable to the harsh conditions that seawater and coastal weather can bring. In fact, the only thing that makes these homes stand strong on a coastline with unpredictable sea patterns is the seawall. You see, seawalls are engineered to withstand waves and storm surges, making coastal homes as stable as they’d be on solid ground. Nevertheless, seawalls have their limits too, not the least of which is constantly tested by the extreme force of the sea. And this makes seawall maintenance extremely important for coastal property owners. After all, a solid and resilient seawall is the only protection you’ve got between your home and the sea. Now, when it comes to maintaining a seawall, you’re sure to have a ton of questions. And that’s exactly why we’ve compiled this thorough guide, detailing all things seawall upkeep along with our pro tips and tricks. So, let’s dive right in and have a look. Seawall maintenance: Why is it so important? Before we get into the nitty gritty of maintaining and upkeeping the seawall, it’s essential for you to understand its importance. For starters, your seawall takes a heavy toll on a regular basis resulting from high tidal waves and storms, among others. And although seawalls are designed for endurance, there’s always a limit. So much so that a lack of maintenance, and you can have an eroding seawall on your property. Moreover, seawalls are highly critical for waterfront properties, and unlike other structural components, timely maintenance is of the essence. That’s because negligence can result in a major structural failure in your home as the seawall protection becomes ineffective. Also, a failing seawall can cause soil erosion around the property, making your home prone to frequent flooding. In short, any neglect to maintain your seawall can lead to anywhere from costly repairs to inhabitable conditions to an unsafe home, and more. What does seawall maintenance involve? Complicated as it might sound, maintaining your seawall is quite straightforward. In fact, seawalls are easier to maintain than a lot of structural elements; all you’ve got to do is pay close attention to some areas of concern. It all starts with a detailed seawall inspection wherein a licensed inspector analyzes the seawall and detects problem areas. And this is followed by remedies such as waterproofing and crack sealing, among others. The best thing is that with some experience and expertise, you can even carry out the maintenance by yourself. Interesting, isn’t it? Now, if you’re wondering how exactly you can maintain a seawall, here are five simple steps that you can follow: Step 1. Inspecting the seawall The first step in maintaining a seawall involves a comprehensive inspection, which should ideally be carried out by a seasoned seawall inspector. Herein, the inspector will visually analyze the seawall, examining its condition and determining whether or not it is structurally sound. As such, you can expect a clear identification of the problem areas and essential remedies to fix them. For instance, if you’ve got a concrete or vinyl seawall, the inspection will check for cracks and suggest reliable methods to repair them. Similarly, for seawalls made of timber, the inspectors will look for signs of rot, termite infestation, splitting, etc. Now, depending on the extent of maintenance you’re looking to undertake, you can choose between three types of inspections, namely: Visual Inspection Structural Inspection Elevation Inspection You see, the whole idea of having seawalls inspected before maintenance is to have a clear understanding of what exactly needs to be fixed. Not to mention, a routine inspection also brings potential problems to your notice before they become expensive repairs. You can go through our blog – The Ultimate Seawall Inspections Guide. Curious about what else a seawall inspection involves? Step 2. Unclogging the weep holes As we discussed earlier, seawalls have to withstand a lot of pressure. And it’s not just seawater that exerts pressure as a seawall has to stand the stress from the other side. This is precisely why weep holes are built into seawalls, serving as crucial pressure relief points that allow seawater to move and ensure proper drainage. Nevertheless, it’s commonplace for weep holes to get clogged from things such as sand or soil, trash brought in by seawater, loose construction mortar, etc. And without water flowing through these holes, the pressure on the seawall can be tremendous, potentially leading to structural damage. Also, leaves, twigs, and limbs from the surrounding plants and trees can partially clog weep holes, reducing the flow of water. So, unclogging the weep holes to relieve pressure is an important step in maintaining seawalls. Thankfully, it doesn’t take much to unclog a weep hole, as clearing the debris and ensuring that water flow is normal is all it needs. It goes without saying you can regularly inspect the weep holes and check if the movement of water is optimal. In fact, this will allow you to detect a clogged hole and clear it before it entirely chokes the water flow. Step 3. Relocating your landscape away from the seawall Believe it or not, the trees and shrubs in your backyard can be the worst enemy of the seawall. Moreover, the damage from your plantation can be imminent if they’re close enough to the seawall. You see, the problem lies with the roots, which naturally grow towards the water and end up growing against the seawall. This exerts tremendous pressure on the seawall, more than what it is designed to withstand, thus forming cracks. Not to mention, the roots of some trees can even make their way through the seawall, leaving them wide open and exposing the soil to seawater. We’re not suggesting that you shouldn’t be planting trees on your property. However, for the safety of the seawall, it’s best to have the area around it clear of landscaping. Also, if you already have trees and shrubs in the vicinity of the seawall, we suggest you
Final Inspection Checklist: All You Need To Know

A final building inspection is a crucial step in the construction process. It ensures the safety and compliance of your newly built or renovated property. But how do you ensure that everything is up to mark? This is exactly why we have a final inspection checklist. In this blog, we’ll delve into the significance of a new construction final inspection checklist, distinguish between a final inspection and a pre-settlement inspection, and offer expert insights for efficiently conducting a thorough final inspection. Additionally, we’ll provide you with a selection of free, customizable final inspection checklist templates that you can adapt for your specific projects. But first, let us learn more about the final inspection. What is the Final Inspection? A building final inspection is a critical quality control step conducted before a product or property is delivered to the customer or occupant. In simple terms, it is like a last check to make sure a product or property is good to go before the customer gets it. Its primary purpose is to ensure that the product or property aligns with the specified requirements and safety standards agreed upon by both the buyer and seller. This inspection also helps in detecting and rectifying any potential issues in the manufacturing or construction processes. A final building inspection is done by an official inspector from the local building authority. They check to see if there are any rule violations, issues, or dangers that might stop them from giving a certificate that says the property is safe to live in or sell. This certificate called a Certificate of Occupancy (CO), is usually needed for most properties to be legally used or sold. Depending on the nature of the product or property and the contract terms, the building final inspection can be conducted by an independent third-party inspector, a contractor, a building inspector, or the commercial property owner. During a final inspection, various assessments and checks are done, including elements such as quality, quantity, appearance, dimensions, durability, functionality, and safety. These evaluations are aimed at guaranteeing that the end product is both of high quality and safe for use. Additionally, final inspections are typically scheduled when a substantial portion, usually around 80%, of the products are ready for shipment or when the property is prepared for occupancy. You might also like to read: Commercial Building Inspection Cost: Factors & Considerations Final Inspection vs Pre-Settlement Inspection A final inspection and a pre-settlement inspection are two different types of inspections that are done before the settlement of a property. As we discussed earlier, a final inspection is conducted by the city’s building inspector to determine if the property meets the building code standards and is ready for occupancy. On the other hand, a pre-settlement inspection is conducted by the buyer or owner to verify that the property is in the same condition as when it was purchased and that any agreed works have been completed. The main difference between a final inspection and a pre-settlement inspection is that the final inspection is mandatory and official, while the pre-settlement inspection is optional and informal. The final inspection can affect the settlement process, as the inspector can issue a certificate of occupancy or a notice of violation. The pre-settlement inspection can also affect the settlement process, as the buyer can request repairs or compensation for any defects or damage found. A final inspection and a pre-settlement inspection can also differ in terms of timing, participants, and checklist. A final inspection comes after the pre-settlement check, which usually happens a few days before the property sale is finalized. A final inspection is typically carried out by a building inspector from the city or another expert responsible for ensuring that the property meets all the required building standards. On the other hand, the pre-settlement inspection is done by the buyer or owner, often with a witness like a real estate agent. In the final inspection, the inspector checks various parts of the property, like drainage, walls, doors, and windows, the roof, foundation, plumbing, and more. They ensure everything meets safety and accessibility standards. The pre-settlement inspection is similar but also includes things like appliances, furniture, keys, and manuals, making sure everything is ready for the new owner to move in. What is the Final Inspection Checklist? As we said before, a final inspection checklist is an important tool for making sure your new or fixed-up property follows all the building rules and is ready to be used. It’s like a handy guide for different people involved, such as building inspectors, contractors, and commercial property owners, to find and fix safety problems, issues, or things that don’t meet the rules before they hand over the property. This new construction final inspection checklist should cover all the things the inspector will be looking at. Using this checklist can help you avoid any delays, extra work, or fines that might happen if you fail the inspection. You might also like to read: Concrete Coring Procedure: All You Need To Know What is Required for a Final Building Inspection Checklist? The list for final inspection requirements can be customized according to the type and scope of the project, but it usually includes some common elements, such as: Site Drainage and Grading To guarantee efficient water control and correct site grading, make sure to: Check that the site’s grading prevents water from collecting or running toward the foundation. Ensure the gutters and downspouts are correctly installed and in good working order. Verify that the stormwater drainage system is clear and sufficient. Confirm that the landscaping work is finished and doesn’t obstruct the drainage. Exterior Walls, Doors, and Windows To make sure the outside of a building is in good shape and works well, look for these things: Check the outer walls for any cracks, stains, or damage. Examine the siding, brickwork, or stucco to ensure it’s put in and finished correctly. Verify that doors and windows are properly aligned and sealed. Ensure the locks and hardware
What is A General Contractor? (Everything Uncovered)

When embarking on a project to build, renovate, or enhance your property, it may be crucial for you to consider hiring a general contractor. But what is a general contractor? In simple words, a general contractor is an individual or a company that supervises and orchestrates the entire construction project. They ensure that the project is successfully executed from inception to completion. Building, renovating, or improving your property is a substantial project that demands meticulous planning, expert coordination, and precise execution. A skilled general contractor construction serves as the linchpin of this process, taking on the responsibility of ensuring that all elements of the project harmoniously come together. In this comprehensive blog, we will get into the nuances of general contracting and construction, discussing further what they do. We will also provide valuable insights into the criteria you should consider when selecting the right general contractor for your project. But first, let us start from the basics. What is General Construction? Before we get into what is a general contractor, we must first understand what is general construction. General construction is a broad spectrum that encompasses a wide array of construction projects, each serving a unique purpose and function. Whether it’s creating residential spaces, commercial venues, or infrastructure, the world of general construction is rich and diverse. Let us look at some of these projects to get a better understanding of general construction. 1. Residential Buildings Residential buildings serve as havens for individuals and families, providing the comfort and security of a home. They come in various forms, including houses, apartments, condos, and townhouses, tailored to meet diverse lifestyle needs. 2. Commercial Buildings Commercial buildings are designed to facilitate businesses and serve customers. Whether it’s an office space, a retail store, a hotel, or a restaurant, these structures are integral to the economic landscape. 3. Institutional Buildings Institutional buildings play a crucial role in society by housing educational and healthcare facilities. These buildings include schools, hospitals, libraries, and museums, which provide essential services and resources to the public and specific groups. 4. Industrial Buildings Industrial buildings house the engines of production. Factories, warehouses, and power plants are crafted to manufacture goods or store essential resources like energy. 5. Infrastructure Infrastructure projects, like roads, bridges, tunnels, railways, and airports, are the vital arteries of transportation and communication networks. They facilitate the movement of people and goods, connecting communities and fostering progress. 6. Recreational Facilities Recreational facilities are designed for enjoyment and leisure. Think of parks, stadiums, golf courses, and more, all offering spaces for people to unwind and engage in entertainment activities, and simply have some fun. You might also like to read: Progressive Design Build: All You Need To Know What is General Contracting? General contracting is a term that encompasses the managerial and supervisory responsibilities carried out by a general contractor in a construction project. It involves overseeing and facilitating the installation, replacement, or repair of various components within a building, structure, highway, sewer, or any other real property improvement. Now, let us discuss the person who does general contracting. What is a General Contractor? General contractor definition, in simple terms, describes them as an individual or a company responsible for the management of construction projects, guiding them through every stage, from initial conception and design to final completion and inspection. They serve as the central point of coordination and control for the entire construction process. A general contractor typically enters into a formal contract with the project client, who can be the property owner or a developer. This contract underlines crucial details such as the project’s scope, budget, timeline, and payment arrangements. In some jurisdictions, construction general contractors must obtain licenses and carry appropriate insurance to operate, demonstrating their commitment to professionalism, legal compliance, and the protection of both their clients and themselves. Read further: Final Inspection Checklist: All You Need To Know Types of General Contractors There are different types of general contractors depending on their scope of work, specialty, and contract type. Some of the common types of general contractors are: Construction Managers They oversee the planning, budgeting, and coordination of a construction project. They act as consultants to the project owner and do not have direct contracts with subcontractors or suppliers. Design-build contractors Design-build contractors provide both design and construction services for a project. They have a single contract with the project owner and are responsible for delivering the project from concept to completion. Prime contractors Prime contractors have a direct contract with the project owner and are responsible for hiring subcontractors and suppliers. They may also perform some of the work themselves or delegate it to other contractors. What Does a General Contractor Do? Pre-Construction Before construction commences, a general contractor is entrusted with several crucial responsibilities: Project Evaluation and Estimation The general contractor meticulously reviews project plans and specifications in collaboration with the client, offering a comprehensive estimate covering costs, duration, and required materials. Regulatory Compliance They handle building permits and licenses, ensuring full adherence to local regulations and legal requirements. Subcontractor Selection and Negotiation In assembling a skilled team, they hire and negotiate contracts with specialized subcontractors who possess expertise in various areas like plumbing, electrical work, roofing, and more. Material Procurement The general contractor efficiently manages the procurement and delivery of essential materials and equipment from suppliers and vendors. Budget and Schedule Management A detailed project schedule and budget are prepared and closely monitored throughout the construction process to ensure progress and financial flow align with expectations. During Construction During the construction phase, the general contractor’s role includes the following vital tasks: Worksite Supervision and Coordination They oversee and synchronize the efforts of subcontractors, workers, and all other stakeholders present on the construction site. Quality Assurance Ensuring that work adheres to project plans, specifications, building codes, and the highest quality standards is a top priority. Issue Resolution As construction progresses, the general contractor is responsible for swiftly resolving any challenges that surface, be it delays, alterations, disputes, safety concerns, or
Progressive Design Build: All You Need To Know

In today’s ever-evolving construction industry, innovation and staying ahead of the curve are essential to succeed in the industry. Traditional construction methods have brought us so far, but that’s not all that they did. They also paved the path for various new approaches that are more efficient, collaborative, cost-effective and impactful. One of those methods that have been getting traction for the past few years is progressive design build. PDB is not just a methodology; it’s a paradigm shift that redefines how construction projects are conceived, planned, and executed. It bridges the gap between design and construction and makes more room for a cohesive and collaborative approach. In this blog, we will learn more about progressive design-build, its benefits and real-world applications. So, let us start by understanding what it is. What is Progressive Design-Build? According to the Design-Bulild Institue of America (DBIA), progressive design-build is a collaborative construction method for delivering challenging projects because it brings the designer, builder and owner together to identify problems early and resolve them during design, making a construction project go a lot smoother. In simple terms, in progressive design build, the owner hires a design builder and then we work together to meet our common goals. It gives us a lot more open dialogue between the contractor and the owner to figure out what the real critical issues are and how we can appropriately address them. Typically, progressive design-build projects have the highest risks or the most opportunities for innovation collaboration, not just with the owner but also with the community, and it’s a great way to deliver a project. A progressive design build model limits the department’s exposure to putting a contract out and gives them the ability to work through a lot of challenges in a collaborative manner. You can work together on innovations and even do things that you have never done before, but because of this relationship, you are willing to try. You might also like to read: Concrete Coring Procedure: All You Need To Know Progressive Design Build vs Design Build Design build is a construction method in which the architect, engineer and general contractor all work together from the beginning of the process, providing one unified team under a single contract. Unlike traditional design-bid-build for your project, which is handled by multiple parties going back and forth on numerous steps, design-build is a streamlined design budgeting and construction process. All are delivered by a single point of responsibility. This approach to commercial construction saves money and time and results in fewer change orders. In Design-Build contracts, decisions involve the whole team, reducing blame and conflicts, but communication sometimes makes a circle to get through the whole organization. Furthermore, owners are forced to lose some control over the project. Because of this, sometimes owners face challenges when making changes, as it can be challenging for the design and construction teams to make the required changes. To address this, PDB offers a solution that enables collaboration while maintaining owner influence and flexibility. Unlike design build, progressive design-build is really a straight line. The owner hires a design-builder and then works together to meet our common goals. It gives us a lot more open dialogue between the contractor and the owner to determine the critical issues and how to address them appropriately. One of the best advantages of using a progressive design-build delivery method is it gives you a way to approach the project that can be centred on the project’s goals. You’re collaborating as a team to achieve a certain goal, whatever goal it is. Additionally, the Builder is brought on earlier in the process, so they’re part of developing the goals in a typical design build format. To get a better understanding of the key differences between PDB and traditional design build method, you can also refer to this table: Aspect Design Build Progressive Design Build Design Build Approach Design-Builder introduced after developing basis of design Design-Builder introduced at an early stage, works with owner to create design basis Collaboration Limited collaboration Fosters collaborative environment early in the project Pricing Model Lump-Sum Price Proposal Open-Book Accounting Decision Making Owner makes decisions based on documents and consultant input Owner makes value-based decisions supported by builder’s cost and schedule models Risk Allocation Owner retains Spearin liability Transfers risk from owner to Design-Builder Subcontractor Selection Owners are not involved in procurement and selection of subcontractors Owners can choose to be actively involved in subcontractor procurement and selection Selection Methodology Price-Based Selection Qualifications-Based Selection Change Orders Susceptibility Susceptible to Change Orders Guaranteed Maximum Price (GMP) ensures Cost Reliability Off-Ramping Easier Off-Ramping Riskier Off-Ramping Features of Progressive Design Build Here are a few features that make PDB the optimum choice for your project: 1. Continuous Communication Between Owners and Design Builders A PDB model allows the owner and the design-builder (typically representing both design and construction teams) to maintain ongoing communication and collaboration throughout the project. It ensures that the project stays on budget and is aligned with the owner’s expectations. This continuous collaboration allows the owner to actively participate in decision-making and project progress, which provides a more tailored and satisfactory outcome. Additionally, the owner enjoys a higher level of control and oversight compared to a traditional Design-Build project. This ongoing contact gives the owner greater influence over the project, allowing them to address any concerns or changes promptly. 2. Qualifications-Based Selection In PDB, the selection of the design-builder is primarily based on qualifications rather than the bid price. This means that the design-builder is chosen based on their skills, expertise, experience, and capability to deliver the project successfully. The primary focus on qualifications ensures that the highest possible value is delivered to the owner. By prioritizing qualifications over bid price, the focus is placed on the design-builder’s ability to meet the project’s unique requirements and quality standards. Read further: How Long Does Concrete Resurfacing Last? 3. Two-Phase Project Completion PDB divides the project into two separate and distinct phases.