
How Much Will a Commercial Building Inspection Cost?
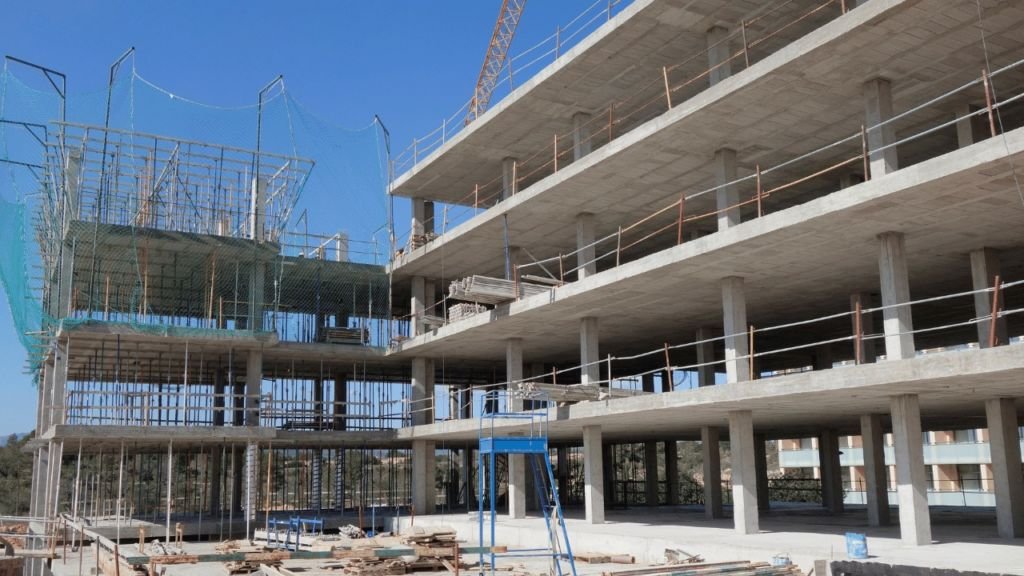
Commercial properties are one of the most profitable business assets in the world right now. According to a survey, the worldwide commercial real estate industry was estimated to be worth over $35 trillion in 2022. It was up by around a trillion US dollars as compared to 2021’s estimated value of approximately $34 trillion. This means that renting or leasing real estate generates a big chunk of the world’s wealth. However, it’s not as easy as it sounds. Before you can even rent or sell your commercial property, you have to make sure that it is safe and up-to-market standards for your client to operate in. To overcome this obstacle, we opt for commercial building inspection. In our earlier articles, we have discussed basement and attic inspections, but commercial property inspection is a whole other deal. Not apples and oranges different, but still different. Since they differ so much, it is reasonable that they get billed differently, too. There are several methods that are mostly used to determine the commercial building inspection cost, but we will discuss that a bit later. First, we need to understand what a commercial building inspection is, its scope, and the various factors that influence commercial building inspection cost. Understanding Commercial Building Inspection Simply put, a commercial building inspection is a test, an evaluation of a building/property that is commercially used. These commercial properties could be anything. It can be corporate offices, cafes, warehouses, and even residential units. The list goes on. As long as the property is used for commercial purposes, it is identified as a commercial property. Ideally, we should perform a periodic commercial building inspection, but they are only mostly conducted when you are in a buying or selling process, or it is the end or start of a tenancy. Importance of Commercial Building Inspection The purpose of these inspections is simple, to identify any problem with the property. It could be structural, electrical, or anything. If there are any such issues, they need to be dealt with as soon as possible. Why, you ask? The answer is simple, it is bad for business. That and there are laws in place that require commercial property owners to do so. Suppose you own a commercial property that a start-up tech company is looking to invest in to use as their office. Now, if there are any issues, such as a problem with the HVAC system, it would be a huge inconvenience for them. And in return, it would also be a huge problem for you. When you get in a meeting with them to negotiate a deal, these issues will not be in your favor, and they will drive down your property’s rent. So, we could also say that these inspections aim to drive profits from rentals or business operations. This goes hand in hand with what the International Association of Certified Home Inspectors (NACHI) has to say about the purpose of a commercial building inspection. They state, and we quote,” Although the Standards are available and extremely useful, the goal of a commercial inspection is to provide the client with the information they need to enter into transaction negotiations with as much power in their possession as possible.” Apart from its monetary aspect, it also serves another purpose, and it might be the most important aspect for you. It ensures the safety of all parties involved, especially those who operate in the building. Commercial property inspection also inspects the foundation of the property. If the foundation is not in good condition, it is bad news for everyone. A bad foundation can cause the property to collapse, which would endanger the lives of everyone operating in the building. With inspection, we can detect it early and make any required repairs. We are not saying that commercial property inspections save lives, but it does help you mitigate risk and give you the tools to protect your property from any mishap. Methods To Calculate Commercial Building Inspection Cost So, how much does a commercial building inspection cost? Based on the benefits you get from a successful commercial building inspection, how much it costs matters very little. However, you still have to foot the bill. So, it is better to get an idea rather than going in blindly. To get an estimate, you first need to understand the baselines and factors influencing the commercial real estate inspection cost. For example, large commercial properties, like warehouses, would be relatively larger in size, which means it would require more time to get a thorough inspection, which would naturally result in higher commercial inspection costs. Whereas, if the space is small, like a cozy cafè, it would cost around the same as a residential inspection. Now that we are done with this, let’s focus on the methods. Well, there isn’t any method that suits each and every circumstance. So, it goes without saying that there are various methods to remedy this unpleasant event. There are four most used methods to get an estimate of commercial building inspection costs. There are other methods as well, but these work the best and are widely accepted. Hourly Rate We are sure that you are already familiar with this method, but for the peace of our mind, let’s revisit this ally. So, as the name suggests, the inspector charges by the hour. Nothing more to it. The longer it takes the inspector to inspect the building, the higher the commercial real estate inspection cost goes. Similarly, if the space is comparatively small, it would mean less time invested and lower inspection costs for you. According to the Certified Commercial Property Inspectors Association (CCPIA), the average hourly cost of a commercial property inspection is around $300/hr. So if we take that as our benchmark, we can say that if you hire an inspector at an hourly rate of $300/hr and it takes them 3 hours to inspect the property, it means your commercial property inspection cost would be $900.
Basement Inspection: A Comprehensive Guide
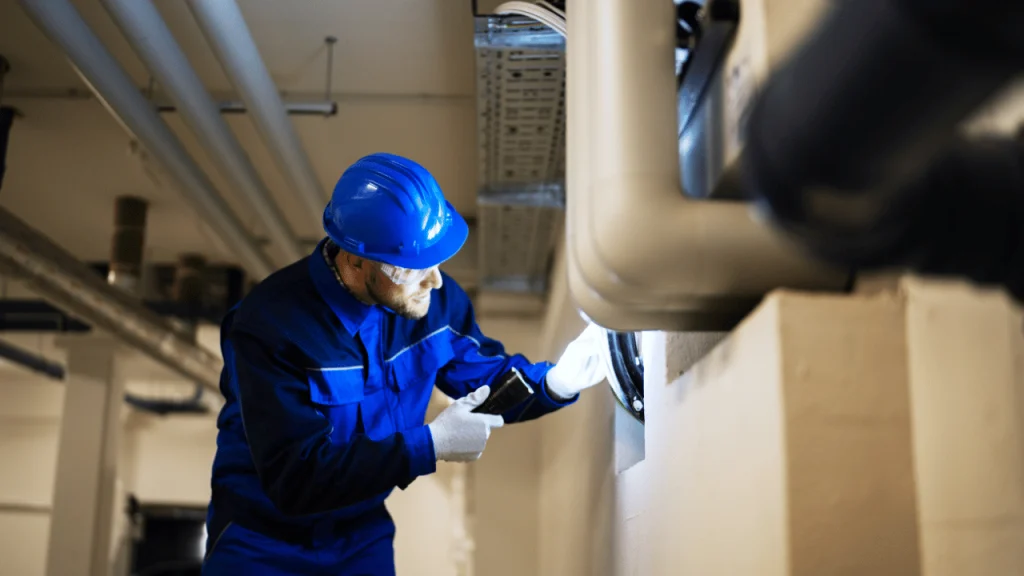
Maintaining the condition of your commercial property is vital, and one effective way to stay on top of it is through regular basement inspections. These inspections play a crucial role in identifying moisture issues and damages and ensuring the structural integrity of your property’s foundation. In this blog post, we delve into the significance of basement inspections and highlight why they should be a top priority for every business owner. Discover the key insights that emphasize the value of proactive maintenance and how basement inspections contribute to a secure and well-maintained business environment. But before diving into its benefits, let’s take a step back and ask the most important question: what is basement inspection? What Is Basement Inspection? Basement inspection is an important property evaluation test that involves assessing the condition of the basement in a commercial property to ensure its functionality, structural integrity, and overall safety. It aims to determine whether the basement meets the necessary standards for business operations and provides a secure environment for employees and customers. It is typically conducted by a certified basement Inspector or structural engineer who specializes in examining the basement area. During a basement inspection, the expert carefully examines various aspects of the basement. They look for warning signs like cracks in the walls or floors, water damage, or signs of structural instability. These issues, if left unaddressed, can lead to more significant problems such as compromised foundation, mold growth, or even potential collapse. Why is Basement Inspection So Important? Well, your basement plays a significant role in the overall foundation of your property. It supports the structure above and provides a space for essential utilities, storage, or even living areas. Any problems or issues with the basement can have far-reaching consequences for your entire property. For example, if there are any unaddressed issues, such as water damage, it can potentially compromise the foundation of your commercial property. It can have serious consequences for the structural integrity of the entire building. If these issues are not dealt with promptly, they can lead to severe repercussions. By conducting a thorough inspection, potential hazards and vulnerabilities can be identified early on. This allows business owners like you to take proactive measures to address the issues, prevent further damage, and ensure the safety of your property, providing a secure environment for your employees and customers. Moreover, an inspection will ensure you can move ahead with basement remodeling services and repurpose an otherwise unused area into an aesthetically pleasing corner without safety and compliance headaches. Who Is A Basement Inspector? A basement Inspector is a professional who examines residential properties to assess their overall condition. They are typically hired by prospective buyers or sellers to provide an unbiased evaluation of a property’s structural integrity, safety features, and general functionality. Basement inspectors have specialized knowledge about various aspects of a property, including the foundation, roofing, plumbing, electrical systems, HVAC (heating, ventilation, and air conditioning), and more. Basement inspectors play a crucial role in the real estate process, helping buyers make informed decisions about their potential investment. They provide an objective assessment of the property’s condition, which can help buyers negotiate repairs or adjust the purchase price accordingly. Qualifications To Consider When Hiring A Basement Inspector When hiring a basement Inspector, it’s crucial to choose someone who is qualified and experienced, among many things. Here are some key factors you should consider when hiring a basement Inspector: 1. Certification and Licensing Check if the basement Inspector is certified or licensed in your area. Many jurisdictions have licensing or certification requirements for basement Inspectors, and it’s a good idea to ensure the inspector you choose meets these standards. 2. Knowledge and Training Inquire about the inspector’s training and educational background. Ideally, they should have completed comprehensive training programs or courses related to property inspections. They must have extensive knowledge of residential construction, building codes, and systems within a commercial property. They should also be well-versed in the structural elements, electrical systems, plumbing, HVAC, roofing, and other components of a property. Remember, continuing education is also important, as it ensures that the inspector stays updated with the latest industry practices and standards. 3. Professional Affiliations Find out if the basement Inspector belongs to any professional organizations or associations, such as the American Society of Basement Inspectors (ASHI) or the International Association of Certified Basement Inspectors (InterNACHI). Membership in these organizations often indicates a commitment to professional standards and ongoing education. 4. Experience and Expertise It is always recommended that you look for someone who has been working as a basement inspector for a significant amount of time and has conducted a number of inspections. An experienced inspector is likely to have encountered a wide range of issues and has a better understanding of potential problems in different types of properties. 5. Insurance and Liability It’s crucial to ask about the inspector’s insurance coverage. A reputable basement inspector should carry errors and omissions (E&O) insurance, also known as professional liability insurance. E&O insurance protects both the inspector and the client in case of any mistakes or omissions during the inspection process. Commercial general liability insurance is also important to cover any accidental damage that may occur during the inspection. 6. Sample Reports Request a sample inspection report to get an idea of the inspector’s thoroughness and clarity in documenting their findings. It should include detailed descriptions of any issues found, along with clear photos and recommendations for further action. The report should be easy to understand and provide a comprehensive overview of the property’s condition. 7. Reviews and References Check online reviews and ask for references from previous clients. Reading about other clients’ experiences can give you insights into the inspector’s professionalism, communication skills, and attention to detail. Don’t hesitate to reach out to references directly to ask about their satisfaction with the inspector’s services. Going through all these steps might feel like a chore but remember, hiring a qualified basement inspector is an investment in your business. Taking the
The Ultimate Guide to Attic Inspections
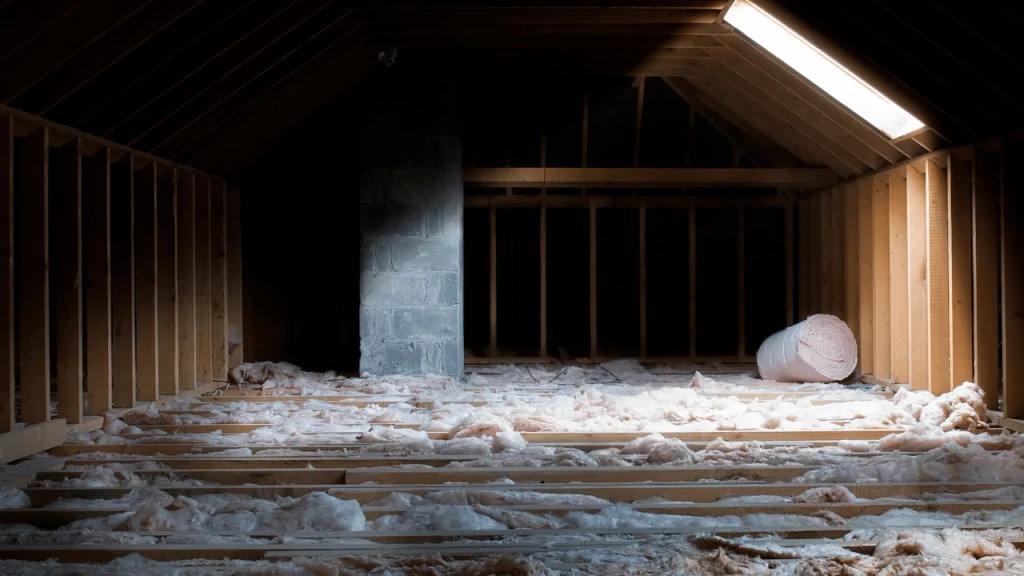
When it comes to home inspections, one often overlooked area is the attic due to its inaccessibility, lower priority compared to other areas, and lack of buyer interest, but they play a crucial role in maintaining a well-functioning home. From insulation and ventilation to potential issues like moisture, pests, and structural integrity, the attic can have a significant impact on energy efficiency, air quality, and overall comfort. Whether you’re looking to improve insulation, prevent mold growth, or ensure proper airflow, a thorough attic inspection is the first step toward a healthier and more efficient living space. In this guide, we’ll shed light on why attic inspections are a crucial aspect of assessing a property’s health and how it could make all the difference in your home’s safety, energy efficiency, and long-term maintenance. Before we delve into the details, let’s start by understanding the basics: what exactly is an attic inspection, and how does it contribute to maintaining a healthy home? What Is Attic Inspection? Attic Inspection is the process of carefully examining your attic to assess its condition, identify potential issues, and ensure everything is in tip-top shape. It involves a thorough examination of the attic area to identify any potential issues or concerns related to insulation, ventilation, moisture, structural integrity, pests, and other factors that can affect the overall health and efficiency of your home During an attic inspection, a qualified inspector will visually inspect various components such as the roof structure, insulation, ventilation systems, electrical wiring, plumbing, and potential signs of damage or deterioration. They may also use specialized tools, like a specialized camera and equipment, to gather additional information about the attic’s condition. Why Is An Attic Inspection So Important? Your attic might seem like a forgotten space tucked away above your living area. However, it plays a crucial role in maintaining proper insulation, controlling moisture levels, and promoting good airflow throughout the property. Regular attic inspections are a crucial step toward maintaining your home and ensuring its overall well-being. Identifying Potential Problems: Conducting thorough attic inspections allows you to identify existing or potential issues that may require attention or repairs. From water leaks and pest infestations to inadequate insulation and ventilation problems, the attic can harbor various troubles that, if left unaddressed, could lead to costly repairs and compromise the integrity of your entire house. Energy Efficiency and Climate Control A well-insulated and properly ventilated attic significantly contributes to energy efficiency. It helps regulate temperature, preventing heat loss in winter and heat gain in summer. By assessing insulation levels, detecting gaps or damage, and ensuring optimal energy performance, attic inspections can lead to significant savings on your energy bills. Maintaining a Healthy Living Environment Attic inspections are crucial for maintaining a healthy home. Hidden moisture problems in the attic can foster mold growth, negatively impacting indoor air quality and posing health risks. Regular inspections allow for the prompt identification and resolution of moisture issues, ensuring a clean and breathable living environment for you and your loved ones. Enhancing Resale Value A well-maintained attic with a clean bill of health can be a major selling point when it’s time to sell your property. Attic inspections help homeowners, buyers, or sellers gain a better understanding of the attic’s current condition and make informed decisions regarding maintenance, energy efficiency, and potential upgrades. Who To Call For Attic Inspection? If you need an attic inspection, Home Inspectors are your go-to professionals. They are the pros who know their way around properties and can give you a thorough assessment of your attic’s condition. They’ll check insulation, ventilation, structure, and wiring and keep an eye out for issues like mold, pests, or water damage. Apart from home inspectors, there are some other professionals as well who you can call based on your specific needs: Building Contractors Building contractors often offer inspection services, including attic inspections. They can take a good look at your attic, spot any safety concerns or structural problems, and suggest repairs or improvements if needed. Roofing Contractors Attic inspections often involve assessing the condition of your roof from the inside. If you’re worried about roof leaks or overall integrity, a roofing contractor who offers inspection services would be your best bet. Pest Control Professionals If you suspect unwelcome rodents have taken up residence in your attic, calling pest control experts is the way to go. They’ll do a thorough inspection, figure out the extent of the infestation, locate the entry points, and provide effective solutions to get rid of the rodents. Energy Auditors If you are specifically looking to assess energy efficiency in your attic, you can contact an energy auditor. They’re experts at evaluating energy usage and can pinpoint areas where you can make improvements. They’ll check insulation, ventilation, and sealings and even hunt down those pesky thermal leaks. Qualifications To Consider When Hiring An Attic Inspector When hiring an attic Inspector, it’s crucial to choose someone who is qualified and experienced, among many things. Here are some key factors you should consider when hiring an attic Inspector: Certification and Licensing Check if the attic inspector is certified or licensed in your area. Look for relevant certifications or licenses that demonstrate their competence and adherence to industry standards. Training and Experience Inquire about the inspector’s training and experience in the field. Look for someone who has undergone specialized training in attic inspections and has a solid background in construction or building sciences. Experience in conducting attic inspections is also valuable, as it allows the inspector to identify potential issues and provide accurate recommendations. Knowledge of Building Codes and Regulations Attic inspectors should have a thorough understanding of local building codes and regulations related to attics. This knowledge ensures that they can identify any code violations or safety concerns during the inspection. Experience Consider the inspector’s experience in the field. Look for someone who has conducted numerous attic inspections and has a track record of identifying and addressing issues effectively. An experienced inspector is more likely to have
Dig Deeper: The Importance of Soil Sampling for Construction for Stronger Foundations
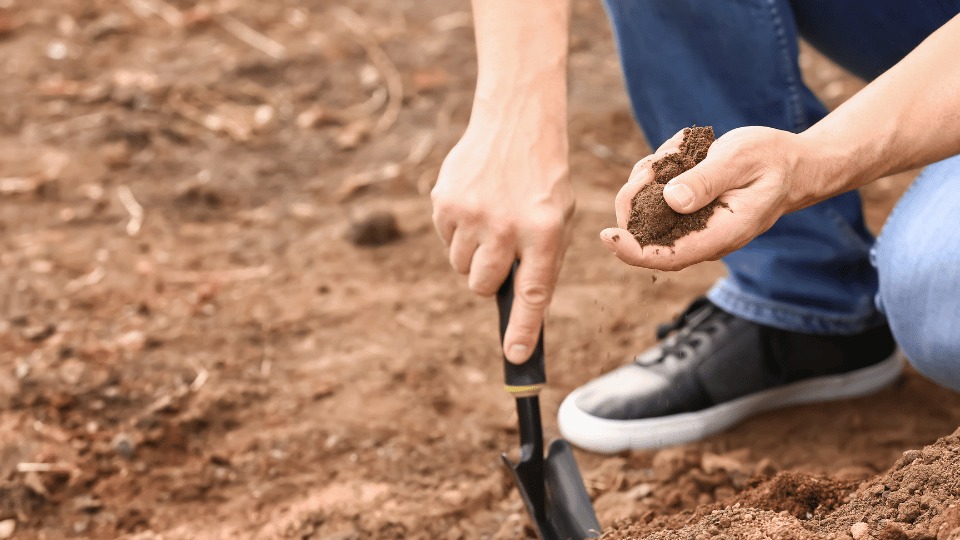
Are you planning to build a new structure or develop a piece of land? If so, you need to make sure that the foundation of your construction project is solid and stable. As the saying goes, “ A building is only as strong as the foundation it sits upon’, which is why soil sampling for construction is crucial for any project. By testing the soil before construction begins, engineers can assess the quality of the soil and determine the appropriate foundation design for the specific site. In this blog, we will explore the importance of soil sampling for construction and how it can help save time and money in the long run. Whether you’re a builder or a homeowner, understanding soil sampling for construction can ensure that your project starts on solid ground. What is Soil Testing Soil testing is a process that involves analyzing soil to determine its physical and chemical properties. It’s like giving the soil a check-up to see if it’s healthy and ready for its next big thing. By collecting samples of soil and testing them with comprehensive laboratory analysis methods, soil sampling for construction reveals crucial information about the soil’s composition, nutrient content, pH level, and more. This information is vital for verifying the suitability of soil for various applications, such as construction, agriculture, and environmental remediation. So whether you’re building a new home or planting a garden, soil testing can help you ensure the success of your project by providing the necessary insight into the quality of the soil. Why is the Soil Test for New Construction so Important? Before beginning any construction project, it’s essential to conduct soil testing. But why? Well, as mentioned before, the success of any construction project depends on the strength and stability of its foundation, which is directly affected by the quality of the soil. Soil testing helps engineers understand the physical and chemical properties of the soil on a construction site, such as its bearing capacity, compaction, and drainage. This information is crucial in determining the appropriate foundation design. It helps engineers to make sure that the building can withstand the weight of the structure and any external forces, making them earthquake-proof or flood-resistant. In short, as we have mentioned before, soil testing is like a health check-up for the soil. It helps us to identify any potential problems before construction begins. By taking this vital step, you can save time and money in the long run by avoiding costly foundation repairs and ensuring a safe and stable structure. When Is It Done, And Who Does It? Soil testing is a crucial step in construction and should ideally be done before starting any major construction work. Soil conditions can greatly impact the safety, stability, and durability of any structure. So, if you’re planning a construction project, get the soil test done now itself. This will help you identify any potential issues with the soil that could affect the safety or longevity of your structure and allow you to take corrective measures before construction begins. Depending on the scope and type of the construction project, a soil test might be necessary. In such cases, it’s always best to follow the regulatory requirements and get the necessary testing done as per their guidelines. Now, who does it? Soil testing for building a house is usually done by geotechnical engineers or soil testing laboratories. These professionals have the expertise and equipment to perform a variety of tests on soil samples to determine their properties and characteristics. They can also provide recommendations on the best foundation design and construction methods based on the results of the soil tests. It’s important to choose a reputable and experienced soil testing service to ensure accurate results and reliable recommendations. Types of Soil Testing Before Construction We are now pretty familiar with the concept of soil testing before construction and why land testing for buildings is important. So, let us explore various types of soil testing for construction. Moisture Test Did you know that moisture in the soil can impact its weight-bearing capacity and even state the likelihood of a termite infestation? Moisture refers to the amount of water present in soil and can be determined by calculating the soil’s water content. This crucial information is obtained by measuring the weight of a soil sample when moist and after it has been dried. As a rule of thumb, lower moisture levels tend to state stronger soil. Various methods can be used to test for moisture content to help determine the percentage of water in the soil. Soil moisture content is important for engineers and builders to design strong and durable foundations and structures. It also helps them to prevent termite damage. Here are a few methods that are typically used for moisture testing: Oven-Drying Method When it comes to testing moisture content in the soil, the oven-drying method stands out as the most common and reliable. The oven-drying method involves taking a moist soil sample and heating it in an oven at approximately 110 degrees Celsius. After 24 hours, the dried sample is removed from the oven and weighed, allowing it to be compared to the weight of the original moist sample. The following formula is used to determine the water content of a soil sample: w= (M2-M3)/(M3-M1) * 100 where M1= Empty container’s mass with the lid M2= Container’s mass with wet soil and lid M3= Container’s mass with dry soil and lid The amount of soil sample required for this test varies depending on the particle size and gradation of the soil. By conducting a sieve analysis, engineers can determine the appropriate quantity of soil needed for the test. This information is vital for ensuring accurate results and can help builders and engineers design stronger foundations that can withstand external forces and avoid potential termite damage. Radiation Method Radiation isn’t just something from sci-fi movies; it’s also a real-life method for testing soil moisture content. Believe it or not, scientists can use
What is the Procedure for Concrete Coring?
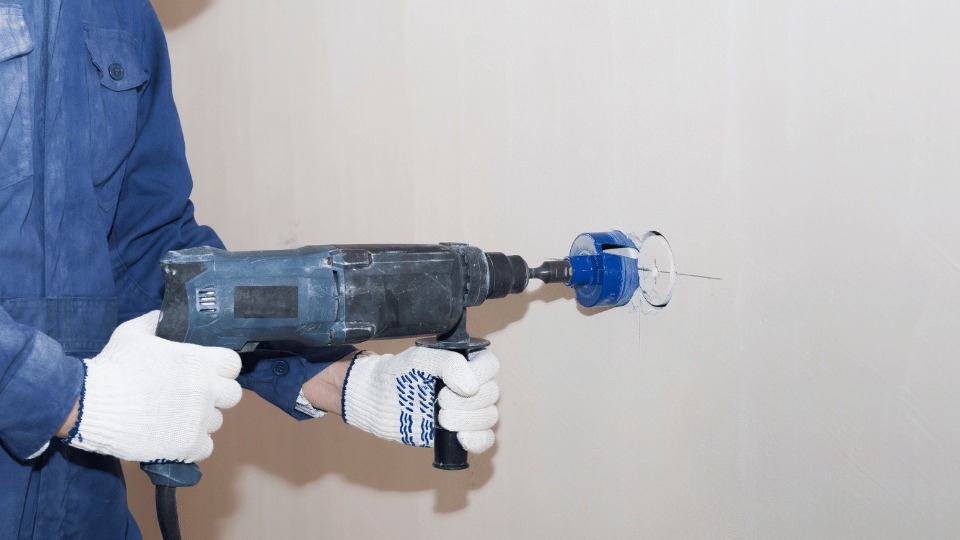
What Is Core Drilling In Construction In the construction industry, experts use the concrete coring procedure as a crucial technique for extracting cylindrical cores or samples from concrete structures, including walls, floors, ceilings, and pavements. This process uses a specialized tool called a core drill, which comes equipped with diamond-tipped cutting tools. You may wonder why we specifically choose diamond-tipped tools for this task. The reason lies in the remarkable hardness and durability of diamonds, which make them ideal for cutting through tough materials like concrete. The core drill securely attaches the diamond-tipped bits and rotates them at high speeds, effectively grinding away the concrete as they penetrate the surface. With the use of diamond-tipped tools and a careful approach, core drilling offers a reliable and effective means of examining concrete structures while maintaining their integrity. It allows engineers, architects, and inspectors to gather essential information about existing structures, perform necessary tests, and make informed decisions regarding repairs, renovations, or new construction projects. Applications of Concrete Core Drilling Now that we know what core drilling is, let’s learn more about its applications. There are several situations where concrete coring comes in handy. Test Integrity and Strength of Concrete One common application is in construction projects where the integrity and strength of the concrete need to be assessed. By extracting a core sample, engineers and inspectors can examine the concrete’s composition, look for any signs of deterioration or damage, and determine if it meets the required specifications. Examining Existing Structures Concrete coring is also beneficial when examining existing structures. Let’s say there’s a building with a suspected issue, such as concrete degradation or cracks. By extracting core samples from the affected areas, experts can analyze them to identify the root cause of the problem. This helps in planning and implementing appropriate repairs or maintenance strategies. Material Testing In construction projects, moreover, it’s crucial to ensure that the concrete used meets the required strength and durability standards. By extracting core samples, concrete can be analyzed for compressive strength, moisture content, chemical composition, and other properties to ensure compliance with design specifications and industry standards. Plumbing and Electrical Installations Core drilling is commonly used to create holes in concrete walls, floors, and ceilings for the installation of plumbing pipes, electrical conduits, and HVAC systems. These holes allow for the passage of necessary utilities while maintaining the structural integrity of the concrete. Renovations and Upgrades Concrete coring is also used in situations where new installations or modifications are planned within existing concrete structures. For instance, if you want to install a new plumbing line or add electrical conduits, coring provides a way to create precise channels without damaging the surrounding concrete. Core drilling also facilitates the installation of anchor bolts for securing heavy equipment or structures to the concrete. Demolition and Removal In situations where concrete structures or elements need to be demolished or removed, core drilling is used to create precise openings for demolition charges or to cut and remove concrete sections. This controlled method helps minimize damage to surrounding areas and enhances safety during the demolition process. Sewer and Drainage Systems Furthermore, core drilling is used in the installation of sewer and drainage systems in concrete surfaces. It helps in creating access points, cleanouts, or tie-ins for connecting pipes to the main sewage or drainage network. How Does It Work? We have discussed about core drilling and its benefits. However, to truly understand its ins and outs, you need to familiarize yourself with the process. Here is all you need to know about it: Concrete coring works by using a specialized core drilling machine to create cylindrical openings or cores in concrete structures. Concrete core drilling requires the use of a diamond concrete drill bit. These drill bits consist of steel tubes that are embedded with industrial diamond pieces. The diamond provides the necessary hardness and abrasiveness to effectively cut through concrete. Drilling Process To perform the drilling, the diamond core drill bit is mounted onto the shaft of the drilling machine. It is then securely attached to the structure that needs to be drilled into. The drilling machine provides the power and rotational force required for the drill bit to penetrate the concrete. During the drilling process, as the diamond core drill bit rotates at high speeds, it grinds away the concrete material, creating a hole. The drill bit is designed with a hollow center, which allows for the collection of the concrete “slug” or core. Extracting The Core Once the drilling process is complete, the core drill bit is carefully removed from the hole. The core of concrete can then be extracted from the drill bit. This core is essentially a cylindrical sample of the concrete that was drilled, and it retains the shape and characteristics of the surrounding structure. Examining The Core The extracted cylindrical shaped core sample can now be examined and analyzed to assess the stability, composition, and strength of the concrete and the overall structure. Things You Need To Know About Concrete Coring While concrete core drilling is primarily used for concrete, it can also be used to cut through other materials, including porcelain tile, limestone, rock, granite, fiberglass, and even ice. In the process, before commencing any drilling work, several factors must be considered, such as the type and strength of the concrete being drilled, the presence of reinforcement bars in the structure, and the implementation of necessary precautionary measures throughout the drilling process. It is crucial to scan the area thoroughly. This preliminary scan ensures that there are no obstructions, such as rods or conduits, that could interfere with the drilling process. Companies like Souffront specialize in concrete scanning services, guaranteeing accurate detection of any hidden objects or structural elements within the concrete. You might also like to read: The Ultimate Guide to Concrete Loading Dock Repair What Are The Benefits of Concrete Coring? Concrete coring offers several benefits in various applications. Here are some of the key advantages of concrete coring:
Concrete Sewer Pipe Repair The Ultimate Guide to Fixing Your Sewage System

When it comes to our homes, there are few things more important than our sewer systems. These networks of pipes carry waste and wastewater away from our homes and businesses, keeping our communities healthy and clean. However, like any artificial system, sewer pipes can break down over time, leading to leaks, blockages, and other issues that can be both costly and disruptive. That’s where concrete sewer pipe repair comes in. Advanced techniques and materials make it possible to swiftly and effectively repair severely damaged sewer pipes. This eliminates the need for costly and time-consuming excavation. This blog will delve into concrete sewer pipe repair, explaining its workings and the benefits it offers to your community. So whether you’re a homeowner, a business owner, or a public works manager, we have got you covered. Let’s dive in and learn the steps to keeping your sewer system running smoothly for years to come. What is a Concrete Sewer Line? First things first, let’s discuss what is a concrete sewer line. Concrete sewer lines consist of reinforced concrete pipes used in sewage systems, present in both municipal and residential areas. They’re really strong and durable, plus they don’t corrode easily. That’s why they’re often used underground for sewer systems. There are many different sizes and shapes of concrete sewer pipes available to suit different flow requirements and system designs. How to Tell If You Need Concrete Sewer Pipe Repair: Common Signs to Look Out For Like most problems, there are a few signs that might indicate that your sewer line is in need of repair. Foul Odors: If you notice a strong sewage smell around your property, it could be a sign of a sewer line issue. Slow Drains: If your sinks, toilets, or showers are slow to drain or are backing up, it could be a sign that your sewer line is blocked. Lush Patches of Grass: If there are unexplained patches of extra green and lush grass in your yard, it could be due to a leak in your sewer line. Water Damage: If you notice water stains, mold, or mildew in your basement or lower levels of your home, it could be a sign of a leaking sewer line. Strange Noises: If you hear gurgling, bubbling sounds when you use your plumbing fixtures or the sound of leaking running water, it could be a sign of a sewer line issue. Cracking in the Foundation: If you’ve observed cracks or buckles inside on the floors or walls, or outside on your foundation’s lower portions, you may have a slab leak. This could be a big problem, as it can actually compromise the overall strength and stability of your foundation. An Unusually High Water Bill: If you’re constantly getting a high water bill, it’s a pretty good sign that there might be a leak somewhere in your house. However, just because your water bill is high doesn’t necessarily mean that there’s a slab leak. If you notice these signs, don’t hesitate. Reach out to a professional plumber or concrete repair and restoration specialist promptly. This prevents further damage and addresses the issue effectively. Read further: Concrete Coring Procedure: All You Need To Know Signs of Structural Damage Caused by Broken Sewer Pipe Leakage Now you might think, how dangerous can a water leak be? Although a damaged sewer pipe or water leakage might appear minor, it’s far more serious than it seems. The implications are more significant than you can imagine. As previously mentioned, even a small water leakage can gradually impact and weaken your home’s foundation. It can compromise your home’s structural integrity. Let us explain this. If the land your home is built on contains clay in the soil, the clay in the soil can absorb the leaked water from the damaged sewer line. It can effectively increase the volume of the soil by up to 10%. This increase in the soil’s volume can put enough pressure on the foundation to lift it, and consecutively damage it. If you see any signs mentioned below, there is a high probability that your home has structural damage from water leakage. There are cracks in the walls that extend from the floor upwards. The tiles or concrete flooring have cracks in them. Some areas of the flooring are raised and have a dome-like shape. The timber boards are warped or make squeaking sounds when walked on. It goes without saying that if you see any of these signs, we highly recommend that you take steps to fix the problem as soon as possible. If left unchecked, it can cause not only structural damage but health hazards as well. You might also like to read: How structural inspections can prevent accidents and grow building life What’s Involved in a Concrete Sewer Pipe Repair/Replacement? Replacing a sewer pipe is a big job that involves a lot of work and a significant investment. Before you dive into a sewer pipe replacement project, it’s important to understand what it’s going to take. Step 1: First, you’ll need to hire a plumbing specialist to assess the situation and determine whether or not a full replacement is necessary. They’ll inspect your pipes and use cameras to determine the extent of the damage and where it’s located. Once they’ve determined that a replacement is necessary, they’ll provide you with an estimate of the cost. Step 2: The next step is to prepare your property for the work. This may involve obtaining permits from your local government and coordinating with your neighbors if the work will impact their property as well. You’ll also need to clear the area around the pipes to make it easier for the plumbing specialists to access them. When the work begins, the first step is to excavate the area around the pipes. This may involve digging up your lawn or driveway, and it can be quite messy. Once the area is cleared, the old pipes will be removed, and new pipes will be
The Importance of Electrical Home Safety Inspections and How to Ensure Your Family’s Protection!

In our technologically advanced society, we are all highly dependent on appliances. To use these appliances, we rely heavily on electricity to power our daily lives. But are you aware of the electrical hazards that could be lurking within the safety of the walls of your home? Electrical fires and shocks can pose a significant threat to your family’s safety and well-being, and unfortunately, many homeowners, like we were once, are unaware of the risks until it’s too late. That’s where electrical home safety inspections come in. These comprehensive assessments can help identify potential hazards before they become major problems, ensuring that your home is a safe and secure place to live for you and your family. In this blog, we’ll explore the importance of electrical home safety inspections, what to expect during the inspection process, and how to ensure that your family stays safe and shock-free for years to come. What is Electrical Home Safety Inspection, and Why It Is Important for Your Home? Information Sorce So, what exactly is an electrical home safety inspection? An electrical home safety inspection is a thorough examination of all the electrical systems that are installed in your home to make your life easier. To keep using these systems efficiently and, most importantly, safely, it’s essential to make sure that your electrical wiring, circuits, and appliances are safe to use and meet the required safety standards. Now, the million-dollar question, “Why do I need an electrical safety inspection?” Well, the answer is simple: to protect your home and your loved ones. Electrical issues can be dangerous and even life-threatening if left unchecked. During an electrical safety inspection, a qualified electrician will examine your electrical system, including outlets, wiring, and circuit breakers. They will look for any potential electrical hazards, such as outdated wiring or overloaded circuits, and make recommendations for repairs or upgrades to keep your home safe. By scheduling an electrical safety inspection, you can have peace of mind knowing that your home’s electrical system is in good shape and that you’re taking the necessary steps to keep your family safe. You might also like to read: Garage Safety Inspection: A Step-by-Step Guide to Get One Done (2023) When Should You Schedule a Home Electrical Safety Inspection? Information Source There are a few key scenarios when it’s the best bet to have your system checked out by a qualified electrician. Schedule an Electrical Safety Home inspection Before Moving In First and foremost would be the time you’re moving into a new home. It’s always a good idea to have an electrical safety inspection done before you move in. This will give you the assurance you need to know that you are moving into a safe home. Schedule an Electrical Home Safety Inspection Before Any Major Home Renovations or Additions If you’re planning any major renovations or additions to your home, you should have an inspection done before you start any work. It ensures that your electrical system can handle the extra load and that any new wiring or circuits are installed correctly. Schedule an Electrical Home Safety Inspection for Older Homes or Those Lacking Recent Inspections If you live in a home that is older than 25 years old or hasn’t had an inspection done in several years, it would be a smart move at your end to schedule one. Outdated wiring and electrical systems can be dangerous, and an inspection can identify any potential hazards and recommend necessary upgrades. Schedule an Electrical Home Safety Inspection to Troubleshoot Electrical Issues If you’re experiencing any electrical issues, such as flickers, frequent tripped breakers, or power outages, it’s time to schedule an inspection. These issues can be a sign of a larger problem, and an inspection can identify the root cause and prevent more serious issues that may arise down the road. You might also like to read: Pre-Purchase Building Inspections: Seeing the Unseen Before You Buy Your Comprehensive Home Electrical Safety Inspection Checklist Now that we know why electrical home safety inspection is important, you are going to need a checklist to get you started. But before we begin, let us give you a quick reminder that safety should always be your top priority when dealing with electricity. One wrong move can lead to a dangerous situation. So, it’s always in your best interest to consult with a qualified electrician rather than doing it yourself. Now, let’s get started with the checklist: Check the electrical panels: Make sure that the electrical panels are properly labeled and that there are no signs of damage or rust. Also, check if the circuit breakers are functioning correctly and not showing signs of tripping. Inspect the outlets and switches: Check for any loose or damaged outlets or switches. Ensure that they are not overloaded with plugs or have any signs of burn marks or discoloration. Look for exposed wiring: Check for any exposed wiring in your home. Exposed wiring can pose a significant risk of electrocution or fires, so it’s essential to address this immediately. Test the GFCI outlets: GFCI (Ground Fault Circuit Interrupter) outlets are designed to prevent electrical shock. To test them, press the “test” button and ensure that the outlet trips off. Then, press the “reset” button to turn it back on. Check the smoke and Carbon Monoxide (CO) detectors: Smoke/CO detectors are critical in alerting you to potential fires. Make sure they are functioning correctly and have fresh batteries. More things to check. Check for overload: Ensure that no circuits are overloaded with appliances or electronics. Overloading circuits can cause overheating, which can lead to fires. Inspect electrical cords: Check all electrical cords for any signs of damage, including fraying or cracking. Damaged cords can cause electrical shocks or fires. Check the lighting: Ensure that all light fixtures are securely fastened and not showing any signs of damage. Also, replace any burned-out light bulbs. Check the outdoor electrical system: Inspect outdoor electrical outlets, lights, and wiring for any signs of damage or
The Ultimate Guide to Concrete Loading Dock Repair

A damaged loading dock can lead to accidents, delays, and even loss of revenue. That’s why we’re here to talk about concrete loading dock repair. Loading docks are an essential part of any warehouse or distribution center. They are designed to withstand heavy loads and constant traffic, but over time, wear and tear can take a toll on them. Cracks, potholes, and uneven surfaces can make it difficult for trucks to load and unload goods safely and efficiently. We’ll understand the different concrete dock repair methods that you may take into consideration if and when you encounter this problem. What is a concrete loading dock? It is a specialized platform designed to facilitate the loading and unloading of goods from trucks or other vehicles. It is typically constructed using reinforced concrete to ensure maximum durability and strength and is often equipped with various features such as dock levelers, bumpers, and seals to enhance safety and efficiency. Its primary purpose is to provide a stable and secure surface for the transfer of goods between vehicles and warehouses or other storage facilities. This is achieved through the use of specialized equipment such as forklifts, pallet jacks, and hand trucks, which are used to move goods from the vehicle onto the dock and vice versa. How is it from a concrete loading ramp? A concrete loading dock is a raised platform that is typically built into the side of a building and can be accessed via a ramp or stairs. It allows trucks to back up to it for loading and unloading and is often equipped with levelers that bridge the gap between the dock and the truck bed, making it easier to move heavy items on and off the truck. On the other hand, a concrete loading ramp is a sloped surface that connects ground level to the back of a truck. It can be portable or permanent and comes in various sizes and weight capacities. Loading ramps are typically used in situations where a loading dock is not available or practical. One of the main differences between both is their height. A loading dock is elevated, while a ramp is at ground level. This means that loading docks require more space and construction than ramps but provide easier access for larger trucks. Versatility also comes into play here. Loading docks are designed for use with specific types of trucks, while ramps can be used with any type of vehicle. Additionally, ramps can be moved around as needed, making them ideal for temporary or mobile operations. Read: THE ULTIMATE SEAWALL INSPECTIONS GUIDE (2023) Important concrete loading dock repairs you must know of Polyurethane Grout Injection Polyurethane Grout Injection is a highly effective method for repairing concrete loading docks. It involves injecting polyurethane foam into the cracks and voids in the concrete. The foam expands and fills the gaps, creating a strong, durable bond that restores the structural integrity of the loading dock. How to use Polyurethane Grout Injection: – Clean the surface of the concrete thoroughly to remove any dirt, debris, or loose material. – Identify all cracks and voids that need to be repaired. – Drill holes into the concrete at regular intervals along the length of each crack or void. – Insert injection ports into each hole. – Mix the polyurethane grout according to the manufacturer’s instructions. – Inject the grout into each port until it begins to flow out of adjacent ports. – Allow the grout to cure for several hours or as recommended by the manufacturer. – Remove the injection ports and patch any remaining holes with a suitable material. Polyurethane Grout Injection is one of the best concrete loading dock repair methods because it is quick, cost-effective, and long-lasting. It can be used on both horizontal and vertical surfaces, and it can be applied in a variety of temperatures and weather conditions. Epoxy Mortar Epoxy Mortar is a two-part system that consists of a resin and hardener. When mixed together, they create a strong adhesive that can bond to concrete surfaces. It is ideal for filling cracks, holes, and other damage in concrete loading docks. How to use Epoxy Mortar: – Clean the damaged area thoroughly with a wire brush or pressure washer. – Mix the epoxy resin and hardener according to the manufacturer’s instructions. – Apply the mixture to the damaged area using a trowel or putty knife. – Smooth out the surface of the repair with a trowel or other tool. – Allow the repair to cure for at least 24 hours before using the loading dock again. Epoxy is an ideal solution due to its strong adhesive properties and ability to fill cracks, holes and other concrete damage in concrete loading dock ramps. Read: WHY GARAGE FLOOR RESURFACING IS BEST OPTION FOR YOU? Slab Jacking Slab jacking is a process that involves injecting a mixture of cement, sand, and water under the concrete slab. This mixture fills any voids or gaps beneath the slab and raises it back to its original position. How to Use Slab Jacking: – Prepare the area. Clean the surface and remove any debris or loose material. – Drill holes into the concrete surface where you want to inject the mixture. The size and spacing depend on the size of your loading dock and the extent of the damage. – Inject the mixture under the slab. Use a hydraulic pump that forces the mixture through a hose and into the holes. – The voids and gaps get filled beneath the slab and it raises back to its original position. Now, you can remove the injection equipment and patch the holes. Slab jacking is an effective and efficient way to repair concrete loading docks. It’s a cost-effective solution that can help you avoid the need for a complete replacement. Replacement or Reconstruction In some cases, when the damage is too severe or the loading dock has reached the end of its useful life, complete replacement or reconstruction may be necessary.
Pre-Purchase Building Inspections: Seeing the Unseen Before You Buy
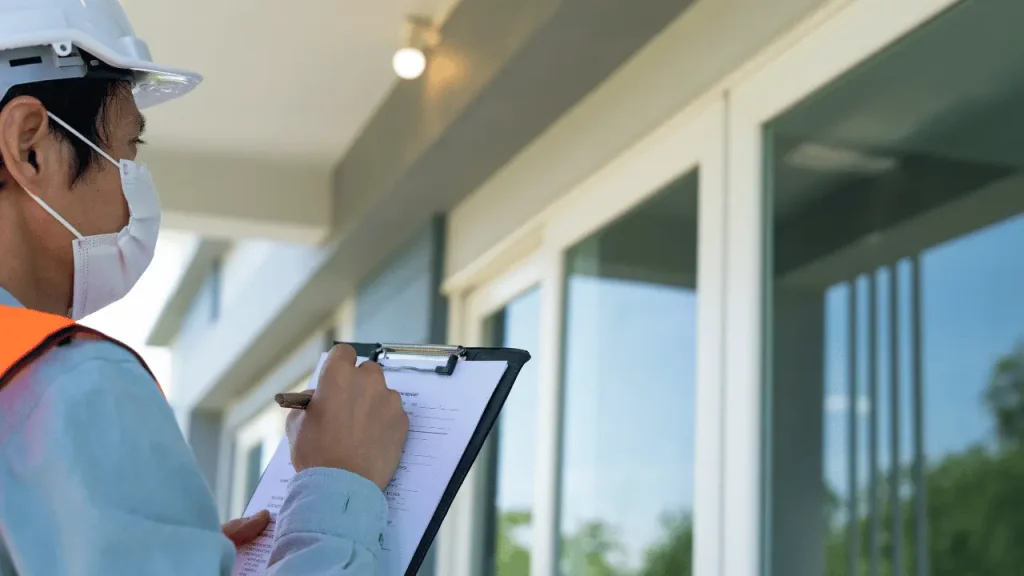
Are you thinking of buying a new house? Before you commit to your purchase, it’s important to get pre purchase building inspections done. Read on to find out more! What Does a Pre-Purchase Home Inspection Include? A pre-purchase home inspection is an important part of the buying process, as it can help to identify any potential issues before you commit to a purchase. Knowing exactly what a pre-purchase home inspection includes can help you to make an informed decision. First, it’s important to understand that a pre-purchase home inspection is not the same as a pre-listing inspection. Typically, the seller gets a pre-listing inspection done before putting the house on the market for their benefit. A pre-purchase home inspection is conducted by an independent third-party inspector for the benefit of the buyer. Benefits of a Pre-Purchase Home Inspection The goal of a pre-purchase home inspection is to identify and document any potential safety concerns and any structural damage or defects that may affect the value or habitability of the property. This includes checking permits, looking for signs of dampness, assessing levels of insulation, inspecting all electrical fittings, and inspecting any existing plumbing fixtures. The inspector may also check for asbestos or other hazardous materials, which could be present in older properties. In addition to these assessments, a professional building inspector will also look at structural elements such as walls, foundations, and roofs. They will also assess mechanical elements such as heating and cooling systems, water heaters, and smoke detectors. Finally, they will inspect exterior features such as balconies, decks, and stairs, as well as any other external features that may be included in the sale. At the end of the inspection process, you should receive a comprehensive report outlining any structural or mechanical issues that have been identified during the inspection process. This report will provide you with information that can help you make an informed decision about whether or not to proceed with the purchase. By understanding what is included in a pre purchase property inspection, you can ensure that your purchase decision is well-informed and backed up by evidence from a professional building inspector. Why Pre-Purchase Building Inspections Are Essential Pre purchase building inspections are essential to help you make an informed decision when buying a property. They provide you with an accurate assessment of the building’s condition, helping you to identify any major structural issues, safety hazards, or minor maintenance defects that may be present. Having a pre-purchase building inspection done can help you avoid any surprises and unexpected costs down the line. Furthermore, it will give you peace of mind that the building is safe for you and your family to live in. Read: GARAGE SAFETY INSPECTION: A STEP-BY-STEP GUIDE TO GET ONE DONE (2023) What Does a Commercial Building Inspector Check? When it comes to pre-purchase building inspections, it is essential to understand what a commercial building inspector will check. During the inspection, the inspector will check every accessible area, including the roof and the subfloor, looking for any cracks in walls and ceilings, as well as any signs of water damage. Additionally, they will check several documents such as planning applications, construction drawings, and specifications, as well as pre purchase pest inspection reports. This allows them to assess the general condition of the property and identify any potential issues that could cause problems in the future. By understanding what a commercial building inspector checks, you can gain peace of mind that your property is safe and up to code. The Benefits of Pre-Purchase Building Inspections Having pre purchase building reports done before signing a contract on a house can provide several benefits. Not only will it alert you to any existing issues within the home, but it will also provide you with bargaining power when placing an offer. Knowing the condition of the building also allows you to plan for any necessary repairs. Furthermore, the report can help you identify major defects, structural defects, safety hazards, and minor maintenance issues which may go unnoticed at first glance. Such knowledge is essential for any buyer who wants to make an informed decision about the purchase of a property. Read: A COMPLETE GUIDE TO 40 YEAR RECERTIFICATION FOR CONDO BUILDINGS (MIAMI-DADE AND BROWARD) What Does a Building Inspection Report Include? A building inspection report includes a thorough assessment of the property’s condition, including major structural defects, safety hazards, and minor maintenance defects. It is compiled by an experienced inspector and includes written evidence of their observations. The report will detail any major structural defects, such as movement or cracking, as well as any minor defects that may require repairs or maintenance. The pre purchase inspection report will also provide the potential buyer with information on the electrical system, the plumbing system, the heating and cooling systems, and the roof. The inspector will also check for signs of pests or other infestations. With all of this information in hand, the potential buyer can make an informed decision about purchasing a property. Cost of Pre Purchase Building Inspections The cost of a pre purchase building inspection varies depending on several factors such as the property’s location, age, and size. In regional areas, inspections can cost around $400, while in metropolitan areas, they can cost up to $1,000. These fees are a small price to pay considering the financial investment of purchasing a property and the potential cost of repairs, infestation removal, and other issues that may arise. The buyer and the inspector usually negotiate the pre purchase building and pest inspection cost, and the report will highlight any areas that may be expensive for the buyer to rectify. The actual cost of the inspection will depend on various factors mentioned above, i.e., the type of property, its size, and its location. What is a Structural, Mechanical, and Electrical (SME) Inspection? A Structural, Mechanical, and Electrical (SME) inspection is the most comprehensive pre purchase building inspection available. It involves a comprehensive check of the structure, electrical wiring, plumbing,
Garage Safety Inspection: A Step-by-Step Guide to Get One Done (2024)

Safety is of the utmost importance in any space, especially when it comes to garages. A garage safety inspection is an essential step to ensure that your garage is safe for use and meets all necessary regulations. As Benjamin Franklin famously said, “An ounce of prevention is worth a pound of cure”. Taking the time to perform an inspection can save you from costly repairs or even worse, injury or death due to an unsafe environment. So, let’s get started on learning how to conduct a comprehensive and effective garage safety inspection! What is a Garage Safety Inspection? It is an important step in ensuring the safety of any vehicle and its occupants. It is a thorough examination of the garage, including the structure, lighting, ventilation, and other safety features. The inspection should also include a check of the garage door, tracks, springs, and other components to make sure they are in good working order. Additionally, it is important to inspect the walls and ceiling for signs of deterioration or damage. When having an inspection performed, it is important to be thorough and take note of any potential risks or hazards. If any problems are found, they should be addressed immediately to ensure the safety of your vehicle and its occupants. Taking the time to conduct regular inspections can help keep your family safe and your car running smoothly. Why is it Important? A garage safety inspection is instrumental in keeping your family and home safe. It is essential to have a professional inspect your garage regularly to make sure it is up to code and that all safety measures are in place. Not only does this help protect your family from potential hazards, but it also helps protect your property from damage due to faulty wiring or other issues. Regular inspections can also help you save money by catching small problems before they become larger and more expensive to fix. Don’t wait until something goes wrong to get your garage inspected. Pre-Inspection Preparation Before you begin your inspection, make sure to gather all the necessary supplies such as a flashlight, ladder, and protective gear. Additionally, it is important to familiarize yourself with local regulations and standards that may apply to your inspection. This will help you identify any potential hazards or deficiencies that may exist in your garage. Besides, it is important to inspect the structure of the garage itself. Check for any signs of structural damage or deterioration, such as cracks in the walls or ceiling, loose boards, or water damage. Check for any potential fire hazards such as exposed wiring or combustible materials. And then, inspect any electrical outlets and make sure they are properly grounded and protected from moisture. Take the time to properly prepare for a garage safety inspection and familiarize yourself with local regulations. It will help you ensure that your garage is safe and secure. Inspecting the Exterior of the Garage When inspecting the exterior of your garage, check for any signs of structural damage such as cracks or deterioration. If you notice any, take action and repair it immediately to avoid further damage. Also, make sure to assess the condition of the roof. Assess the condition of your garage roof for signs of wear and tear, like missing shingles or water stains. Don’t let these issues become a bigger problem. Identify potential hazards and take action before they become a problem. Ensure your garage remains safe for years to come. Inspecting the Interior of the Garage Next, when you turn towards the inspection of your garage interior, you need to check for any electrical hazards that may be present. Make sure all wiring is properly installed and in good condition and ensure that all outlets are grounded and have a functioning circuit breaker. Additionally, look for signs of water damage or corrosion, as these can be indicative of a potential electrical hazard. As per U.S. Fire Administration, about 23,400 cases of electric malfunction fires were, along with other leading causes, responsible for residential fires. With this, you can imagine the amount of damage your house can receive if you were to neglect the safety of your garage since most of the machinery is usually kept inside the garage’s storage room. It’s also essential to assess the fire safety measures in place in your garage. Make sure all flammable materials are stored away from any heat sources and that any combustible liquids are stored securely. Additionally, inspect the smoke detectors to ensure they’re in working order and replace any batteries if necessary. Consider installing a fire extinguisher in the garage for added protection. Read: WHAT DOES A RESIDENTIAL GENERAL CONTRACTOR DO? Inspecting the Doors and Windows of the Garage Ensure your doors and windows are functioning flawlessly: no sticking or jamming. Every year, over 2,000 people suffer painful injuries due to faulty automatic garage doors. Broken springs are often to blame, leading to severe and even life-threatening accidents. (Source) You should also check if the locks are functioning properly and that they are secure enough to prevent unauthorized entry. Moreover, you should look for any signs of damage, such as cracks or warping, which can weaken the security of the door or window. If you find any issues with the doors or windows, you should have them repaired or replaced as soon as possible. It is also a good idea to install additional security features, such as deadbolts and window bars, to further protect your garage from intruders. Inspecting the Floor of the Garage When inspecting the floor of your garage, it’s important to look for signs of wear and deterioration. This is especially true for garages with concrete floors, as they are prone to cracking and other damage over time. If you notice any cracks or other damage, it’s important to take action right away. Cracks can be filled with concrete repair material, while other forms of damage may require more extensive repairs. Additionally, check the floor