
All you need to know about MEP design plans (2024)
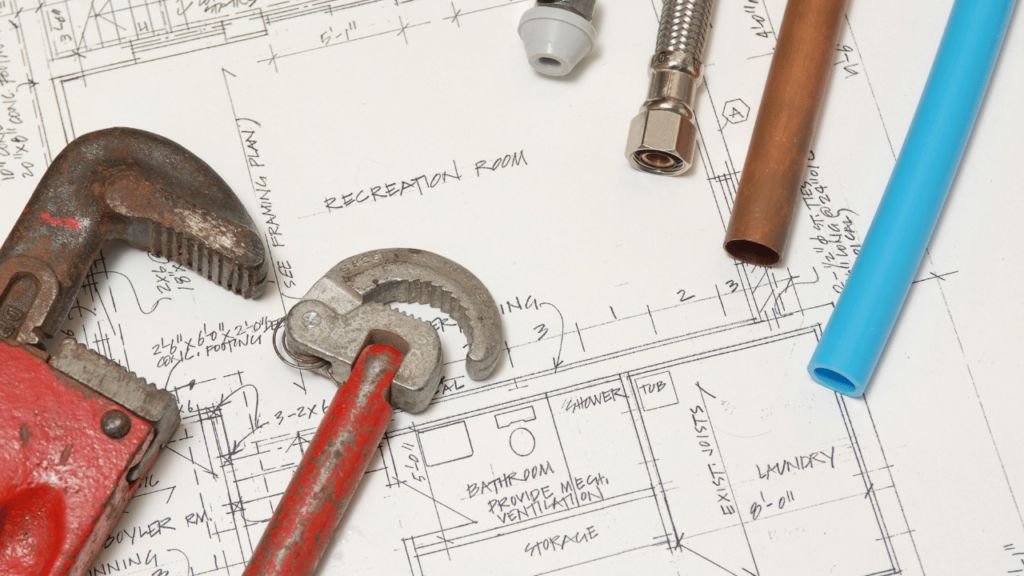
Are you in the construction business? If yes, then you must be aware of the importance of MEP plans. MEP stands for Mechanical, Electrical and Plumbing and these plans are essential for any construction project. Without them, the project cannot move forward. But do you know what exactly these are? Do you know how they can help you with your construction projects? If not, then don’t worry! In this blog post, we will be discussing MEP plans in detail. We will discuss what they are and why they are important. Furthermore, we will understand why Souffront could be the go-to solution for a top-quality MEP service. Let’s start with a short introduction to what MEP design plans are. What are MEP Design Plans? These are documents that outline the mechanical, electrical, and plumbing (MEP) systems for a building. The MEP plans provide a detailed description of how the systems will be installed and operated in the building. The plans include information such as the location of outlets, switches, and other components, as well as the size and type of materials used. They specify the layout of pipes, ducts, and conduits that are necessary to connect the various components of the system. MEP design plans also include diagrams that show how the systems will be connected to other parts of the building. These plans also provide information on energy efficiency measures, such as insulation and air sealing, that can help reduce energy costs. And finally, you receive guidance on how to maintain and repair the systems over time. Understanding Each Component in Depth Mechanical: Mechanical systems are responsible for providing heating, ventilation, and air conditioning (HVAC) to the building as well as controlling indoor air quality. Mechanical systems also provide hot and cold-water supply to the building and control the flow of water in the plumbing system. Further, mechanical systems are responsible for controlling the temperature of the building, providing ventilation to keep the air fresh, and controlling humidity levels. The components of a mechanical system include boilers, chillers, pumps, fans, ductwork, piping, valves, controls, and other equipment. All these components work together to ensure that the building is comfortable and safe for its occupants. Electrical: Electrical systems provide power to the building and its components, such as lighting, appliances, and outlets. These systems also provide safety features such as circuit breakers and ground fault interrupters. Electrical systems can be divided into two main categories: low voltage and high voltage. Typically, we use low voltage systems for lighting and small appliances, while we use high voltage systems for larger appliances and industrial applications. It is essential that we design our electrical systems with both, safety and energy efficiency in mind. Properly installed electrical systems should include proper grounding, circuit protection devices, and surge protection devices. Proper wiring techniques must also be used to ensure that the system is safe and efficient. Wiring connects different system components, while circuit breakers and switches regulate the flow of electricity throughout the system. Plumbing: Plumbing systems are responsible for providing water to the building, as well as removing wastewater. They also provide other services such as heating and cooling. The plumbing system consists of pipes, fixtures, valves, tanks, and other components. Pipes transport the water from the source to various locations within the building. Fixtures are devices that control the flow of water and provide access to it for use. Valves regulate the pressure and flow of the water in the system. Tanks store and supply water to the system. Designing a plumbing system requires careful consideration of local codes and regulations, as well as the building’s specific needs. It is important to consider factors such as water pressure, pipe size, materials used, and other design elements when designing a plumbing system. Proper installation is also essential for ensuring that the system functions correctly and safely. Who Needs MEP Engineering Design Services? MEP engineering design services are needed by anyone involved in a construction project. Architects, engineers, and contractors all need to have access to these plans to properly design and construct a building. In addition to providing detailed information about the systems within a building, these services can also help ensure that the building meets all local codes and regulations. Read: THE ULTIMATE SEAWALL INSPECTIONS GUIDE (2023) Benefits of MEP Plans 1. Help in boosting efficiency They are an essential part of any building project. They provide a comprehensive overview of the systems that will be used to power, heat, cool, and ventilate a building which helps engineers ensure efficiency in a variety of ways. The design plan should include an in-depth analysis of the building’s size, climate, and activities. By considering these factors, engineers can create systems tailored to the building’s exact needs – no energy wasted on unneeded features. Second, an efficient MEP plan will leverage the latest, cutting-edge technologies for maximum energy efficiency. Think LED lighting, high-efficiency HVAC systems, and other smart energy-saving measures. By strategically integrating these solutions into their designs, engineers can guarantee buildings are operating at peak efficiency. Regular maintenance and inspections are essential for an efficient MEP plan. Identifying potential problems early can help extend the life of systems, while regular inspections guarantee optimal efficiency. Don’t let minor issues become major headaches – stay ahead of the game with regular maintenance and inspections. 2. Lead to increased cost saving MEP plans help prioritize energy efficiency and resource optimization through the use of energy-efficient fixtures, appliances, and systems. This not only reduces energy consumption but also results in lower energy costs. Moreover, they can help keep buildings in good condition through proactive maintenance checks and inspections, reducing the risk of costly disasters and overall operational costs. The use of high-quality, long-lasting materials in construction also results in reduced maintenance needs and cost savings. All in all, you get a comprehensive approach to building management that not only saves money but also supports sustainability efforts. 3. Provide quality assurance When it comes to quality assurance in MEP
How much soil testing cost: factors and tips for 2024

Soil testing is an essential part of the construction process, yet many people overlook it or are unaware of its importance. Not only can proper soil testing save you time and money in the long run, but it can also ensure the safety and stability of your construction project. But with so many factors to consider, it can be difficult to budget for soil testing costs. In this post, we’ll cover the basics of soil testing cost and provide tips for budgeting and finding cost-effective options. Whether you’re a contractor, a developer, or a homeowner, understanding the cost of soil testing is crucial to the success of your construction project. From pre-construction testing to ongoing monitoring, soil testing can help identify any issues that could affect the stability of your foundation or the overall safety of your structure. Ignoring soil testing can lead to costly mistakes and delays down the line, so it’s important to budget for this important step from the outset. The Importance of Soil Testing in Construction Before diving into the specifics of soil testing cost, it’s important to understand why soil testing is necessary in the first place. Simply put, soil testing helps ensure the stability and safety of your construction project. The soil on which a structure is built plays a crucial role in the overall stability and integrity of that structure. Different types of soil have different properties and characteristics, and it’s important to understand how these properties will affect your construction project. For example, certain types of soil may be prone to settling or erosion, while others may have a high clay content that can make foundations prone to cracking. Soil testing helps identify any potential issues with the soil on your construction site, and can help you determine the best course of action to take. This could include selecting the right type of foundation, implementing proper drainage systems, or taking other measures to mitigate potential problems. Read: THRESHOLD BUILDING INSPECTION GUIDE: HERE’S WHAT YOU NEED TO KNOW Ignoring soil testing can lead to serious consequences. Without proper testing, you may end up with a foundation that is prone to settling or cracking, which can be costly to fix. Sometimes, the damage may be irreparable, and you may need to start the construction process over from scratch. In addition to the financial cost, skipping soil testing can also lead to delays in the construction process, which can be frustrating for all parties involved. To summarise, soil testing is an important step in the construction process that can save you time, money, and headaches in the long run. So, how much does it cost? Let’s take a look at some of the factors that can affect soil testing cost. Factors That Influence the Soil Testing? Here are a few key considerations: Location: The location of your construction site can affect the cost of soil testing. For example, soil testing in urban areas may be more expensive due to the higher cost of labor and materials. Type of soil: Different types of soil require different testing methods and equipment, which can affect the overall cost of soil testing. For example, testing soil with a high clay content may be more labor-intensive and therefore more expensive. Scope of testing: The extent of the soil testing will also affect the cost. A larger construction site with more complex soil conditions may require more extensive testing, which will drive up the price. Testing frequency: Ongoing soil testing during the construction process can also affect the overall cost. For example, testing during the foundation stage may be more expensive than testing during the framing stage. To get a better sense of soil testing costs for your specific project, it’s a good idea to get quotes from multiple providers. Don’t be afraid to negotiate or ask about any potential discounts or special offers. It’s also a good idea to ask about the provider’s experience and qualifications, as well as any additional services they may offer (such as consulting or project management). In addition to these factors, there are also certain cost-saving measures you can take. For example, you may be able to save on soil testing costs by conducting a smaller scope of testing, or by working with a reputable provider who can offer competitive pricing. Read: WHAT DOES A RESIDENTIAL GENERAL CONTRACTOR DO? Pre-Construction Soil Testing Soil testing isn’t just something that should be done during the construction process. It’s often more cost-effective to conduct soil testing before construction even begins. Pre-construction soil testing can help identify any potential issues with the soil on your construction site and allow you to take corrective measures before construction begins. For example, if the soil on your construction site is found to have a high clay content, you may need to take steps to stabilize it before building your foundation. This could involve adding sand or gravel to the soil or implementing a different type of foundation. By identifying these issues before construction begins, you can avoid costly mistakes and delays down the line. Pre-construction soil testing can also help you make informed decisions about the type of foundation to use, the size and design of your structure, and other important considerations. Ultimately, this can help you save money on your construction project by avoiding costly mistakes and unforeseen issues. But what about the cost of pre-construction soil testing? Is it more expensive than testing during the construction process? It’s worth noting that pre-construction soil testing can be more expensive than testing during construction. This is because it often requires more extensive testing, as well as additional consulting and project management services. However, the upfront cost of pre-construction soil testing can be offset by the potential cost savings it offers in the long run. Pre-construction soil testing can be a valuable investment that pays off in the long run. While it may cost more upfront, it can help you avoid costly mistakes and delays down the line, making it well worth the
The Ultimate Seawall Inspections Guide (2024)

In this comprehensive guide to seawall inspections, we’ll examine these evaluations’ role in protecting your property and the surrounding area. We will explore the various types of inspections available, how often they should be performed, and the components of a seawall inspection. We’ll also explore the options for seawall repair and provide tips for maintaining your seawall to extend its lifespan. What Are Seawall Inspections? A seawall inspection comprehensively evaluates a seawall’s condition and structural integrity. A seawall inspection aims to identify any issues or problems with the seawall. Additionally, it helps determine the necessary repairs or maintenance to keep it in good working order. Exploring the Different Types of Seawalls: Vertical, Curved, and Mound Coastal erosion and wave damage can pose significant threats to properties and infrastructure located along the coastline. To protect against these hazards, many communities and coastal businesses have turned to seawalls as a solution. Seawalls are structures built along the shoreline that absorb the energy of incoming waves and prevent erosion. So, let’s look at the three main types of seawalls and understand them in depth. Vertical Seawalls: A Solid Solution for Coastal Protection A vertical seawall is a coastal defense structure that protects against erosion and wave damage. Professionals construct them by driving vertical pilings into the ground. Further, they attach a facing material, such as concrete or stone, to the front of the wall. The purpose of a vertical seawall is to absorb the energy of incoming waves and prevent them from eroding the shoreline. It also prevents causing damage to nearby structures. These seawalls are often used in areas with high wave energy and strong storms. They provide a more robust and effective form of protection than other seawalls. However, they can be expensive to build and maintain. They may negatively impact the local ecosystem by disrupting the flow of sand and sediment. Despite these challenges, vertical seawalls are a common choice for coastal protection in many parts of the world. Curved Seawalls: A Flexible Option for Coastal Defense A curved seawall, also known as a revetment, is a coastal defense structure that shields against erosion and wave damage. It’s constructed by placing large, curved blocks or stones in series along the shoreline, creating a semi-circular or crescent-shaped structure. The purpose of curved seawall is to absorb the energy of incoming waves and prevent them from eroding the shoreline. Also, prevent causing damage to nearby structures. Unlike a vertical seawall, which is a solid wall, a curved seawall allows water to flow through and around it. This reduces the impact of waves on the shoreline. This can be beneficial for the local ecosystem, as it allows for the natural flow of sand and sediment. Additionally, curved seawalls are often more aesthetically pleasing than vertical seawalls. It’s because they blend in with the natural surroundings and do not block the view of the ocean. However, a limitation is that they may not be able to withstand strong storms, as well as other seawall types. In addition, the movement of the individual blocks may require more frequent maintenance to ensure the structure remains effective. Mound Seawalls: A Natural Approach to Coastal Protection A mound seawall, also known as a sand-filled seawall, is another coastal defense structure protecting against erosion and wave damage. Experts construct them by placing a large mound or embankment of sand along the shoreline. Then, they cover it with a protective layer of vegetation, such as grass or plants. The purpose of a mound seawall is to absorb the energy of incoming waves and prevent them from eroding the shoreline. Or, even cause damage to nearby structures. A key benefit of a mound seawall is that it allows for the natural flow of sand and sediment. This can help to maintain the health of the local ecosystem. You may witness leveraging mound seawalls in conjunction with other coastal defenses like breakwaters or groins to protect against erosion. But they may not be suitable for steep slopes or cliffs. The weight of sand and vegetation may not be sufficient to hold the structure in place on a steep slope. This leads to instability and potential failure. In addition, the construction of a mound seawall on a steep slope may be more difficult and costly. This is due to the challenging terrain. These factors may limit the use of mound seawalls in certain areas. Materials to Leverage When Building a Seawall The following are the most commonly in-use materials when building a seawall: Concrete: Concrete is popular for seawalls because it is durable and long-lasting. However, installing it can be expensive and may not be the most aesthetically pleasing option. Steel: Steel is another strong and durable material used to build seawalls. It is resistant to corrosion but can be more expensive to install than other materials. Timber: Timber is a natural material that can be used to build seawalls. It is relatively inexpensive and easy to work with, but it may not be as durable as other options and may need to be replaced more frequently. Stone: Stone is a natural material that can be used to build seawalls. It is durable and long-lasting, but it can be expensive to install and may not be the best choice in areas with high wave action. When deciding on the material for a seawall, it’s important to consider the location, surroundings, budget, and desired appearance. It’s advisable to seek the advice of an engineer or contractor to identify the most suitable option for the specific project. Some Common Seawall Inspection Types Several types of seawall inspections may be performed, depending on the specific needs of the structure and the area it is protecting. Some common types include: Visual inspection: A visual inspection is a general evaluation of the seawall’s condition. During a visual inspection, the seawall examination provides for any visible signs of damage, such as cracks, erosion, or other defects. Structural inspection: A structural inspection is a more in-depth evaluation of the
Why Garage floor resurfacing is best option for you?

Is your garage floor looking a little worse for wear? Are you considering replacing it completely but don’t want to pay the high costs involved? Then garage floor resurfacing might be the perfect option for you! In this blog post, we’ll cover why it’s a great choice and how you can get started. The basics: what is garage floor resurfacing and how does it work? It is a process of renewing the surface of an existing concrete garage floor. The process involves filling in any cracks or holes with filler material, grinding down the surface for a smooth finish, and then applying a new coating of epoxy. Epoxy is a robust and durable chemical solution that allows customization for any space while demonstrating high resistance to impacts. It is also easy to clean and maintain and provides long-lasting results. By resurfacing your garage floor, you can restore its original beauty and protect it from further damage, while also saving time and money over replacing the entire floor. Cost comparison: the benefits of choosing to resurface over replacing In general, resurfacing a garage floor is usually a more cost-effective option than replacing it. Here are a few reasons why: Cost savings: Replacing a garage floor can be an expensive proposition, especially if the concrete slab needs to be removed and a new one poured. On the other hand, resurfacing a garage floor typically costs less because it involves applying a new layer of material over the existing surface. Depending on the type of resurfacing material used, the cost can range from $3 to $12 per square foot, while the cost of replacing a garage floor can range from $6 to $20 per square foot or more. Quicker turnaround time: Resurfacing a garage floor typically takes less time than replacing it, which means you can start using your garage again sooner. Typically, resurfacing a garage floor takes just a few days, depending on the garage’s size and the complexity of the project.In contrast, replacing a garage floor can take a week or more. Less disruption: Resurfacing a garage floor typically causes less disruption than replacing it because it doesn’t involve tearing out the existing floor. This can be especially beneficial if you use your garage for storage or as a workspace. Less waste: Resurfacing a garage floor generates less waste than replacing it because it doesn’t involve tearing out the existing floor. This can be a more environment-friendly option and can also save you money on disposal fees. Why do you need garage concrete floor resurfacing? The following are reasons why you might need to consider garage concrete floor resurfacing: Repair damage or wear One important reason to consider garage concrete floor resurfacing is to repair damage or wear that has accumulated over time. Garages are subjected to heavy use and may be exposed to the elements, which can cause wear and tear on the floor. Accidental spills or drops can also contribute to damage. Resurfacing can help to repair these damages and restore the integrity of the floor, ensuring that it remains safe and functional for years to come. Without resurfacing, these damages can become more extensive and costly to repair, making them an important investment in the long-term health of your garage. Provide improved appearance Another compelling reason to consider garage concrete floor resurfacing is the improved appearance it can provide. It’s not uncommon for a garage floor to become worn, stained, or otherwise unsightly over time. Resurfacing can give your garage floor a fresh, polished look, making it more inviting to use and enhancing the overall appearance of your space. This can be especially beneficial if you use your garage for entertaining, working on projects, or as a home gym. A resurfaced floor can make these activities more enjoyable and give you a sense of pride in your space. Additionally, a well-maintained garage can add value to your home, making it more appealing to potential buyers. Enhance durability Garage concrete floor resurfacing can also enhance the durability of your floor, making it more resistant to cracks, chips, and other forms of damage. As concrete ages, it can become more prone to these types of issues, which can compromise the structural integrity of the floor and create safety hazards. Resurfacing can help to strengthen and protect the floor, making it more durable and able to withstand heavy use and exposure to the elements. This can be especially important if you use your garage to store heavy equipment, vehicles, or other items that put a lot of strain on the floor. Easier maintenance One practical benefit of garage concrete floor resurfacing is the easier maintenance it can provide. A damaged or worn floor can be difficult to clean and maintain, requiring extra time and effort to keep it looking presentable. In contrast, a resurfaced floor is much easier to clean and maintain. It can be swept, mopped, or hosed down with minimal effort, saving you time and energy. This can be especially important if you use your garage for activities that generate a lot of dirt, grime, or other types of messes. By investing in resurfacing, you can enjoy a cleaner, more organized garage without the hassle of constant upkeep. Improved safety Improved safety is another important reason to consider garage concrete floor resurfacing. A smooth, even surface is essential for preventing accidents or injuries in any high-traffic area, and a garage is no exception. Resurfacing can help to eliminate trip hazards and improve traction, making it easier and safer to navigate the space. This can be especially important if you have children or older family members who use the garage, as they may be more susceptible to falls or other types of accidents. By investing in resurfacing, you can help protect the well-being of your loved ones and reduce the risk of accidents or injuries in your garage. Increased value Increased value is another potential benefit of garage concrete floor resurfacing. A well-maintained, attractive garage can add value
A Complete Guide To 40 Year Recertification (Miami-Dade and Broward Counties)

A 40-year recertification is a prerequisite for all structures in the counties of Miami-Dade and Broward, including condo buildings. Talking about a 40 year inspection and recertification process for condos, its importance can’t be overstated, given that it involves the safety of hundreds of thousands of people. In fact, if data from the Community Association Institute is any suggestion, there are over 1.5 million condominium units across Florida. And among these condo units, 37 percent of them are present in the two counties of Broward and Miami-Dade. As such, you shouldn’t be surprised when we say that condo buildings are among the top priorities for structural engineer inspection and recertification. Furthermore, in the aftermath of the tragic Surfside condo collapse, the overall safety of condominium buildings has come into focus. After all, the Champlain Towers South building was undergoing a 40-year structural inspection at the time of its collapse. Thus, the latest round of changes to the recertification scheme in Miami-Dade was much called for. Now, if you are a member of your condominium board or association, the onus is on you to get a timely 40-year recertification inspection. Also, if your condo building is in Miami-Dade, you’ll need to comply with the new county rules calling for a 30-year recertification instead of 40. And while this may sound like a task, we have compiled everything that you need to know for hassle-free condo recertification. Don’t Miss the Deadline; Get Your 40-Year Inspection Done Today! Missing the inspection deadline can lead to penalties and some severe consequences. Not to forget your building’s structural integrity and occupants’ safety is at stake too. Schedule an inspection and have that peace of mind. Request A Quote What is a 40 year recertification? As the name suggests, a 40 year inspection and recertification is a mandatory exercise for all buildings in the two Florida counties of Miami-Dade and Broward. Think of it as an essential safety check conducted by qualified professionals, such as licensed engineers and architects, who identify potential problems that may arise as your building ages. For instance, let’s say you live in a condominium that’s 40 years old. Now, there are chances that this condo might have developed structural problems, roofing cracks, etc., during these many years. So, a 40 year structural inspection will detect these problems and allow you to fix them, thus avoiding safety hazards and keeping you compliant with local codes. Similarly, you’ll need an inspection and recertification every 10 years after the first inspection. This ensures your aging condominium continues to remain safe and that its major systems and components meet required standards. Which buildings need a 40 year inspection and recertification? The type of buildings included in the recertification program differs slightly in Miami-Dade and Broward. Here are the building types that need recertification: Miami-Dade: All buildings expect single family homes sized up to 2000 sq ft and with 10 or less occupants. Broward: All buildings expect single-family homes sized less than 3500 sq ft. Also, Federal and State buildings built on Indian Reservations in Broward County need not be inspected. In short, nearly all buildings in these two counties are required to get a 40 year inspection and obtain a recertification. Moreover, all condominiums notwithstanding their size need to be inspected and certified. What are the new 30/40 year recertification rules for condo buildings in Miami-Dade? Post the Surfside condo collapse, there had been strong demands to change the existing recertification inspection rules. And Miami-Dade county responded with a slew of changes to the 40 year structural inspection scheme, effective June 2022. Among the key highlights of the changes in rules is a 30/40 year recertification inspection requirement for all structures, condos included. That means you’ll have to get your condominium building thoroughly inspected and recertified in its 30th year. Further, recertification of your condo building will be carried out every ten years thereafter, and so the name 30/40 year recertification. But there’s a catch with the new Miami-Dade county rules, something you should be aware of. If your condo was built anywhere between 1983 and 1986 and has a 40-year recertification due before March 31, 2024, the new rules won’t apply to it. Meaning, the building needs to get a recertification certificate in its 40th year. If the condominium was constructed between 1983 and 1992 and is about to turn 30 before March 31, 2024, a recertification will be done as per the new rules. If your condo building built between 1983 and 1997 is located within three miles of the coast, it needs a mandatory inspection and recertification before December 31, 2024. Also, for all condos within three miles of the coast, a 25-year recertification timeline will apply instead of 30. What is the cost of 40 year condo recertification? The cost of 40 year recertification for condo buildings varies for different municipalities in Miami-Dade and Broward. For instance, municipalities like Miami Beach, Miami, Surfside, Hialeah, etc., oversee the recertifications in their jurisdictions, and each levies a different fee for the process. For unincorporated areas of Westchester and Kendall, Miami-Dade County’s Regulatory and Economic Resources department is in charge of overseeing recertification and charging a fee. Recertification charges apart, your municipality may even charge you an additional fee for application, an extension of recertification, a late fine, and more. Here’s a fee comparison of different municipalities for a better understanding: While the municipality of Miami requires you to pay a fee of $276 for recertification, in Fort Lauderdale, you need to pay a $300 fee while submitting an inspection report. Similarly, Fort Lauderdale levies a fee of $500 for every three months of extension, while Miami Beach charges a $600 fee for an extension of six months. Further, you’ll also have to factor in the cost of hiring an expert for the structural engineer inspection, along with possible building repair and restoration requirements. Will the recertification process increase your monthly HOA fee? As an owner of a
Threshold Building Inspection Guide: Here’s What You Need to Know

Are you looking for a reliable and affordable way to ensure the safety of your buildings? If so, you’ll want to consider using threshold building inspection. It helps you identify and prevent dangerous structural problems, ensuring the buildings are safe and compliant with all applicable regulations. In this blog, we will discuss threshold building inspection, certified inspectors, and their roles and best practices in-depth. By the end of the post, you’ll be aware of the process and the person to hire for such inspections. Let’s get started. What is a Threshold Building? As per Florida Statutes 2022 (Chapter 553 – Section 71), a threshold building refers to ” any building which is greater than three stories or 50 feet in height, or which has an assembly occupancy classification as defined in the Florida Building Code which exceeds 5,000 square feet in area and an occupant content of greater than 500 persons.” What is a Threshold Building Inspection? It is a special type of inspection mandated by the state of Florida on any building that is more than three stories or 50 feet in height or has an assembly occupancy classification exceeding 5000 square feet. This inspection aims to ensure the structure’s quality and safety, and a certified special inspector must perform it. In addition, the enforcing agency may only issue a building permit for the construction of any threshold building to a licensed general contractor who is also certified in structural engineering in the state of Florida. The inspection must take place before construction begins. Further, it will involve more inspections than just the minimum required by the state. Why is Threshold Inspection Necessary? Threshold inspections are important to ensure that the quality of a building takes no hit. Without these inspections, buildings may become structurally unsound and unstable due to deterioration over time. This can lead to safety hazards such as collapsing walls, leaking roofs, or failing foundations. Additionally, insufficient insulation or ventilation can cause uncomfortable living conditions in the home. Threshold inspections help identify any issues before they become significant problems and can even save you money in repairs down the line. A thorough examination will check for any signs of water damage, structural weakening, pest infestations, and other potential problems. By addressing any issues and fixing them immediately, you can avoid costly repairs and keep your home safe and comfortable for years to come. Who is a Threshold Building Inspector? As per Florida code 61G1-25.003, a licensed structural engineer can serve as a threshold design inspector. The minimum qualifying criteria for a threshold building inspector are as follows: The inspector must have proof of current licensure in good standing as an architect in the State of Florida. They must possess three years of experience in performing structural field inspections on at least three threshold type buildings, obtained within ten calendar years preceding submission of the application and evidenced by letters of recommendation from three architects or engineers in the State of Florida, one of whom must be certified as a threshold building inspector. Self-certification as to the competency of the applicant to perform structural inspections on threshold buildings. A threshold building inspector is responsible for verifying that all building components are up to code, including foundations, walls, roofs, windows, and doors. The Roles and Responsibilities of a Threshold Building Inspector Threshold building Inspectors are certified and licensed engineers or architects specializing in inspecting threshold buildings. Their role is to ensure the safety of a building by performing inspections to verify that the construction meets building codes and other regulations. In addition, they inspect all aspects of the building, including its structure, foundation, mechanical systems, electrical systems, fire protection systems, and more. They will develop an inspection plan based on local codes and regulations. With the approval of the local building official, they can perform inspections throughout the entire construction process to ensure it’s correct and safe. During their inspections, they look for any code violations or defects in the quality which could pose a risk to people or property. They perform inspections during construction and final checks after completion to confirm that all requirements get met and to address the issues before they can allow occupancy. The local building official must review the reports of the threshold building inspector, which include in-depth records of each inspection and any issues they find with recommendations for improvements or repairs, if necessary, before granting occupancy. Benefits of Hiring a Threshold Building Inspector Hiring a threshold building inspector ensures your building is safe and up to code. There are many benefits to hiring a certified threshold inspector, including protecting your investment, avoiding costly repairs, and ensuring the safety of both the building’s occupants and its surroundings. They can detect any significant structural issue that may lead to expensive repairs The primary benefit of having a threshold building inspector examine your property is that they can detect any potential structural issues or deficiencies that could lead to costly repairs or other problems down the road. This includes inspecting for foundation cracks, roof leaks, gas and water line issues, faulty wiring, and plumbing problems. By discovering these issues early on, you can save yourself time and money as well as avoid potential harm in the future. They make sure they have all the necessary permits and follow regulations A qualified inspector will protect your property by ensuring that all necessary permits are there and any renovations or additions meet the necessary codes. Furthermore, they will know exactly what codes need to be met for construction projects. They will inspect for proper ventilation systems, fire safety systems, sprinkler systems, and other safety features as per law so you can be sure your property is safe from any legal ramifications due to non-compliance with local regulations. They make sure those living in the building remain safe from any potential hazard Finally, having an experienced threshold building inspector ensures that everyone living or working in the building remains safe from potential hazards
What Does A Residential General Contractor Do?

To have your dream home built, you will need the services of a residential general contractor. This person is accountable for ensuring that all daily tasks are completed successfully, including checking work for errors and meeting all deadlines. In addition, the general contractor is responsible for coordinating with and meeting with other construction specialists such as engineers, architects, interior designers, and so on. Every building project needs a reliable general contractor. Many people hire a residential general contractor without really knowing what they do. In this blog post, we will explain what a general residential contractor does, the benefits of hiring one, tips to hire the right professional, and what you can expect from them. By the end of this post, you should have a good understanding of these contractors and how they can help you with your residential project. Who is a Residential General Contractor? A residential general contractor is a professional who manages a home’s construction, remodeling, or addition. They work with subcontractors to ensure the job is completed on time and within budget. In some cases, they may also be involved in the design process. Licensing requirements vary by state, but most require that contractors be licensed. This allows them to meet safety and quality standards required by the state where they work. When selecting such a professional, it is crucial to consider their experience and qualifications. What Does A Residential General Contractor Do? A residential general contractor is a professional who manages and coordinates all aspects of a construction project. They are responsible for hiring, supervising, and coordinating subcontractors; ordering materials; making sure the job is completed on time and within budget. This means that general residential contractor usually work on home renovations, additions, or new construction projects. Homeowners may hire them to manage their renovation or construction project from start to finish, or they may choose to hire individual contractors for each task. However, managing an entire renovation or construction project can be much more complex than managing the tasks of individual contractors. That’s why it pays to have a reputable residential general contractor on your team! An excellent residential general contractor will have years of experience in their field and will be well-versed in all aspects of remodeling or constructing a home. They should also have a team of experienced professionals capable of completing each task on schedule and within budget. For example, to find a good residential general contractor, look for firms with high ratings on Google, Yelp or other contractor review sites, or ask friends or family who have used them in the past. The Benefits of Hiring a Residential General Contractor Hiring a residential general contractor can be a great way to save money, have schedule flexibility, and ensure quality work. First and foremost, you will be able to save money. A good general contractor can work with you to schedule the job so that it is completed as quickly and efficiently as possible while still meeting your specifications. Additionally, they will be able to subcontract certain tasks if needed to keep costs down. This can often result in significant cost savings over trying to do the work yourself or working with small contractors. Another great benefit of hiring a general contractor is that you will have full control over the project from start to finish. This means you can adjust as needed and ensure that the end product meets your standards. If you’re looking for someone who will take care of everything for you, then hiring such an individual is the perfect solution for you. But, if working with a general contractor isn’t for you, then there is always the option of doing the work yourself – but this may require more time and effort than simply choosing a qualified professional! Services Offered by Any Top Residential General Contractor The following are some of the services that great residential general contractors offer: Design Build Professionals aim for a well-curated design-build process when working with you. This method makes it possible to finish construction projects more quickly and with less effort. More well-known advantages of design-build include: Single source responsibility. Early cost establishment. Improved efficiency. A team approach. A reduction in change orders. Enhanced risk management. Pre-Construction Services Making well-informed choices from the get-go of a building project is essential to realizing your ideal outcome. To do this, it’s important to have the appropriate budget, timeframe, and schedule in mind from the beginning of every project. Therefore, the general contracting team will help you bring your ideas to reality throughout the planning phase. Residential Details are given priority in every home improvement job. When it comes to home building, a professional/certified contracting team will value and comprehend the highest standards of quality, including appreciating the level of human engagement required in excellent construction. In most cases, they will build a design to your specifications. The most common residential services among the top general contracting companies include renovation and remodeling. Construction Management The best general contractors stand out from the crowd because of the personal investment they make in the success of each project. They use individualized strategies from the planning stages all the way through execution, with the intention of outperforming your expectations. In addition, they would have the personnel and expertise to provide solutions for more extensive or commercial projects as well. Read: THRESHOLD BUILDING INSPECTION GUIDE: HERE’S WHAT YOU NEED TO KNOW What To Expect When Working With A Residential General Contractor When working with a residential general contractor, you can expect them to manage the construction project from start to finish. This includes obtaining all the necessary permits, hiring subcontractors, and coordinating with other professionals (engineers, architects, etc.). In most cases, the general contractor will not be involved in the construction work. They will instead focus on ensuring that the project stays on budget and is completed on time. It is essential to be patient and remember that they may have their methods and procedures. You must
The Ultimate Guide to Concrete Restoration Process and Methods

Concrete is one of the most versatile and commonly used construction materials in the world. It is strong, durable, and can be used in various applications. However, concrete is not indestructible. Over time, it can crack, chip, and break down. Concrete restoration contractors specialize in repairing and restoring concrete surfaces. They have the training, experience, and equipment to properly assess the damage and determine the best course of action. In many cases, they can help increase your concrete surfaces’ life. In this blog, we will discuss complete concrete restoration in detail and even understand how to find the right concrete restoration contractor. Let’s get started. What is concrete restoration? The term “concrete restoration” refers to the practice of fixing up worn-out slabs of concrete. It is possible to restore concrete to its former state, which is especially useful for walkways and roads that have been worn and faded over time. The terms “concrete repair” and “concrete restoration” are not interchangeable. The structural problems with the concrete may be fixed, but the aesthetic value of the concrete will not be considered throughout the restoration process. Both of these advantages can be gained through concrete restoration and repair. Different methods of concrete restoration There are many different methods of concrete restoration, each with its advantages and disadvantages. The most common methods are: Power washing: Power washing is a popular method of concrete restoration because it is relatively quick and inexpensive. However, power washing can damage the surface of the concrete if not done carefully. Sandblasting: Sandblasting is another popular method of concrete restoration. It is more expensive than power washing, but it can remove even the toughest stains from concrete. Chemical cleaning: Chemical cleaning is an effective way to remove stains from concrete, but it can be dangerous if not done properly. Mechanical abrasion: Mechanical abrasion is a process that uses abrasive pads or brushes to remove stains from concrete. This method is more expensive than power washing or sandblasting, but it is less likely to damage the surface of the concrete. The Benefits of Concrete Restoration Services Restoration is key to maintaining its structural integrity and longevity when it comes to concrete. Frequently restoring your concrete can avoid costly repairs down the line and keep your property looking its best. Here are some of the top benefits of concrete restoration: Improved Aesthetics: Whether your concrete is starting to show its age or has been damaged, restoration can drastically improve its appearance. This is especially important if your concrete is visible to customers or guests. Increased Durability: One of the most important benefits of concrete restoration is increased durability. By filling in cracks and repairing damage, you can help extend the life of your concrete and prevent future problems. Enhanced Safety: Another big benefit of concrete restoration is enhanced safety. Cracks in concrete can pose a trip hazard, so it’s important to repair them as soon as possible. In addition, damaged or deteriorating concrete can be structurally unsound, so it’s important to have it restored by a professional before it becomes a safety hazard. Improved Value: Not only will restoring your concrete improve its appearance and durability, but it will also add value to your property. If you’re considering selling your home or business, potential buyers will be impressed by the newly restored concrete and willing to pay more for the property. Peace of Mind: When you restore your concrete, you can know that you’ve done everything possible to maintain the structural integrity of your property. This is especially important if your concrete is located in an area that experiences extreme weather conditions. You might also want to read: Concrete Restoration Services: A Robust Guide to Undergo (2022) How does hiring a great concrete restoration contractor benefit you? A great concrete restoration contractor will provide you with a written estimate that includes the scope of work to be performed, the materials to be used, and the expected cost. They will also work with you to develop a timeline for the project. Once the project is underway, they will keep you informed of progress and address any concerns you may have. Upon completion, they will walk you through the finished work and provide maintenance instructions. Here are a few more benefits of having a great concrete restoration contractor by your side:- Save money: They can help you save money on your project. They can also help you avoid costly mistakes and ensure that your project is completed on time and within budget. Expert guidance: They can help you achieve the desired results for your project. A concrete restoration professional can provide expert advice and guidance throughout the restoration process, ensuring that your project is completed to the highest possible standard. Help you make better decisions: A great concrete restoration contractor will also have a wealth of experience and knowledge to share with you, helping you to make informed decisions about your project. They will be able to advise you on the best materials and methods to use, as well as give you an insight into the latest trends in concrete restoration. The Process of Concrete Restoration Concrete restoration is a multi-step process that includes: Assessment: The first step in the concrete restoration process is to assess the condition of the concrete. This assessment will help to determine the best course of action for restoring the concrete. Cleaning: Once the assessment is complete, the next step is to clean the concrete. This step will remove any dirt, grime, or other debris that may be present on the surface of the concrete. Repair: After the concrete has been cleaned, any necessary repairs will be made. This may include filling cracks, holes, or other damage caused by weathering or wear and tear. Protection: Once the repairs have been made, a protective coating will be applied to the surface of the concrete. This coating will help to protect the concrete from future damage and weathering. Also read: How structural inspections can prevent accidents and grow building
How structural inspections can prevent accidents and grow building life
Structural inspections are important for keeping buildings safe and ensuring they will last many years. By inspecting the structure of a building, engineers can identify potential problems that could lead to accidents or damage. In this blog post, we will explore how structural damage inspection can prevent accidents and grow building life. Finally, we will discuss why they are important, what they involve, and how they can benefit homeowners and businesses. You might also want to read: An Ultimate Guide To Home Structural Engineer Inspection What are structural inspections? Structural inspections are periodic reviews of a building’s condition. They help to identify potential problems so they can be fixed before they cause accidents or damage to the building. Over time, buildings settle, and materials degrade. It can lead to cracks in walls or ceilings, uneven floors, and doors or windows that don’t close properly. These problems can be dangerous for occupants and also lead to further damage to the building. Regular inspections can help catch these problems early on before they become major issues. In some cases, small repairs can be made to fix the problem. In other cases, the issue may require more extensive work. But catching problems early can help prevent accidents and save money in the long run. There are two main structural inspection types: visual and manual testing. Visual inspections involve simply looking at the building to identify any obvious problems. Manual testing involves using specialized equipment to test for cracks or movement in walls or floors. Both types of inspections are important in order to get a complete picture of the building’s condition. In most cases, inspectors will do both types of inspections during each visit. Structural inspection frequency will vary depending on the type of building and its age. For example, older buildings or those with known issues may need to be inspected more often than newer buildings. Importance of structural inspections Structural inspections are important because they can help prevent accidents and improve the lifespan of buildings. By inspecting the structure of a building, engineers can identify potential problems that could lead to accidents or cause damage to the building over time. Regular inspections can also help extend the life of a building by catching potential problems early and addressing them before they become serious issues. Ultimately, regular structural inspections can help keep people safe and protect building investments. Ref Data Ref:- List of building and structure collapses How often should buildings be inspected? Building inspections are a vital part of maintaining a safe and functional structure. How often a building should be inspected depends on several factors, including its age, use, and local building codes. For most buildings, an annual inspection by a qualified professional is sufficient. However, older buildings or those with known issues may need to be inspected more frequently. Buildings that are subject to high winds or seismic activity should also be inspected more frequently to ensure they are safe. Local building codes will also dictate how often inspections must be performed. In some cases, a residential structural engineer inspection may need to be done more than once a year. Following all local code requirements is important to avoid penalties or fines. If you are unsure how often your building should be inspected, consult a qualified professional or your local building department. They can help you determine the best inspection schedule to keep your building safe and up to code. What are the consequences of not conducting regular structural inspections? If you don’t conduct regular structural inspections, the consequences can be serious: Without routine maintenance, small problems can become big ones quickly. For example, a tiny crack in a support beam could grow and eventually cause the beam to collapse. If you don’t know about potential problems, you can’t fix them before they cause an accident. For example, if you didn’t know that a support beam was cracked, you wouldn’t be able to fix it before it collapsed and injured someone. Without regular inspections, you won’t be able to keep your building in good condition, which will shorten its lifespan. How can property owners prepare for a structural inspection? As a property owner, it is important to be proactive in maintaining the structural integrity of your building. A structural inspection can help identify potential problems that could lead to incidents or damage to your property. Here are some tips on how to prepare for a structural inspection: Schedule an appointment with a qualified inspector in advance. It will ensure that you have enough time to prepare for the building damage inspections and make any necessary repairs. Make sure all areas of the property are accessible to the inspector, including removing any debris or obstructions that could impede the inspection process. Be prepared to answer questions about the history of the property and any recent renovations or repairs that have been made. The inspector will use this information to gauge the condition of the structure. Have any relevant documents, such as blueprints or building plans, readily available. These can help the inspector understand the property’s layout and identify potential problem areas. Be prepared to make necessary repairs after the inspection. The inspector will provide a report detailing their findings and recommendations for repair You might also want to read: Hiring the Best Structural Engineer for your Residential or Commercial Property What will a professional inspector look for during an inspection? A professional inspector will look for a variety of things during an inspection. Still, some of the most important factors they will consider are the structure’s condition, the foundation’s stability, and the condition of any mechanical or electrical systems within the building. They will also be paying close attention to any signs of water damage, mold, or rot, as these can all be indicative of serious problems that could lead to accidents or further deterioration of the building. Conclusion We hope this blog has helped you understand the importance of structural inspections and how they can prevent accidents and
Things to know while choosing an Infrared Thermography service provider
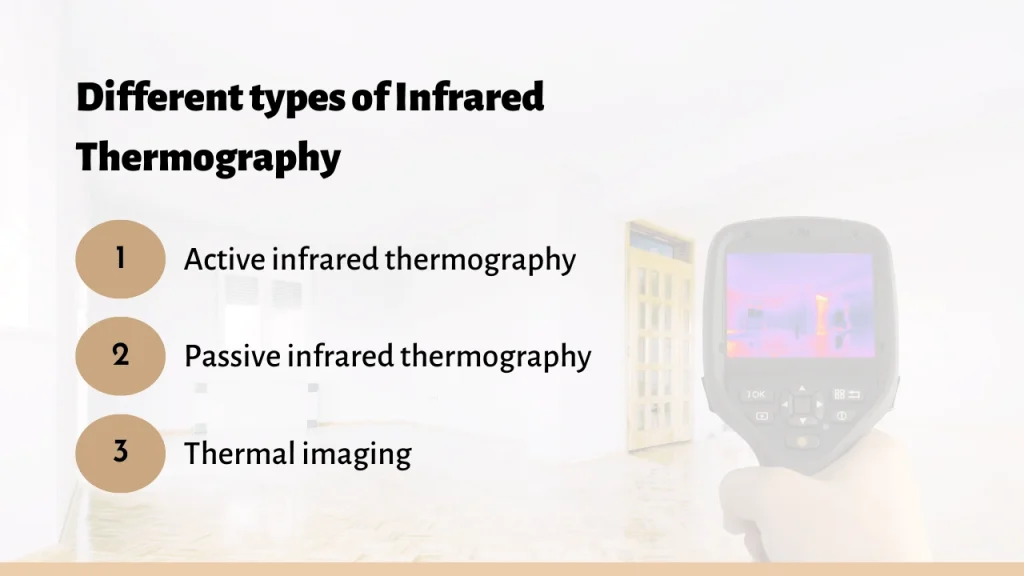
When it comes to choosing an infrared thermography service provider, there are a few things you need to keep in mind. First, this technology is often used in a variety of industries, from manufacturing to healthcare, and it’s important that you choose a company that can provide the services you need. Through this blog, we will understand the points to know while opting for an infrared thermography service provider. First, let’s understand the three different types of infrared thermography. Different types of Infrared Thermography There are three different types of infrared thermography- Active infrared thermography: In this type, a thermal camera is used to measure the temperature of an object. The camera measures the temperature by detecting the infrared radiation emitted by the object. Passive infrared thermography: In this type, the thermal camera is used to detect the heat radiation emitted by objects in its field of view. Thermal imaging: Thermal imaging is a type of infrared thermography that uses a special camera to create a thermal image of an object. You might also want to read: Infrared Thermography Testing Techniques: Top Techniques to Know Pros and Cons of Infrared Thermography When it comes to choosing an infrared thermography service provider, there are a few things you should keep in mind. Here are some pros and cons of using this technology: Pros: – Can help detect issues early on before they cause major damage – Can be used to inspect hard-to-reach areas – Is non-destructive and non-invasive Cons: – Requires special training and certification to operate correctly – Can be expensive You might also want to read: Infrared Thermography: An Exclusive Guide That You’ll Need (2022) Points to keep in mind while choosing an Infrared Thermography service provider Experience As you may know, Infrared Thermography is a cutting-edge technology that can help identify potential problems in your home or business. When it comes to finding an Infrared Thermography service provider, it’s important to consider the company’s experience. An experienced provider will have a deep understanding of how the technology works and will be able to offer insights into what they see in the images. They’ll also be able to provide guidance on what steps you should take next – whether that’s repairing a problem yourself or calling in a professional. Certifications When considering an Infrared Thermography service provider, one of the most important things to look for is their certification. A company that is properly certified will have gone through the necessary training and testing to ensure that they are providing a high-quality service. This means that you can be confident in their abilities to provide accurate readings and interpretations of thermal images. Additionally, certified companies are typically up-to-date on the latest industry standards, which helps to ensure that you’re getting the best possible service. Services offered If you’re looking to have infrared thermography services performed, there are a few things you should know in order to choose the right service provider. First, you need to be aware of the different kinds of services that are offered. There are two main types: those that measure surface temperature and those that measure subsurface temperature. Surface temperature measurements are taken using an infrared camera, while subsurface measurements require special equipment that can penetrate the surface and take readings from deeper within the object being measured. Pricing Pricing is always an important factor to consider when choosing any type of service provider, but it becomes even more critical when you’re looking at a potentially life-saving technology like Infrared Thermography (IRT). Thankfully, there are a number of IRT providers out there who offer very reasonable rates for their life-saving services. Thermographer qualifications A qualified thermographer should have at minimum, a level 1 certification from the International Thermographic Society (ITS) or American Infrared Solutions (ASI). They will also have up-to-date knowledge of building science and how infrared technology is used to locate sources of heat loss and moisture intrusion in buildings. A good thermographer will be able to interpret thermal images and convert them into actionable information for their clients. Thermal imaging camera quality An infrared thermography camera is a vital tool for any business or individual seeking to improve their energy efficiency. By detecting surface temperature patterns, an experienced operator can help identify areas of heat loss and potential air leaks. A quality thermal imaging camera will have a high resolution and produce clear images. It should also be lightweight and easy to maneuver. When choosing an infrared thermography service provider, be sure to ask about the quality of their cameras. You might also want to read: When and Why Should You Go For An Infrared Thermography Inspection Conclusion There are a few things you should keep in mind while choosing an infrared thermography service provider. First of all, you need to make sure that the company you’re considering is experienced and has a good track record. Secondly, you need to ensure that they use high-quality equipment. And finally, you should ask around for recommendations from people who have used the services of the company before. With these factors in mind, you should be able to find a great service provider that can help you with your needs. If you are in constant search for a certified and trusted infrared thermographer, then look no further because Souffront Construction and Engineering is here to guide you. Our team consists of level II certified IR thermographers, so rest assured that the infrared thermography inspection services we conduct are accurate are successful. You can hop on a call with our client support team to learn more about us and our services.