
Wind Mitigation and 4 Point Inspection: an Exclusive Guide to Understand

Tired of continuously searching for wind mitigation and 4 point inspection Miami FL? Keep reading because, by the end of this blog, you will gain a wealth of knowledge and won’t have to search for 4 point wind mitigation inspection endlessly. Florida insurance inspections include both wind mitigation and the 4 Point Inspection. However, there are significant distinctions in the roles each is meant to play. There are certain features of a home that can qualify for insurance discounts thanks to a wind mitigation inspection. A house insurance application is greatly aided by the information provided by a 4-point inspection, which details the state of the HVAC, electrical, plumbing, and roofing systems. In this blog, we’ll examine 4 point and wind mitigation inspection in detail. It will help you make a sound decision about which one to use. Without any ado, let’s begin with 4 point inspection. 4 Point Inspection: An Introduction The purchase or renewal of a homeowners insurance policy on an older house is frequently contingent upon the homeowner passing a 4 point inspection. A four-point inspection is an important check that insurers perform before committing to home insurance. The inspector will evaluate the state of your house or apartment and report their findings to you. There are four main areas of expertise: heating, ventilation, air conditioning, electrical, plumbing, and roofing. The 4 point inspection gets its name from these criteria. An independent home inspector can tell your insurance company if they should take the risk of insuring your property. Addressing problems identified by the house inspector is crucial. Neglecting them could lead to costly issues in the future. Possibly, an insurer won’t cover your property. This can happen if you don’t address the issues that prevented coverage in the past. When Do We Require a 4 Point Inspection? A 4 point examination is not necessary for every house. In contrast, a 4 point examination may be mandated if you want to buy an older home that is more likely to have structural problems. For instance, if your home shows signs of wear and tear, a 4 point inspection must happen as per your homeowner’s insurance company before they’ll cover any repairs. However, since regulations differ from state to state, the home’s location is also a factor in the requirements that must be met. As an illustration, in Florida, all properties older than 30 must pass a 4-point inspection. Why is it important to get a 4 point inspection? The availability of alternate options is not always present. For example, if you own an older house and wish to renew or purchase insurance, you may be required to receive a 4-point examination by your insurance provider. If this happens, your insurance company might foot the bill. Even if it is isn’t a mandate, a 4-point inspection may be in your best interest. It helps you decide whether to buy a house and at what price and avoids any unpleasant surprises during the transaction. For example, a 4-point inspection helps as an additional guarantee of the property’s condition if you’re selling your home. Your home’s quality and value confirmation will happen, or you’ll gain insight into how to improve its resale price, whichever comes first. 4 Point Inspection: What is included in it? Heating, Ventilation, and Air Conditioning (HVAC) When HVAC systems are not working correctly or are old, they can pose serious health risks. They have the potential to compromise indoor air quality and promote the accumulation of dust. Asthmatics and other people who have trouble breathing would be particularly affected by a malfunctioning HVAC system. As part of its 4-point inspection, the HVAC department looks at the building’s heating, ventilation, and air conditioning systems. This section includes the certified inspector’s assessment of the system’s current state, age, and lifespan. This might contain data on how much energy consumption takes place and where it’s being generated. On top of that, they keep an eye out for specific problems, such as condensation seepage, poorly executed setup, inadequate upkeep or upgrading, frayed or exposed wires, lack of adequate chimneys, faulty or nonexistent filtering, and discarded machinery. Electrical Wiring and Electrical System The electrical wiring and system in a home inspection are a part of a comprehensive four-point examination, and the inspector makes a note of the system’s make and model as well as its current state. They’ll make a list of what needs fixing and highlight any flaws they notice with cloth wiring, standardized two-prong plugs, knob, tube, aluminum wiring, safety switches and fuse boxes, double-tapped breakers, and Federal Pacific electrical panel. Note: Damages to your electrical system pose a significant risk of fire. Therefore, you must deal with this system without delay. According to the most up-to-date statistics from the U.S. Fire Administration, between 2012 and 2016, electrical problems led to thirteen percent of all residential fires. A total of 25,700 fires were caused by electrical problems in 2018, but this number went down by 2% from 2009. Plumbing Connections and Fixtures Inspecting the plumbing is an integral part of the 4-point inspection. The water system and heater inspection are also part of a comprehensive house inspection. The latter is something the inspector has an interest in doing so that water is spread evenly throughout the dwelling. They make a note of the age and type afterward. After that, they start looking for problems like inefficient and antiquated water heaters, dripping water, bad traps, a lack of safety valves, corrosion problems on a large scale, congestion causing a drop in water pressure, leaks that could occur if the water pressure is too high, and polybutylene supply lines. Roofing Among these four checks, the roof inspection is particularly important. Since a roof affects more than just the framework of a house, it often ends up being the most in-depth part. Aspects like mold development and thermal efficiency are also impacted. At this inspection stage, the inspector takes down some background data, like the roofing material. Also, the roof’s age, expected lifespan, and the condition is evaluated. That could mean
Understanding Concrete Spalling: Causes, Prevention & More
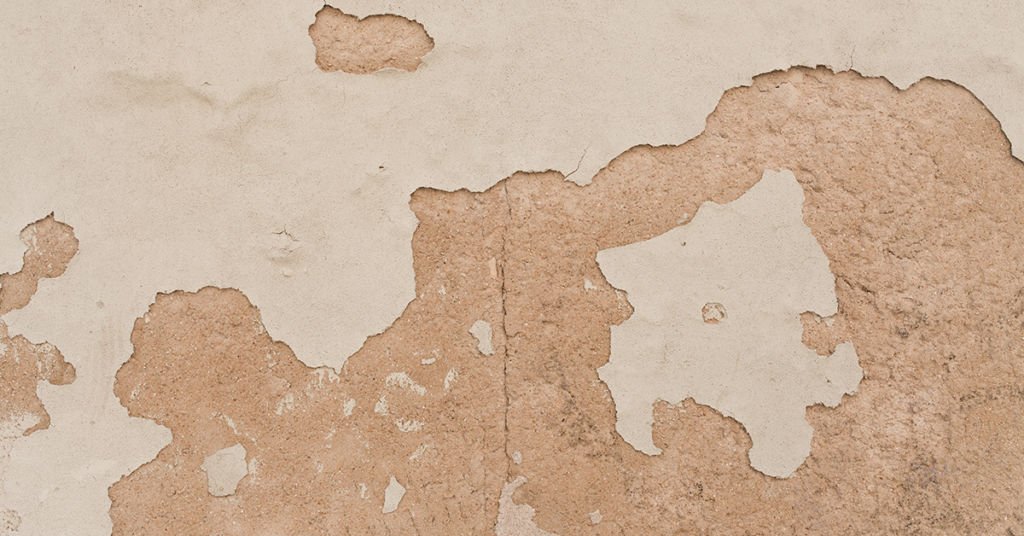
Concrete’s adaptability comes in handy for anything from massive foundations to small touches like pool decks. Concrete has a lengthy lifespan when laid and you appropriately maintain it, lasting through multiple generations of scraped knees and chalk drawings. It’s important to remember that the weather can damage concrete—untreated concrete spalls like untreated wood rots. Concrete spalling is a serious concern and in this blog, we will discuss everything about concrete spalling. Let’s get started. Concrete Spalling: A Brief Introduction Concrete spalling occurs when small pieces of concrete separate from the rest of the structure, revealing the reinforcing or the concrete’s inner workings to the elements. High-volume foreign products formation takes place due to specific chemical reactions within the concrete, which causes spalling. These innovative items will boost internal pressure within the concrete due to the material’s inherent lack of void space. Therefore, fissures emerge to vent this pressure outside. The presence of these fissures invites atmospheric reactions with the concrete’s interior environment, heightening the risk of failure. If the flaws continue to widen, the concrete will eventually crumble and fall apart. To a large extent, this issue stems from formation of new products. Manifold factors responsible for causing concrete spalling include exposure to high temperatures, corrosion, chemical attack, pollution, and more. You might also want to read: TOP CONCRETE CRACK REPAIR METHODS YOU MUST KNOW OF Concrete Spalling: What are the effects? The following are some significant effects of spalling concrete: The risk to human life increases since the concrete fragments could cause injuries or destroy property below. There is increasing risk of corrosion due to the reinforcement in the concrete being exposed to the environment. Over time, corrosion will cause steel to corrode and break, which might cause the entire building to collapse. When concrete spalls, the surface area of the material that can withstand a load diminishes. The structure’s capacity to withstand moments, loads, and shears reduces. Without proper treatment, reinforcing corrosion will continue to spread. The accompanying upkeep expenditures will rise as a result of this. Damage to the building’s aesthetic appeal caused by spalling concrete will lower its market value. Concrete Spalling: Cause and Prevention Measures Failure to Provide Adequate Cover A lack of proper protection from the elements will make the reinforcement more susceptible. A surface fissure, however little, will reveal the backing. Corrosion occurs in steel when it has exposure to the environment. A high internal pressure brought on by the corrosion products’ greater volume than the steel leads to spalling. Therefore, designing and supervising structures correctly, or using materials with care, are also necessary. Freeze-thaw Cycles In colder climates, seeping water freezes into ice, which has a greater volume than water. To control this expansion, professionals leverage air-entraining chemicals to embed tiny air spaces throughout the concrete. Alkali Aggregate Reactions Formation of the Alkali-Silica Gel (ASG) takes place when the alkali in the cement combines with the silica in aggregates in contact with water. This gel has a greater volume than the typical results of hydration. Without all three components—water, alkali, and silica—the alkali-aggregate reaction cannot occur. Therefore, to impede the reaction, we can lower the alkali component of the cement, or use synthetic aggregates without the presence of silica in it. High Temperature Explosive spalling can happen when concrete is subjected to extreme temperatures, such as those found in a fire, or when the concrete is oversaturated. Due to its enhanced brittleness at high temperatures, high-strength concrete is more prone to cracking and breaking than regular-strength concrete. Therefore, fire safety in the building must be a priority to lessen the possibility of explosive spalling. Poor Compaction The reinforcements may corrode and spall if they get exposure due to improper compaction. The solution to this issue is to employ competent supervision and using vibrators to achieve proper compaction. Inadequate Water Content When there isn’t enough moisture in the mix, it becomes less manageable and more challenging to compact. Unexpected air pockets can occur, laying the groundwork for cracks to appear later. A high ratio of water to cement will result in a decrease in the strength of the concrete, making it more susceptible to microcracking and, as a consequence, spalling. Any potential accidents during mixing can be avoided by strictly adhering to the specified mix design ratio and maintaining enough supervision. Sulfate Attack Cement with a high concentration of sulfates or atmospheric sulfates is to blame. Insufficient strength in the concrete, brought on by the breakdown of the hydration reaction’s byproducts, is what ultimately causes spalling—making use of sulfate-resistant cement and reducing concrete’s permeability. Chloride Attack In coastal buildings, this is a common occurrence. The corrosion of the steel reinforcing is the direct cause of spalling concrete due to chloride assault, adding more concrete on top, and painting the reinforcements to prevent rust. Lacking a Smooth Finishing Water has a greater tendency to pool on top of a building with a rough surface finish than on one with a smooth finish. However, the structure’s unfinished, shoddy appearance can aggrevate water seepage and possible spalling. The only solution to this is to provide a smooth finish. Unhealthy Environment In addition to physical damage, concrete will suffer from chemical attacks due to environmental pollution. Spalling occurs when sulfide-containing contaminants mix with water and seep inside a building. Using paints that are resistant to water will prevent this from happening. Concrete Spalling Repair: How to Go About It? #1: You can carefully pry loose the concrete blocks. For extra precaution, you can remove an additional two inches of concrete around the damaged region. #2: Using listening instruments to locate any unevenness around the afflicted area due to the spalling is a potential additional safety measure. You can treat any area of concern to prevent more issues. #3: To get rid of any rust in the steel, you may even use a wire brush to clean the reinforcement. #4: You can leverage compressed air to clean the surface and coat the reinforcements with anti-rusting polymer
Concrete Restoration Services: Everything You Need to Know
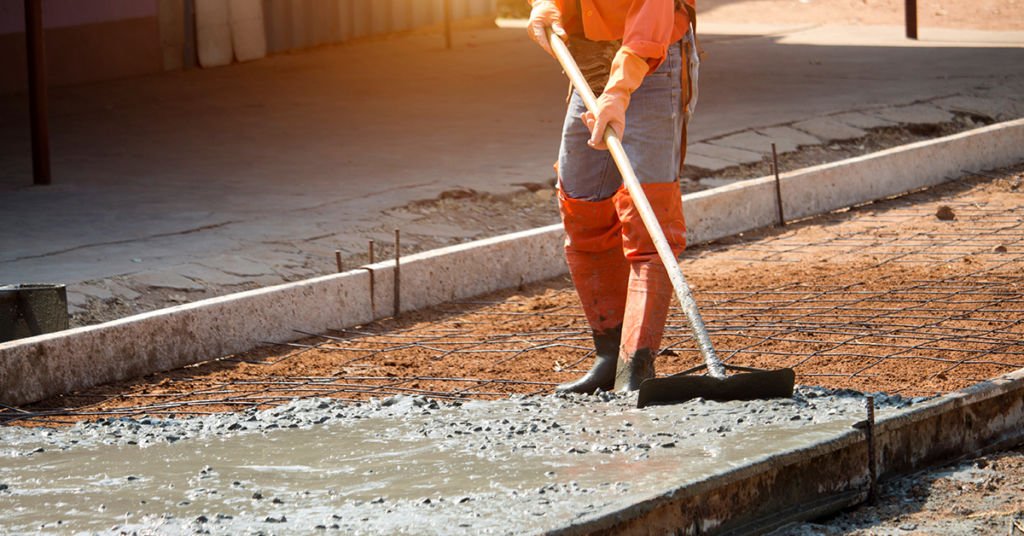
Concrete Restoration Services Guide: Though it can be used in various applications and is durable, concrete can be damaged. Over time, concrete degrades due to damage, natural wear, and tear, or erosion, leaving behind unsightly patterns and structural changes. Repair, replacement, or restoration are the usual responses to damage to a concrete building or surface. The expense and difficulty of crack repairingis high. A concrete restoration is the first thing to undergo for small to moderate cracks. Restoration of concrete addresses structural and aesthetic issues that arise from damage, unlike repair. Concrete repair contractors will take measures to restore your concrete surface or building to its pre-damage state. This includes removing cracks, fading, stains, and other problems. Common Methods of Concrete Restoration Once you determine that concrete restoration services are the best option for your property, your contractor will assist you in determining which method is most appropriate for addressing your particular needs. The four most typical repair techniques are epoxy injection, polyurethane grouting, leveling, and complete removal and replacement. Epoxy Injection Filling cracks and openings with epoxy is one option. Epoxies forge a sturdy weld that can enable a surface with crack to keep taking the weight it’s used to. As far as concrete restoration techniques go, this is one of the least intrusive and cost-effective options, yet it is not without drawbacks. Epoxy injection is not a replacement for fixing the issue that led to the fracture in the first place. To prevent further cracking, you will need to inject epoxy into the area repeatedly unless you address the underlying cause. To use epoxy, you must first ensure that the professionals fix all the leaks and that the region is completely free of moisture. Polyurethane Grouting In the same way that epoxy is a restorative resin, polyurethane grouting repairs severe damage to concrete. Lightweight, quick-acting, and less intrusive, it is well-suited to demanding or heavily-used situations. Since it is non-toxic and dries quickly, you can return to business after applying it, provided you resolve the underlying issue. Instead of epoxy injections, polyurethane grouting may operate in damp or unclean environments without degradation. However, it’s not a permanent fix, so it might not hold up under heavy stress. Concrete Leveling When the surface of a slab of concrete has sunk or separated, this problem can be fixed by jacking it back up from below. You may be familiar with these terms as they relate to the procedure: raising, leveling, and slab jacking. The stages necessary to finish leveling concrete are as follows: Creating a passageway through the concrete floor or deck to the ground below. Even out the concrete’s surface by filling the damaged region with polyurethane foam or filler substance. Using fresh concrete to fill and smooth the application holes. Leveling concrete is less disruptive and more cost-effective than removal and replacement. It’s a practical alternative for homeowners whose lots slope steeply but who don’t want to (or can’t afford to) tear up and replace their old concrete. Concrete Removal and Replacement When concrete is too bad for any other treatment to save it, its removal and replacement is generally the only option. The replacement may be preferable to multiple minor restoration or repair activities if it will save money, time, or both. When the structural integrity of a structure is at risk due to damaged concrete or when the concrete itself is no longer functional, this is the recommended course of action. For instance, a concrete parking garage floor may need replacement if it has numerous significant fractures, gaps, and sinking that prevent vehicles from being driven on the surface. Large concrete sections mustn’t receive removal or replacement without proper equipment and professional laborers. You might also want to read: HAVE DETERIORATING CONCRETE ON YOUR HANDS? HERE’S A QUICK CONCRETE RESTORATION GUIDE Factors That Lead Concrete to Degrade While an excellent concrete surface or enclosure will be sturdy, long-lasting, and supporting, it is vulnerable to premature deterioration from several environmental variables. The following are examples of frequent triggers of chemical breakdown and structural damage in concrete: Temperature Even while concrete can survive high temperatures, excessive heat and cold or continual changing between the two causes it to deteriorate, especially when water is present. Water collecting in puddles on cracked and broken concrete can cause flooding and more damage. Concrete can receive big damages through water freezing and expanding by up to 9 percent. Overload Damage, including bending, warping, cracking, and chipping, can result from overloading. For concrete, this is especially a problem in places with a lot of foot and vehicle activity, such as on sidewalks, driveways, and parking lots. Corrosion Fading and general symptoms of wear and tear are part of the natural aging process that results from extensive usage and exposure. Persistent contact with corrosive substances, such as those produced by hydraulic wear, or the corrosion of embedded elements, such as metal, can lead to the premature deterioration of the concrete around them. Impact Concrete can swiftly and abruptly deteriorate due to accidental and unnatural deterioration. Blasting, flames, and tool/vehicle/machinery impacts are all excellent examples. Depending on the force of the impact, the remaining cement may sustain further damage from factors such as open cracks if they don’t receive repairs. Environment Since natural disasters like earthquakes, seismic tremors, seawater, and tornadoes are unavoidable, even the most solid concrete surfaces and buildings are vulnerable to them. These weather conditions might exacerbate the uneven surface or the excessive cracking and shifting of concrete. Chemicals When exposed to de-icing salts, chemical sulfates, industrial waste, food and beverage, and acids, concrete surfaces can undergo chemical changes. In addition to weakening the concrete over time, this reaction can make it unstable and inflict aesthetic damage. When Do You Need Concrete Restoration Services? When is it appropriate to plan a concrete restoration appointment to save time, money, and frustration? It’s important to look out for these issues with your concrete construction or surface: Cracks Surfaces, including walls and floors, often
What Are the Different Concrete Crack Repair Methods?
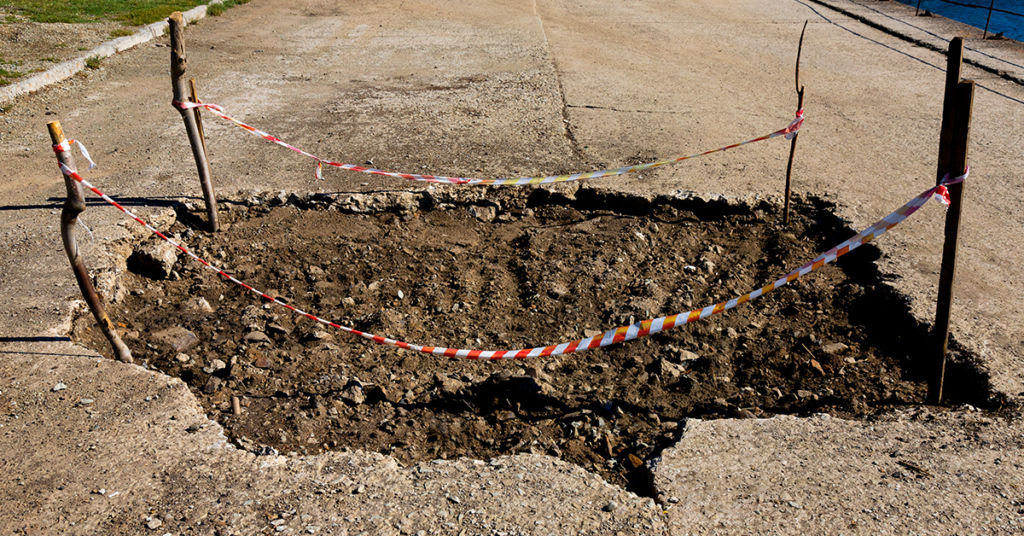
Concrete repair uses various techniques, including epoxy injection, routing and sealing, grouting, stitching, drilling and plugging, and gravity filling. This blog will discuss all these different concrete crack repair methods and what importance each method withholds. If you wish to know about concrete restoration, you may check out this blog. Feel free to continue below if you are knowledgeable about concrete restoration and only want to know about the different concrete methods for crack repair. How to Determine the Most Appropriate Technique in Concrete Crack Repair? Identifying the root cause of a crack in a structure is the first step in deciding which concrete repair technique will be most effective. Only when we find the root cause of the problem, i.e., we identify the specific type of crack can we choose an appropriate solution. For instance, if drying shrinkage were the primary cause of the cracking, the cracks would probably stabilize after some time. However, if the foundation is continually sinking, repairs will be useless until one addresses the underlying cause of the fissures. Different Concrete Crack Repair Methods to Understand Epoxy Injection When a crack is less than 0.002 inches wide, professionals leverage epoxy injection to repair it (0.05 mm). The method involves sealing the crack on the exposed surfaces, then injecting the epoxy under high pressure through the entrance and venting ports set up at regular intervals along the cracks. Concrete constructions, such as buildings, bridges, and dams, can have concrete crack repair with epoxy injection (ACI 503R). A recurrence of cracking is likely to occur close to the original crack unless we address the underlying cause. However, if the source of the fractures doesn’t receive elimination, two alternatives exist. Either build a junction that will allow for the movement and then inject the crack with epoxy or another acceptable substance, or rout and seal the crack, thus treating it as a joint. If the fractures are actively leaking and we cannot dry them, this method is not applicable, except for certain moisture-tolerant epoxies. We can inject moisture-tolerant polymers into wet fractures. However, impurities (such as silt and water) might lessen the epoxy’s structural repair capabilities. A low-modulus, flexible glue that we inject into a fissure will prevent excessive movement in the concrete. Because of the small layer of material and the considerable lateral constraint given by the surrounding concrete, a flexible adhesive’s effective modulus of elasticity in a crack is essentially the same as that of a rigid adhesive. Therefore, it takes a lot of practice and expertise to master the art of epoxy injection, and the temperature in the area where you plan to use it may restrict its usefulness. Routing And Sealing When repairing cracks, utilize a crack sealer that won’t compromise the structure or functionality. Furthermore, they need to prevent hazardous materials from getting inside. One repairs cracks through this method when just cosmetic repairs are necessary rather than structural ones. In this technique, we widen the initial surface crack (routing) and then seal using a joint sealant. Because the process is straightforward and does not require special knowledge or skills to mend the cracks, it sees frequent application. It is typically laid down on level ground, such as a floor or pavement. In addition to horizontal and vertical surfaces, it also works on curved ones. You can patch all sizes of cracks, from the tiniest hairline to the largest fissure, with this procedure. Concrete sealants get made from epoxies, silicones, or asphalt. To reduce the risk of cracking, cement grouts are rarely used. Use caution while applying sealant if the area is in use for something other than what was the intention. In this technique, a concrete saw, a hand tool or a pneumatic tool helps cut a groove in the concrete, with the depth ranging from 6 mm to 25 mm. Following this, we use water or air blasting to clean the groove thoroughly. We then set a drying time for the groove. The sealant then gets pressed into the groove once it has cured completely. The surface can have normal utilization once the curing process is complete. Stitching This method involves drilling holes on either side of the crack. After the holes get sealed, the legs of the stitching dogs get bonded to them with either non-shrink grout or an epoxy-resin-based bonding technique. It’s recommended that the stitching dogs’ length and/or orientation be flexible. We must place such that the stress that the crack’s transmission induces is has a uniform distribution throughout a larger area. This is the ideal way to restore tensile strength over large cracks. Providing Additional Reinforcement a) By Conventional Reinforcement You can fix cracks in reinforced cement concrete with this technique. Initially, this procedure uses a sealer to fill in the crack. Next, we drill holes with a diameter of about 20 mm, crossing the crack plane at about 90 degrees. Following this, we insert epoxy reinforcement bars measuring 12 mm or 16 mm in diameter with their ends reaching at least 500 mm on either side of the crack. Finally, we set the distance between reinforcement bars depending on the cracks’ depth or structural engineers’ advice. b. By Prestressing Steel This procedure is commonly chosen when you need to strengthen a significant portion of a component or have a concrete crack repair. When employing this technique, we apply a compressive force using prestressing strands or reinforcement bars. Therefore, the prestressing steel must have adequate anchoring. Drilling and Plugging Method For this technique, we bore a hole along the length of the crack, with a diameter of 50 mm to 75 mm. After cleaning and filling the hole with grout, the problem disappears. The grout key’s job is to stop the adjacent concrete from shifting as the fracture widens. The key is also useful in preventing soil erosion from behind a leaking wall and heavy water seepage via fractures. Gravity Filling Method Gravity filling can seal fractures with surface widths of 0.001 to 0.08 in. (0.03
Infrared Thermography Testing Techniques: Top Techniques to Know
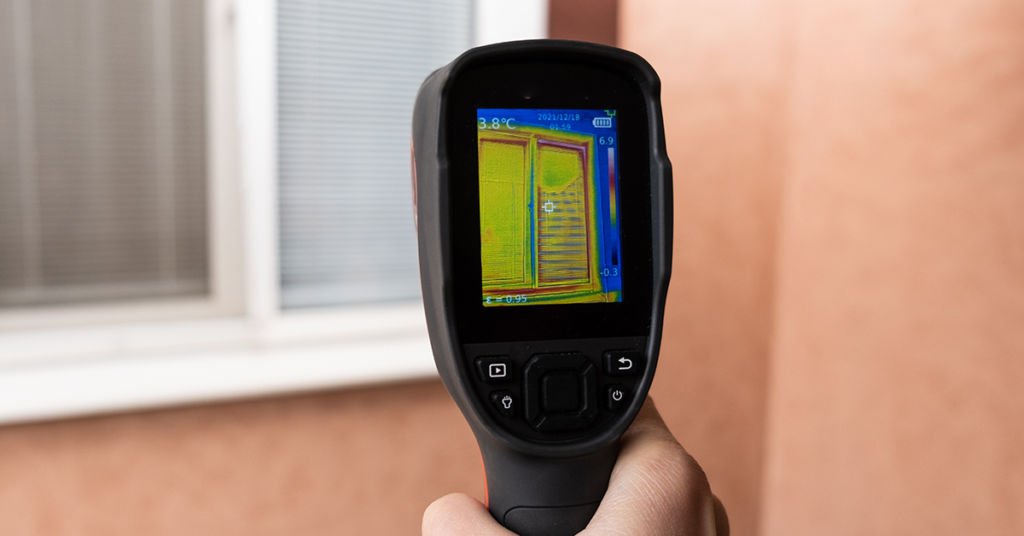
Today’s blog will discuss the different infrared thermography testing techniques and the benefits and limitations of infrared thermography. If you are not well-versed with infrared thermography and want to learn more, it’s best to check out this blog. It explains infrared thermography in-depth, ensuring even first-time learners understand it. But if you are aware of it, feel free to proceed and understand the different infrared thermography testing techniques. Infrared Thermography: A Brief Introduction An infrared thermograph may be created by translating an item’s radiation into a temperature and graphically exhibiting that temperature distribution. Thermograms are pictures of the measured temperature distribution and can reveal sources of heat that are otherwise hidden from view. It finds widespread application in fields like condition monitoring and preventive maintenance. Regardless of lighting conditions, thermal imagers can quickly identify and show infrared wavelengths since all things above absolute zero (-459.67 degrees Fahrenheit) thermal infrared radiation. One widespread practice is wearing night-vision goggles, which allow the user to see in complete darkness. Infrared thermography’s principal use is ensuring machines are working correctly and finding any inefficiencies or faults by analyzing their thermal signatures. For asset managers responsible for condition monitoring, infrared thermography is a significant improvement in the inspection of mechanical equipment. Although infrared imagers are user-friendly, deciphering the data they provide can be a bit of a challenge. Knowing the basics of radiometry and heat transport processes helps us understand how infrared imagers function. You might also want to read: Infrared Thermometer: Here’s What You Must Know Infrared Thermography: Different Testing Techniques Several different infrared thermography testing methods are available. The factors you prioritize, such as the type of data you require and the object under observation, will determine your chosen option. What follows is a discussion of the most typical approaches to infrared thermography testing. Passive Thermography: During passive thermography testing, pictures of the machine’s thermal signature are taken either while it is operating or immediately afterward. This is a great option to obtain information without using an external power source or putting the system offline. Active Thermography: As the name implies, active thermography employs an external energy source to generate temperature variations in the component, which are then affected by the component’s internal materials and flaws. It can be used to demonstrate the path of thermal energy within a component and detect working parts anomalies. Flash thermography: It is a method for detecting heat-blocking defects in materials by sending pulses of light through the material in question. Vibrothermography: Using such a technique, cracks in machinery or components can be located by sending sonic waves through the object. Acoustic energy is responsible for the disturbance that causes friction between the two rough edges on either side of the fissure. The infrared camera can pick up on the heat that this generates. Lock-in thermography: Like many other approaches, it is necessary to apply an external energy source (light, sound, heat, etc.) to the surface of a component to expose anomalies below the surface. For this method to be effective, it is necessary to know the abnormality’s composition and qualities and its depth, size, and location. Time-wise, it’s more of a drag than the other methods we’ve looked at, but it can get through more sturdy constructions. How to Interpret Data Correctly? Infrared thermography’s accessibility is a major factor in its rapid adoption as a PM technique of choice. Mistakes are rather common due to misunderstandings of data interpretation and imager capabilities. These include: The inability to comprehend the resolution: A failure to understand resolution is evidenced by the fact that infrared thermography imagers have restrictions on what they can see and how accurately they can quantify it. Therefore, before acquiring an infrared imager, it is important to understand the limitations of its resolution. Not taking into account the surrounding environment: Without considering other variables such as wind, rain, ambient air temperature, or sunlight, it is impossible to get an accurate reading of the actual temperature, in your reporting, including environmental factors like wind and precipitation. Avoid uncomfortable heat by inspecting surfaces while they are not in direct sunlight. Putting aside chilly areas: You will naturally search for hotspots, but ignoring chilly places might lead to severe consequences. Systems that use electricity or steam are especially susceptible to this problem. Absent heat suggests either a faulty steam trap or an electrical capacitor. Considering only the surface temperature: environmental considerations make thermal imaging less effective at displaying true temperatures than other methods. So, instead of worrying about the temperature, you should look for variations in thermal patterns. When infrared thermography is used to compare numerous components, the part that stands out as abnormal is typically the one producing problems. You might also want to read: When and Why Should You Go For An Infrared Thermography Inspection? Infrared thermography: Benefits and Limitations Infrared thermography has many benefits, specifically with preventive maintenance, such as: It does not involve handling hardware or machinery Output in real-time Gain access to information about big areas simultaneously Graphics that are simple to understand and comprehend For additional analysis, data might be transferred to a computer program. There will be no need for testing to cause downtime or production delays. With the benefits, there are certain drawbacks as well. Here they are: The cost of infrared gear tends to be high. Therefore, it’s important to weigh the potential savings from infrared technology’s early detection warnings against the time and effort that will be required. If a component is covered with a non-transparent material, such as glass, infrared temperature sensing technology cannot work. Glass seems opaque when viewed with an infrared camera. Expertise and a wealth of background information are needed to interpret imaging results from infrared data. Final Words We reach the concluding parts of our blog. To summarize our discussion, we first discussed in brief about IR thermography. Next, we discussed the different infrared thermography testing techniques. Finally, we understood how to interpret data correctly from such an inspection and the benefits and limitations of IR thermography. If you have read this blog
Infrared Thermometer: Here’s What You Must Know

An Introduction to Infrared Thermometer An infrared thermometer (also referred to as a non contact thermometer) is a device that monitors a subject’s surface temperature by analyzing its thermal radiation levels. In industrial settings, as well as during a number of situations, IR thermometers are more prevalent because it might be risky or difficult to measure temperature directly from a subject. In order to measure temperature remotely, these gadgets make use of a phenomenon called thermal radiation. Thermal radiation is produced by almost every object. The IR thermometer gauges temperature by directing a body’s infrared radiation toward a spot known as a thermopile. Electric current flowing through the thermopile changes as it warms up. We obtain the temperature reading based on the current that the thermopile produces. IR thermometers, also known as distance-to-spot-ratio thermometers, have a range of temperature measurements depending on how they get built. 4:1, 8:1, 30:1, and even 50:1 are the standard distance-to-spot ratios. The greater the ratio, the greater the distance you can elude the heat source. An infrared thermometer range covers -100°F to 10000°F temperature, making it convenient to inspect most objects, and at various temperature levels. If you are looking for the best infrared thermometer, this blog will definitely help you decide upon one because we will also discuss three popular infrared thermometer types. Let’s understand how infrared thermometers work. You might also want to read: Infrared Thermography: An Exclusive Guide That You’ll Need (2022) How Does an Infrared Thermometer Work? In order to measure the temperature of a wall or other object, the infrared thermometer contains a laser that makes it easier to point the thermometer to a specific spot. The temperature in units is shown on the gadget once the laser measures the temperature the wall or other surface emits. When checking the temperature of objects or regions that can get very hot, such as a car engine or a Thanksgiving turkey, the capacity to read the temperature of an area remotely is useful. Infrared thermometers come in a variety of designs, but they all operate on the same fundamental principles. The infrared thermometer is a handheld pistol with a point-and-click interface that helps get an instant temperature reading from any non-organic surface, such as in the case of food, vehicles, or insulation. The laser from an infrared thermometer marks the spot that needs measurement for temperatur. You can designate the center of the object whose temperature you wish to measure with the laser. The entire area is greater than the laser, which is just a mark to indicate where you want to take a measurement. Infrared thermometer accuracy holds good for most objects. However, reading infrared radiation from reflecting surfaces can make taking a measurement more challenging. As a result, they are more emissive on glossier surfaces. Therefore, taking many readings from the same position and the area around the center point is essential if you want precise measurements. You might also want to read: When and Why Should You Go For An Infrared Thermography Inspection Popular Infrared Thermometer Types You Must Know About In its simplest form, an infrared thermometer is made up of a lens that directs heat infrared radiation onto a detector, which converts it into a signal with a color code. Since they don’t require direct touch with the measured object, infrared thermometers may monitor temperature at a distance. However, the infrared thermometers available today can be configured in several different ways, depending on the task. The following are the three most popular types of IR thermometers to know about. Spot infrared thermometers Often referred to as pyrometers, these thermometers help find and gauge the temperature at a particular spot on a surface. They resemble handheld radar guns. The use of spot infrared thermometers is a preference whenever thermal radiation needs measurement on assets that are difficult to access or on assets that are working in harsh environments. It’s possible that you’ve seen heating, ventilation, and air conditioning (HVAC) specialists in your office building or home utilizing a spot infrared thermometer to monitor the temperature of a ventilation system. They do this by pointing the gun toward the ceiling vents to get an accurate reading. Spot infrared thermometers for preventive maintenance are help in situations like belt and bearing examination, electrical room monitoring, energy audits to find heat loss, fluid-handling systems, and many more. The FOV and distance-to-spot ratio are the two primary metrics by which spot infrared thermometers measure temperature (D:S). A spot thermometer must have its target entirely inside its field of view to acquire an accurate temperature reading. Don’t forget about the ratio of distance to spot size; if the ambient temperature deviates from the desired value, an error will result. Simply said, the distance-to-spot ratio is the diameter of the temperature measurement area divided by the distance to the object being measured. Higher ratios indicate higher resolution and fewer measurable areas for an instrument. For instance, a spot thermometer with a 40-to-1 ratio provides more precise results when measuring a small object than a 10-to-1 ratio device. Infrared scanner systems These infrared thermometers have a wider field of view and find widespread application in factories that utilize conveyors or web systems. Infrared scanner systems are come in handy for applications such as scanning products moving along a conveyor belt, sheets of glass, or metal emerging from an oven. Infrared thermal-imaging cameras In order to create two-dimensional thermographic images, thermal-imaging cameras, a more sophisticated form of radiation thermometer, measure temperature at numerous locations spread across a vast region. Compared to a spot thermometer, thermal imaging cameras rely significantly more on software and hardware. Most cameras can connect to specific software and display real-time images for a more thorough analysis, accuracy, and report generation. In addition, modern handheld thermal imaging cameras are portable. Infrared thermal imaging cameras allow users to switch between different color palettes to distinguish manifold temperature variations. Iron palette: It is the most popular palette. Black represents the coldest places, blue
Infrared Thermography: An Exclusive Guide That You’ll Need (2024)

The oil and gas sector extensively uses infrared thermography as an inspection tool for condition monitoring and predictive maintenance. However, the fact that infrared technology does not need to be in physical contact with the piece of machinery that needs monitoring confers several benefits over the more conventional methods of visual inspection and other methods. It is a nondestructive testing type that measures temperature variations of a component as heat moves through, from, or toward that component. IR thermography is known as thermal imaging, infrared thermometry, thermal testing, or infrared thermography testing. In the post we have for you today, we will learn all there is to know about IR thermography. So let’s get down to business without further ado and begin with a basic overview of IR thermography. Infrared Thermography Meaning The process of “viewing” and “measuring” invisible infrared radiation emitted from an object is known as infrared thermography. It involves the use of an infrared imaging and measurement camera. As a result of its wavelength being too long to be detected by the sensors in our eyes, the human eye cannot see thermal or infrared radiation. We interpret this region of the electromagnetic spectrum as heat. In contrast to visible light, everything with a temperature higher than absolute zero emits infrared electromagnetic radiation. Infrared radiation is emitted by even very cold objects, such as ice cubes. The amount of infrared radiation release increases with object temperature, and our eyes cannot perceive certain things, but the infrared thermography camera can! Discussing briefly about IR thermography uses and applications, some notable examples include: Earth science imaging Law and security imaging Medical Imaging Chemical Imaging Machine condition monitoring Electrical system monitoring Fluid system monitoring IR thermography’s main objective is to identify inefficiencies and flaws in machinery by detecting anomalous heat patterns within the machine and confirming that it is operating normally. Asset managers in charge of condition monitoring can significantly benefit from employing IR thermography to inspect mechanical equipment. However, despite the ease of use of infrared imagers, deciphering the data they generate can be a little more challenging. Therefore, it is important to understand how infrared imagers work and the heat transfer and radiometry process. Next, we proceed toward IR thermography principles and applications to understand its functioning and use in different areas. You might also want to read: When and Why Should You Go For An Infrared Thermography Inspection The Operating Principle of Infrared Thermography According to the operating principle of infrared thermography, infrared sensors typically calculate temperature by focusing on infrared energy. It is a part of the electromagnetic radiation that every item emits as its temperature rises over zero. This radiation relates to the object in a manner proportional to its internal temperature. The object’s radiation beams are concentrated on a detection component through the thermographer’s optics. The radiation is proportionate to these electrical signals. An analysis of these signals takes place to provide output signals directly showing the temperature. The obtained information may be there on a computer screen or transmitted to a control system via a connecting link. Planck’s radiation law is the foundation for measuring infrared temperature. Its temperature and wavelength are closely related to the spectral radiation that a black body emits into space. Even using the Stefan-Boltzmann law, scientists could simplify the equation’s interpretation. It aids in clarifying how the detector’s electric signal and an object’s temperature relate to one another. Infrared Thermography Applications The following are some essential applications of infrared thermography you must understand. Evaluation and Testing It is now possible to quickly detect and receive precise temperature readings through infrared technology, which is crucial for research and testing applications. To start an effort to comprehend the fleeting phenomenon underlying combusting particles, research scholars have widely used thermography cameras, infrared thermometers, pyrometers, and other devices to monitor the temperature of individual particles in coal combustion reactors. The development of a new low-emission burner technology will be aided by this, potentially reducing carbon footprints. As a smart sensor technology that monitors and manages the temperature process, this technology has been approved for use in the industrial setting. Injection Molding Temperature directly correlates with the quality of applications for 3D printing or completed goods in injection molding. An essential part of producing defect-free goods is regulating the temperature of the production environment. In the manufacturing of automotive components, when even the smallest flaw is intolerable, it is tremendously beneficial. An online system uses a thermal imager to gauge the temperature of the distribution products’ surface. Assemblies that don’t adhere to the established temperature range can be immediately rejected using the technology synchronized with the PLC system. Manufacturing In the manufacturing sector, the temperature is a crucial factor that affects the product’s quality. Using glass, as an illustration, the temperature of the molten glass has a beneficial impact on the end product’s quality. To ensure that the process temperature is properly maintained at the casting level, it is essential in the metal manufacturing business to keep an eye on the temperature of the molten metals. Infrared sensors are crucial in this situation. Condition Monitoring The most desirable technology for this kind of preventive maintenance is a thermal imaging camera, which can maintain the equipment’s overall health and prevent any unexpected damage or disruptions in the manufacturing process. It can useful to identify hot spots in essential process equipment that professionals can fix and restore beforehand to prevent a catastrophic failure of the machinery or production process. Moreover, it reduces expenses too. Infrared Thermography Benefits Professionals can quickly scan large areas using infrared thermography testing, which has the advantage over destructive testing methods in that no destruction is required. In addition, significant time, labor, work, and equipment savings take place. Infrared thermography is superior to other non-destructive approaches in several ways. For example, since the infrared thermographic equipment does not generate radiation and merely records the infrared radiation that the evaluated material emits, there is no risk associated with using it. Unlike most
Design Build Construction vs General Construction: A 2024 Guide

General Construction vs Design Build Construction: Do you ever wonder how a vacant plot of the ground came to hold a complete building when you saw a retail center, hospital, or school? Everyday structures have a complex construction process going on behind the scenes. It starts with design, then bidding, and finally building. This procedure can be performed in various ways. For example, the Design and Build method is popular, along with the conventional approach. Project owners seek to experiment with novel methods of planning, designing, and constructing their projects, which increases the number of design-build contracts with time. Like traditional or general construction, design-build construction has merits and demerits. The situation at hand will be the deciding factor in whether traditional or design-build construction is needed. In this blog, we will differentiate between general construction and design-build construction and discuss their elements, merits, and demerits. Without further ado, let’s begin. General Construction: An Introduction It makes sense that we first understand what general construction is and then gradually move towards design-build construction. There are three stages in general to the traditional method. The traditional approach starts with design. Before any construction is done, the client collaborates with a firm that specializes in architectural design to lay out the building design. The designers are not involved in any aspects of the construction process other than those related to the design, in contrast to a design-and-build agreement. Traditional contracts separate the organizations in charge of the various project components. Once a design is completed and the project owner authorizes it, the parties move on to the bidding phase. Depending on the finished design, the client will receive proposals from several outside contractors during this phase. In addition, the client must approve all the project specifics, including the construction expenses, in the proposals. Following the project owner’s selection of their construction team, the various design and building organizations work together to execute the plans. The traditional approach organizes the project’s steps by dividing the groups in charge of each construction component. Design Build Construction: An Introduction One team completes the entire building process, from planning to building, under design build construction, a contemporary approach in the construction business. Clients no longer need to collaborate with different architectural design teams to create floor plans, as was the case with general contracts. The design build contract aims at streamlining project collaboration and communication for both the client and the construction crew. As the project progresses, designing and building are frequently done concurrently. Therefore working with only one team may result in greater communication than working with different entities. By selecting the complete project team prior to the commencement of the project, this strategy also streamlines the bidding procedure. In addition, the project owner will only need to deal with one person for all of their design and construction requirements, giving them greater control over project oversight. Difference Between General Construction and Design Build Construction The following are the main points of difference between traditional or general construction and design-build construction. Factor General Construction Design Build Construction Time Design and construction are sequential here, increasing project schedules Construction overlaps design and reduces project schedules Communication Multiple communication channels Single point of contact throughout the project Cost Initially unknown. Certain at a later stage Costs are realized and fixed from initial design phase Value Engineering Occurs when you hire a firm Occurs at the project onset Risk Risk of failure to perform by consultants or contractors remains with the client With a single, united workforce, reduced risk and liability Control Owner retains authority over construction design and planning. Less owner knowledge and resources are needed Flexibility Contract-heavy with little room for client-side modifications. Projects may take longer to complete, schedules and programs may alter, and costs may increase. Client-side variants can be modified quickly and nimbly. Costs and designs are produced simultaneously. Essential Elements of a Design Build Construction For a design build construction project to commence, there are three documents that one will require. Here they are: Employer Prerequisites The project owner outlines all of their needs for the project in this component. Even though the team will handle the design, the employer will still need to provide their expectations for the contractor to use as a benchmark when creating their proposal and quotation. It is because the contractor bases their work on what the customer anticipates seeing after the project is finished. Any other documents that can aid the contractor in understanding the project, such as those relating to the soil study report, the local sewage system, and land ownership laws, may also be required by the employer. Proposal by Contractor The contractor will submit the project owner a proposal that includes a complete project breakdown based on the employer’s requirements. In order to meet the needs of the project owner, the design-build team specifies the scope of the design proposal, the materials required, the estimated time of completion of construction, the site layout, and other contract-specific details. The contractor’s proposal is sent to the customer for approval and includes names, contacts, and pertinent information for contact tracing. Contract Cost Assessment The estimated project cost is shown in the Contract Sum Analysis, which is provided to the client for review. This document includes a complete description of every component’s cost and the project’s anticipated total cost. The client may make changes based on the study of the contract cost in relation to their budget at this point. Following approval, billing arrangements and interim payments will be discussed between the project owner’s team and the contractor’s team. Essential Elements of General Construction The general construction route is a bit different, and is more popularly known as “Design, Bid, Build”. The following are the crucial elements of general construction. Design The project owner collaborates with an architectural design company to develop the building design, providing the requirements and final appearance of the overall structure. The budget, timetables, and implementation planning happen during the design phase.
40 Year Recertification Cost: How Much to Expect?

If you are reading this blog, you have likely received the Notice of Required Recertification. In short, when your building enters the 40th year of its construction, Florida requires you to get an inspection done, known as the 40 year structural recertification. Now, you want to know about the 40 year recertification cost. In case you are unaware, you can check this blog on 40-year building recertification, which helps you understand the process in depth. However, if you are aware of it, keep reading forward. In this blog, we will also discuss the elements considered while estimating the 40-year recertification cost. The cost of a 40-year recertification inspection Our package for a 40-year recertification inspection starts from $2,250 and goes up to $35,000. 80% of the inspections we have done so far are between $2,500 and $5,000 For small buildings with 5,000 square feet or less, the cost would be somewhere around $2,250 Next, for mid-size buildings having an area between 5,000 and 20,000 square feet, the cost would range between $2,500 and $8,000 Finally, for a high-rise building having multiple apartments, the cost would start at $35,000 Now, the prices you can see is for those in Broward county or Miami-Dade county because that’s what we cover. But, say if you live in Palm Beach county or Monroe county, the price would vary since we would need to drive up there as the distance increases from our main office. Elements to consider while estimating the 40-year recertification cost Following are the elements that every construction and engineering firm considers while estimating the inspection cost, and these are also applicable for other milestone building inspections and structural inspections in Florida. Size The building size is the most crucial element to consider while estimating the cost of 40-year recertification. If an engineer has to inspect a high-rise building consisting of 30 apartments, the inspection could take almost a day. Additionally, depending on the engineer’s inspection, the report could be lengthy, signifying more work and, therefore, a higher cost. Location Your building location is the next element that plays an active role in determining the 40 year recertification cost. It helps the engineer understand how the inspection should go. For example, if you are closer to the ocean or coastal lines, a detailed inspection will need to occur. It is since salt intrusion is constantly being sprayed into the building. However, if your location is distant from the ocean, the inspection intensity would be lower and, therefore, cost less. Height Your building’s height is another vital element to consider for a higher or lower inspection cost. If it’s a two-story building, it will be cheaper, and if it’s a twenty-story building, it will be more pricey because the inspection officer would have to check all the floors, which would take more time. Additionally, they’ll need to leverage inspection technologies like a drone to cover portions where they can’t reach or see to ensure a highly detailed review is done. Structure Complexity Consider the following hypothetical scenario: the inspector is contracted by FP&L to perform a 40-year examination of an electrical facility. When it comes to the structure, there are a lot of odd structures, like towers and trusses, which are tough to inspect. On the electrical side, some high-power gadgets and mechanisms are not typical of a standard inspection. However, unless the inspector has a significant amount of previous expertise with buildings of this kind, it is only natural that he will have difficulty looking into all the intricacies. On the contrary, a two-story building inspection that houses eight different families would be far less complicated. Most of the time, these structures are built out of concrete and block, and they feature a roof structure composed of trusses and a shingle roof. This straightforward structure will most likely be equipped with four separate electrical meters and a dedicated electrical panel for every individual unit. Don’t delay the inspection and invite penalty. Know the cost today and get it done. Request A Quote Now! Additional Or External Factors That May Affect The Cost Our team, at SC&E, inspect residential and commercial properties. For example, we see regular apartments, multi-family apartments, and condominiums on the residential side. The number of balconies, floors, and violations (if any) will add to the bill. Commercial properties are easier to access since they are usually open spaces like retail stores, warehouses, etc., so they hardly have any external factors affecting the inspection cost. But if any, most likely, they are the same as residential properties. Why are 40-year recertification inspections necessary? The Florida legislature enforced a 40-year recertification program to protect the public. When the 1974 incident occurred, a Federal office building housing the US Drug Enforcement Administration collapsed. This incident took lives of seven DEA employees. At present, many times, building owners make improvements and renovations to their structures. Also, they frequently neglect proper maintenance. As a result, numerous residences feature hazardous circumstances for their tenants. Such conditions include potential fire risks, hidden structural issues, deteriorating roofing systems, and exposed wiring. The law states that only licensed professionals like home inspection engineers must conduct the inspection. They must also provide a signed and sealed report. Final Words So, this was all about the costs involved in getting a 40-year recertification inspection done if you reside in Miami-Dade county and Broward county. Not only the regular cost, but we also understood the additional or external factors that may add to your bill, so it shouldn’t take you by surprise. This blog aims to educate you about the average cost you will incur to get a 40 year structural recertification done and pretty much our charges too. Souffront Construction and Engineering is a certified firm with expertise in providing 40 year recertification, infrared thermography inspections, structural engineering, SIRS inspections, general contracting and concrete restoration services. If you have received the “Notification of Recertification” and are looking around for recertification costs and the best team to conduct it, reach out to us to learn
How to Hire an Engineer for 40 Year Recertification Inspection
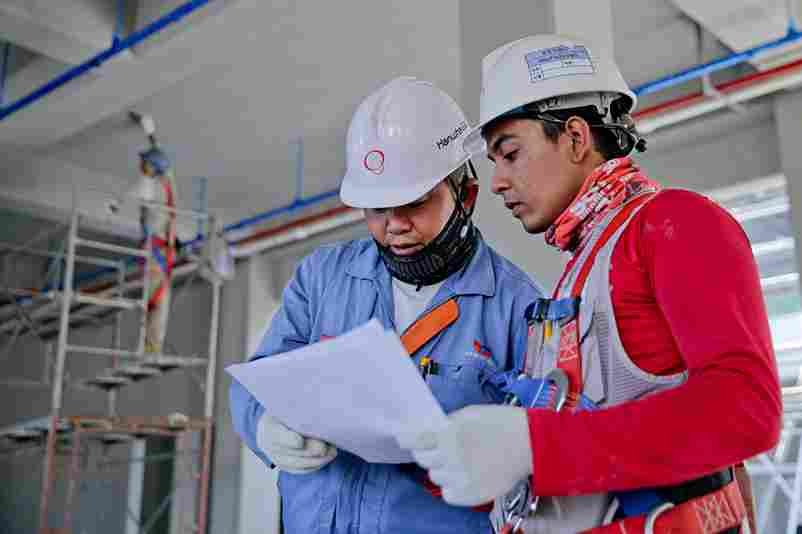
You receive a notice in your mail regarding the 40-year recertification inspection and ask yourself: What exactly is it? If you don’t know what it is, I recommend you read this blog on 40-year recertification. It will give you an in-depth understanding of the process and its importance. However, if you are aware of it, you are good to go and continue with this blog. This blog on how to hire an engineer for the 40-year recertification inspection will help reduce your time investment in this process. Looking for a Specialist Always remember that only certified firms or engineers with relevant experience are authorized to conduct 40-year recertification inspections, as per Florida law. The number of such professionals is abundant, and you must do your homework to find the best one for your property. You can start your search on the Internet. Referrals and Yellow Pages are great places to get such professionals. However, Google is the best place to gain knowledge. Based on that, see the available ones that fit your needs. Here, it’s best to use specific keywords to get the best results. For instance, if you are from Miami-Dade County, you can search for “Miami-Dade 40-year recertification.” Whereas, if you are from Broward County, you should search for ” broward county 40 year inspection”. If you wish to explore the entirety of Florida, you can get the best results for a “40-year inspection Florida”. Getting to Know More About the Inspector After you decide upon the person you want to go ahead with, you would like to know more about them. So, the first place to check is the official website of DBPR (Department of Business and Professional Regulations). Here, you can input the inspector’s name or even the name of the licensed owner of the business you want to take services from. You will get vital information about the engineers and if they have any complaints against them, along with if they are still active. Now that you’ve received the required information, it’s a great time to make that phone call and ask some intelligent questions so you don’t come across as someone who knows nothing or is an amateur. To do this, you must understand a few things about how building structures are developed. Rebar (shorter version of reinforcement bar), made from steel, was put into concrete structures to bolster and reinforce concrete structures under tension several years ago. This means one could develop any kind of structure without the impediment of structural limitations of concrete. It marks the beginning of the era of building new and modern concrete structures. It will ensure your building structure never crumbles and falls, causing incidents like the Champlain Towers or the 1974 collapse. Questions You Must Ask the Engineer Once you are through with finding the engineers and shortlisting the potential ones, you need to prepare a few questions and get some good answers out of them. It’s best to have a pen and paper at your disposal while you question them. It will help you can jot down each engineer’s response and then compare the answers later on. Here are some potential questions that you mask the engineers: Can you provide me with a written proposal once you receive information on my building? (A written proposal is significant because it shows they know their work and are professionals) Do you possess Errors and Omissions insurance? (Remember that a well-established firm will always carry such insurance to protect you and themselves as well) What are your charges for the inspection? Can you provide detailed information? Also, do you offer a second or third visit after the initial assessment? What are the payment terms? Can I pay you once the inspection is finished, or is there an upfront payment percentage? State the time frame for this inspection. (You don’t want to hire someone who takes twice or thrice the time of a regular 40-year inspection) Contract Signing Phase You have finally discovered your engineer and are now prepared to sign the agreement. It is crucial to have your lawyer review the contract, mainly if it is a significant and pricey inspection. The contract’s language needs to be straightforward. As a result, you need to be able to carefully examine it and ask the engineer any queries you might have. Although this inspection could seem complicated, the contract language need not be. There is no reason why you shouldn’t ask questions and receive direct, helpful responses. Many agreements call for upfront payments. While paying a percentage in advance is common, try to hold off on paying the full price until the inspection has been completed. Finally, keep an eye on the inspection’s development. You shouldn’t encounter any issues because engineers are recognized as experts who uphold high ethical standards. The aforementioned steps collectively answer the question: How to hire an engineer for a 40-year recertification inspection? Now, if you haven’t gone through the blog I asked you to, which is on 40-year recertification, I will give you a glimpse of it by discussing a few questions and their answers (which are must-know). So, here they are. What does a 40-year structural recertification include? Your chosen engineer or inspector will conduct an exhaustive, in-depth check throughout the 40-year recertification inspection. Consequently, the examination will cover lighting, electrical wiring, and other components in addition to the building’s construction and foundation. The goal is to ensure that nothing is left to chance and that every aspect of your structure is secure. The engineer will review your building’s foundation, its steel frame, inner and outer walls, lighting, roofing, windows and doors, and wood frames (for their resilience). During structure inspections, they will examine additional factors and these fundamental safety considerations. Based on the assessment results, the engineer will also offer advice for upkeep and repairs. Read further: 40 Year Recertification Cost: Everything You Need to Know About It What is the 40-year recertification process? Once your building enters the 40th year of its construction period,